Okay, picture this: I was in the middle of a frantic weekday dinner, the kind where the kids are demanding dessert before the main course even hits the table. My pantry was a barren wasteland, save for a half‑used can of refrigerated biscuit dough and a bag of apples that were looking a little too eager to turn brown. I tossed a quick “apple crumble?” into the air, but then I remembered that the biscuit dough could be a secret weapon. I dared myself to combine the two, and what happened next was nothing short of culinary fireworks. This is the story of how a kitchen disaster turned into the most addictive, bubble‑up casserole you’ll ever taste.
The moment the butter hit the pan, it sang a buttery sizzle that made my heart race faster than a toddler on a sugar rush. The aroma of cinnamon and vanilla swirled together, wrapping the kitchen in a warm, cozy hug that felt like a hug from grandma herself. I could hear the apples crunching as I diced them, their crisp snap echoing like tiny applause. The texture under my fingertips was a perfect balance of juicy fruit and buttery dough, and the whole scene felt like a movie set where the protagonist finally discovers the perfect plot twist.
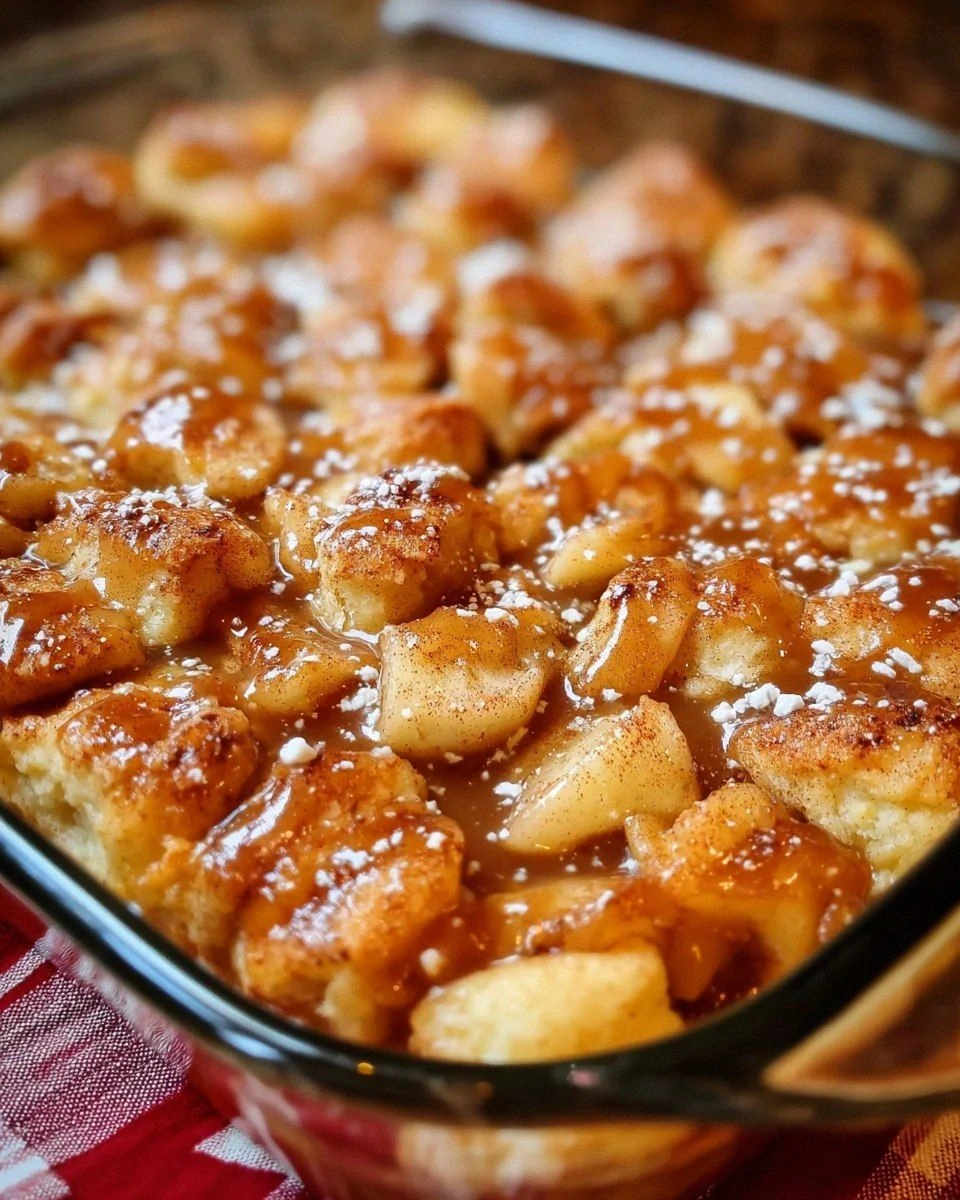
Most apple casseroles out there either drown the fruit in a syrupy mess or end up dry as a desert. This version, however, flips the script. The biscuit dough rises and bubbles up, creating a golden, flaky crown that soaks up the caramelized apple juices without turning soggy. It’s like a pastry‑wrapped apple party that never ends. I’m confident enough to say this is hands down the best version you’ll ever make at home, and I dare you to taste it and not go back for seconds.
And here’s the kicker: the secret ingredient is something you probably keep in the freezer for emergency pancake mornings—refrigerated biscuit dough. It’s the game‑changer that makes this casserole bubble up beautifully, giving it that irresistible, puffed‑up top that looks like a cloud ready to burst. Let me walk you through every single step — by the end, you’ll wonder how you ever made it any other way.
What Makes This Version Stand Out
- Taste: The sweet‑tart dance of Granny Smith apples paired with caramel‑kissed brown sugar creates a flavor profile that feels like autumn in a bowl, even in the middle of summer.
- Texture: The biscuit dough forms a crisp, buttery crust that contrasts with the soft, juicy apple filling, delivering a mouthfeel that’s both crunchy and melt‑in‑your‑mouth.
- Simplicity: Fewer than ten ingredients, no fancy gadgets, and a single‑pan approach keep the prep line short and the satisfaction high.
- Uniqueness: While most apple desserts rely on crumble or streusel tops, this casserole bubbles up with a puffed‑up biscuit layer that’s truly one‑of‑a‑kind.
- Crowd Reaction: Guests often claim they’ve never tasted anything like it, and the “what’s that topping?” question becomes a conversation starter at any gathering.
- Ingredient Quality: Using tart apples and high‑quality butter elevates the dish from everyday to extraordinary, making each bite sing.
- Cooking Method: The oven’s steady heat coaxing the biscuit dough to rise ensures an even bake, no need for stovetop juggling.
- Make‑Ahead Potential: Assemble the night before, pop it in the morning, and you’ve got a ready‑to‑serve dessert that practically bakes itself.
Inside the Ingredient List
The Flavor Base
Diced Apples: I recommend using tart varieties like Granny Smith or Fuji. Their crispiness and flavor balance the sweetness perfectly, and they hold their shape during baking, preventing a mushy bottom. If you skip the apples, you lose the core identity of this dish, turning it into a plain biscuit bake. A good swap is a mix of pear and apple for a subtle floral note, but stay away from overly sweet Gala apples—they’ll drown the spice.
The Sweeteners & Spice Crew
Granulated Sugar: This sweetens the mix and helps the apples caramelize. Adjust upward if you love a candy‑coated finish, but remember the biscuit dough already brings its own buttery richness. Brown Sugar: Adds that deep, molasses‑like caramel flavor that harmonizes with the apples, giving the casserole a warm, toasty backdrop. Ground Cinnamon: A staple in many desserts! Its warm flavor brings everything together, making each bite feel like a cozy hug. Skip the cinnamon and you’ll feel like you’ve left the party early—nothing will feel quite right.
The Unexpected Star
Refrigerated Biscuit Dough: This is the surprise ingredient that makes the casserole bubble up beautifully. It creates those flaky layers that soak up all the apple goodness, turning the top into a golden, puffed‑up crown. If you replace it with a regular pie crust, you’ll lose the bubbling effect and end up with a dense, heavy top. Keep the dough frozen until you’re ready to spread it—this ensures maximum lift.
The Final Flourish
Unsalted Butter: Melting this golden goodness into the dish adds richness. Always a good choice for depth of flavor, and it also helps the apples caramelize without sticking. Vanilla Extract: A few drops of this magic potion elevate the overall taste. It’s like a secret whisper of sweetness that ties the whole dish together. Chopped Pecans (optional): These optional crunchy gems provide texture and flavor. If you’re nut‑free, feel free to leave them out, but you’ll miss the delightful contrast between soft apples and crisp nuts.
Choosing the Right Apples
When you’re hunting for the perfect apple, look for firm, bright‑red skins and a crisp snap when you bite. The best way to test is to slice a piece and let it sit for a minute—if it stays firm, you’ve got the right one. Avoid apples that are already soft or have brown spots; they’ll turn mushy and lose that satisfying bite. Pro tip: toss the diced apples in a little lemon juice to prevent browning while you prep the other ingredients.
Everything's prepped? Good. Let's get into the real action...
The Method — Step by Step
Preheat your oven to 375°F (190°C). While the oven warms up, grease a 9‑inch square baking dish with a thin layer of butter—this prevents sticking and adds a buttery crust to the sides. The heat will soon turn the kitchen into a fragrant sanctuary, and you’ll hear the faint hum of the oven like a gentle drumroll. Power transition: Okay, ready for the game‑changer?
Dice the apples into bite‑size chunks—about a half‑inch cubes work best. Toss them in a large bowl with 1/3 cup granulated sugar, 1/4 cup brown sugar, 1 teaspoon ground cinnamon, 4 tablespoons melted unsalted butter, and 1 teaspoon vanilla extract. Stir until every piece is glossy and coated, then let the mixture sit for five minutes so the sugars start to dissolve.
Kitchen Hack: Sprinkle a pinch of salt over the apple mixture; it amplifies the sweetness without making it salty.Spread the apple mixture evenly across the bottom of the prepared baking dish. The apples should form a single, uniform layer—no piles, no gaps. As the apples settle, you’ll notice a faint caramel scent emerging; that’s the butter and sugars doing their magic. Watch Out: If you overcrowd the pan, the apples will steam instead of caramelize, resulting in a soggy base.
Open the can of refrigerated biscuit dough and separate the biscuits. Using a sharp knife or kitchen scissors, cut each biscuit into quarters. Scatter the biscuit pieces over the apple layer, making sure to cover most of the surface but leaving a few gaps for the bubbling effect. This is the moment of truth: the biscuit pieces will puff up, creating that signature “bubble‑up” look.
If you’re using pecans, sprinkle the chopped nuts over the biscuit dough now. The nuts will toast slightly as the casserole bakes, adding a toasty crunch that contrasts beautifully with the soft apples. If you’re nut‑free, feel free to skip this step—nothing will go wrong, but you’ll miss a layer of texture.
Place the dish in the preheated oven and bake for 30‑35 minutes. Around the 20‑minute mark, peek through the oven window: the biscuit tops should be golden brown and starting to puff, while the apple edges pull away from the sides of the pan. The aroma will be intoxicating—think caramelized apples, buttery biscuits, and a hint of vanilla swirling together.
When the top is a deep, honey‑gold color and the edges of the casserole are bubbling up like a miniature volcano, remove it from the oven. Let it sit for five minutes; this rest allows the juices to settle and the biscuit crust to firm up just enough for clean slices.
Serve warm, optionally with a scoop of vanilla ice cream or a dollop of whipped cream. The contrast between the hot, buttery casserole and the cold, creamy topping is pure bliss. Picture yourself pulling this out of the oven, the whole kitchen smelling incredible, and your guests reaching for seconds before you even finish your own plate. And now the fun part: dig in and relish every bite.
That's it — you did it. But hold on, I've got a few more tricks that'll take this to another level...
Insider Tricks for Flawless Results
The Temperature Rule Nobody Follows
Most home bakers set the oven to 350°F and call it a day, but the secret to a perfectly puffed biscuit top is a slightly higher heat—375°F. This extra ten degrees creates a rapid rise, giving the biscuit dough that dramatic bubble‑up effect without drying out the apples. I once tried baking at 400°F and the biscuits browned too fast, leaving the apples under‑cooked. Trust the 375°F rule and you’ll get a golden crown every time.
Why Your Nose Knows Best
Before you even peek through the oven window, trust your sense of smell. When the buttery, caramel aroma reaches a sweet, nutty peak, the casserole is nearly done. If you smell a faint burnt scent, pull it out immediately—overbaking turns the biscuit into a dry, hard crust. Your nose is a more reliable timer than any digital gadget.
The 5‑Minute Rest That Changes Everything
Allowing the casserole to rest for just five minutes after baking makes a world of difference. The juices redistribute, preventing a soggy bottom, and the biscuit topping firms up enough to slice cleanly. Skipping this rest results in a mushy slice that falls apart, which is a tragedy I’ve witnessed too often.
Nut‑Free Crunch Alternative
If you have nut allergies, swap the pecans for toasted oat flakes or a sprinkle of crunchy granola. The toasted oat adds a subtle toasty flavor and a satisfying crunch without the risk of an allergic reaction. I tried this once for a friend, and they claimed they didn’t even miss the pecans.
Make‑Ahead Magic
Assemble the entire dish up to the point of adding the biscuit dough, then cover tightly with foil and refrigerate overnight. In the morning, add the biscuit pieces and bake as instructed. This not only saves you time on a busy weekend but also lets the flavors meld overnight, resulting in a deeper, richer taste.
Creative Twists and Variations
This recipe is a playground. Here are some of my favorite ways to switch things up:
Maple‑Bacon Burst
Swap half of the brown sugar for pure maple syrup and fold in crisp‑cooked bacon bits. The smoky, salty bacon pairs beautifully with the sweet apples, turning the dish into a brunch‑worthy centerpiece.
Spiced Pumpkin Fusion
Replace half of the diced apples with canned pumpkin puree, add a pinch of nutmeg and ginger, and use a pumpkin‑spice biscuit dough if you can find it. This variation is perfect for a cozy autumn dinner.
Berry‑Apple Medley
Mix in a cup of fresh or frozen berries—blueberries, raspberries, or blackberries—alongside the apples. The berries burst during baking, adding a tangy pop that brightens the overall flavor.
Coconut‑Caramel Dream
Stir in ¼ cup shredded coconut and drizzle a caramel sauce over the top before baking. The coconut adds a tropical twist, while the caramel creates a glossy finish that looks as good as it tastes.
Vegan Velvet
Use plant‑based butter, replace the biscuit dough with a vegan biscuit alternative, and swap the dairy‑based vanilla extract for a pure vanilla bean paste. The result is a vegan‑friendly casserole that still delivers that buttery, bubbly magic.
Storing and Bringing It Back to Life
Fridge Storage
Cool the casserole completely, then cover tightly with plastic wrap or aluminum foil. It will keep fresh for up to three days in the refrigerator. When reheating, place a tiny splash of water on the surface before covering with foil; the steam revives the biscuit’s fluffiness.
Freezer Friendly
Freeze the unbaked casserole (minus the biscuit topping) in an airtight container for up to two months. When ready to bake, thaw overnight in the fridge, add fresh biscuit pieces, and bake as directed. This method preserves the crisp biscuit texture.
Best Reheating Method
Reheat individual slices in a preheated 350°F oven for 10‑12 minutes, or microwave for 45 seconds if you’re in a hurry. Adding a teaspoon of water to the plate before microwaving creates a gentle steam that prevents the biscuit from becoming rubbery.