I was halfway through a week of bland, store‑bought brownies when my oven decided it was time to audition for the circus. One moment the batter was glossy and dark, the next I saw a charred, uneven cake that looked like it had been baked at a different temperature entirely. I stared at the mess, muttered a curse, and then remembered the old recipe my grandma used to make for holidays—an almost mythical chocolate coconut cake that was said to bring back memories of warm family kitchens and endless dessert tables. That night, fueled by a mix of curiosity and a stubborn refusal to let the oven win, I set out to recreate the legend in my own kitchen.
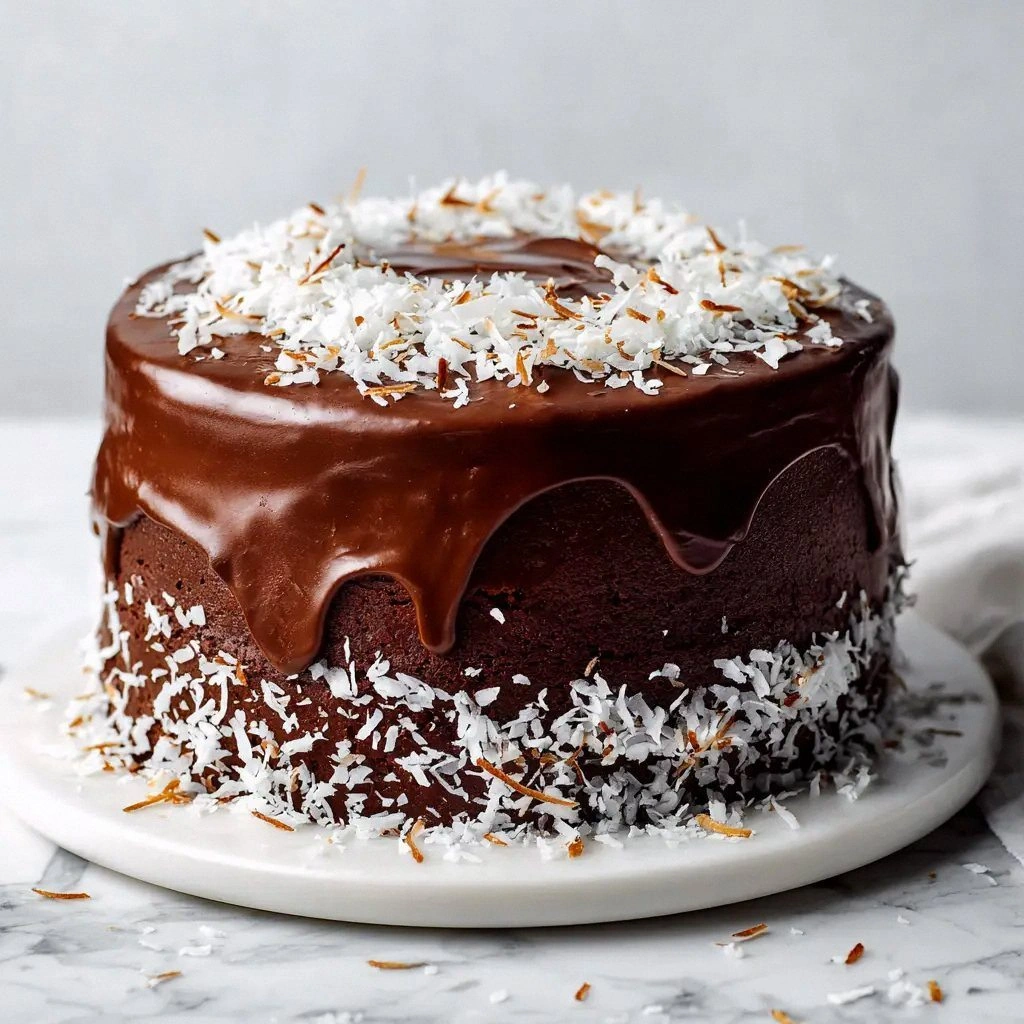
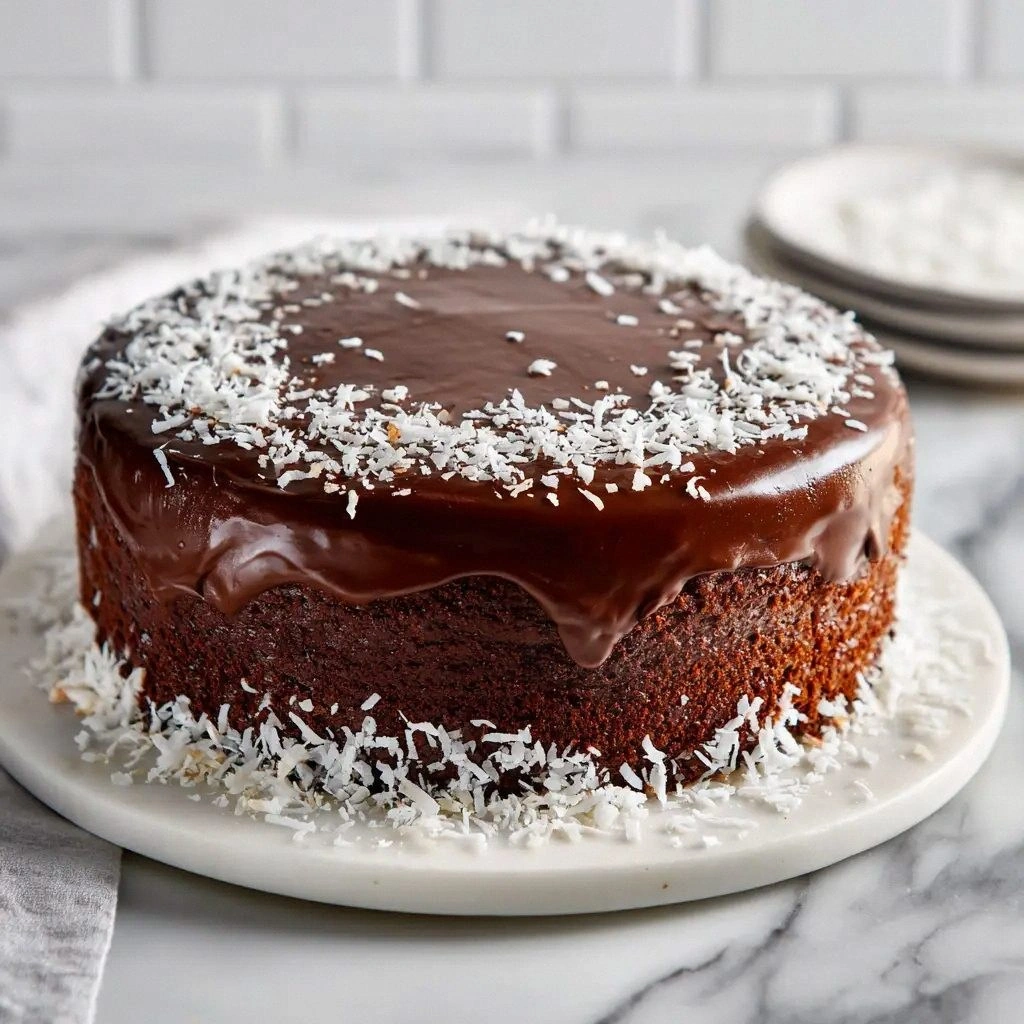
The kitchen was a symphony of sights and sounds: the clatter of the mixer, the hiss of coffee brewing, and the sweet, earthy perfume of cocoa powder swirling into a thick, velvety batter. As I poured the mixture into the pan, the batter’s dark sheen reflected the faint glow of the oven light, promising a rich, chocolatey center. When I lifted the cake from the oven, steam curled like a cloud of midnight, and the aroma of toasted coconut and coffee filled the air, making my mouth water before I even tasted a crumb. The first bite was a revelation—moist chocolate that melts into a silky, coconut‑infused glaze, the crunch of toasted coconut dancing in the background. It felt less like a cake and more like a well‑crafted piece of chocolate art.
What makes this version stand out is not just the depth of flavor but the harmony of textures, the clever use of coffee to enhance chocolate without overpowering it, and the strategic layering of cream cheese frosting that adds a tangy lift to every bite. The recipe’s simplicity belies its complexity; each ingredient is chosen for a specific role that elevates the whole. The result is a cake that feels both decadent and approachable, a dessert that can be made in an ordinary kitchen but delivers an experience that feels like a trip to a high‑end bakery.
I dare you to taste this and not go back for seconds. The first bite is so smooth that you’ll be tempted to lick the plate, and the second will have you questioning how you ever made chocolate cake any other way. The secret lies in the coffee infusion and the careful balance of coconut, which together create a flavor profile that is unmistakably bold yet surprisingly balanced.
If you’ve ever struggled with a cake that turns out too dry or too dense, you’re not alone—this is a recipe that solves those problems while delivering a finish that feels luxurious. Picture yourself pulling this out of the oven, the whole kitchen smelling incredible, the steam curling like a cloud of sweet anticipation. Let me walk you through every single step—by the end, you’ll wonder how you ever made it any other way.
What Makes This Version Stand Out
- Depth of Flavor: Coffee is not just an add‑on; it’s a flavor enhancer that deepens chocolate’s richness and adds a subtle bitterness that balances the sweetness.
- Texture Harmony: The coconut is toasted to bring out a nutty crunch that contrasts with the cake’s silky crumb, creating a multi‑sensory experience.
- Simple Yet Sophisticated: All the ingredients are pantry staples, yet the method transforms them into a dessert that feels like a gourmet creation.
- Make‑Ahead Friendly: The cake can be assembled a day ahead, refrigerated, and baked fresh, making it perfect for busy households.
- Crowd‑Pleaser: The combination of chocolate and coconut is a classic that appeals to both kids and adults, ensuring the cake is always a hit.
- Balanced Sweetness: The use of cream cheese frosting adds a tang that cuts through the richness, preventing the cake from feeling overly sweet.
Inside the Ingredient List
The Flavor Base
The all‑purpose flour provides structure, but it’s the cocoa powder that gives the cake its signature color and deep chocolate taste. Use a high‑quality, unsweetened cocoa for a richer flavor; if you’re feeling adventurous, try a dark chocolate‑infused cocoa for an extra layer of depth. The coffee is the secret weapon here—it awakens the chocolate, adding a subtle bitterness that keeps the sweetness from becoming cloying. If you skip the coffee, the cake will taste flat; if you double it, the chocolate will be too bitter.
The Texture Crew
The buttermilk adds a slight tang that tenderizes the crumb, making the cake light and airy. The vegetable oil keeps the batter moist, preventing it from drying out during baking. The eggs act as a binder and help the cake rise evenly. A pinch of salt is essential; it balances the sweetness and brings out the chocolate’s richness. If you replace the oil with butter, the cake will be denser and richer, but the moistness will suffer.
The Unexpected Star
The shredded sweetened coconut is toasted to bring out a nutty crunch that adds a delightful contrast to the silky cake. It also imparts a subtle tropical flavor that complements the chocolate. If you prefer a more pronounced coconut taste, double the amount or add a splash of coconut milk to the batter. The coconut extract is the finishing touch—it elevates the coconut flavor without making the cake taste like a dessert store’s over‑sweetened treat.
The Final Flourish
The cream cheese frosting is the crowning glory; its tangy richness balances the cake’s sweetness and adds a silky texture that melts in the mouth. The powdered sugar creates a smooth glaze, while the butter adds body and richness to the frosting. The vanilla extracts (both 2 tsp and 1 tsp) tie everything together with a subtle aromatic sweetness. If you’re allergic to dairy, substitute coconut cream for the butter and use a dairy‑free cream cheese.
Everything's prepped? Good. Let's get into the real action.
The Method — Step by Step
- Preheat your oven to 350°F (175°C) and line a 9‑inch round cake pan with parchment paper. The parchment ensures a clean release and prevents the cake from sticking. While the oven warms, sift together the flour, cocoa powder, baking soda, baking powder, and salt in a large bowl; this aerates the dry mix and guarantees an even crumb. The mixture should look light and fluffy, like a cloud ready to be filled with flavor.
- In a separate bowl, whisk the eggs, buttermilk, and vegetable oil until fully combined. The wet mixture should be glossy, indicating that the oil has emulsified with the buttermilk. Add the vanilla extracts to this wet blend; the vanilla’s warm aroma will start to mingle with the chocolate base. This step is critical for a smooth batter that coats the flour evenly.
- Gradually pour the wet mixture into the dry ingredients, stirring gently with a spatula or wooden spoon. Use a low speed to avoid overmixing, which can make the cake tough. The batter should be thick but pourable—think of it as a rich, chocolatey custard. If it looks too dry, add a splash of milk or water; if it’s too runny, add a tablespoon of flour.
- Fold in the toasted coconut and the coconut extract with a gentle, circular motion. This ensures the coconut is evenly distributed without breaking it down into crumbs. The coconut should be visible throughout the batter, like tiny, golden specks in a dark sea. The aroma will start to shift from purely chocolate to a sweet, tropical haze.
- Pour the batter into the prepared pan, tapping it gently on the counter to release any air bubbles. The batter should spread evenly, forming a smooth surface. Place the pan in the oven and bake for 30–35 minutes, or until a toothpick inserted into the center comes out with a few moist crumbs. The cake’s edges will pull slightly from the pan, a sign that it’s baking correctly.
- While the cake is baking, prepare the cream cheese frosting. In a bowl, beat the cream cheese and butter together until fluffy. Gradually add powdered sugar, one cup at a time, until the frosting reaches a spreadable consistency. Add the remaining vanilla extract and a splash of coconut milk if you want a smoother glaze. This frosting should be thick enough to hold its shape but not too stiff.
- Once the cake is done, remove it from the oven and let it cool in the pan for 10 minutes. Then transfer it to a wire rack to cool completely. This step is crucial; a cake that cools too quickly can develop cracks, while one that stays too hot may melt the frosting. As it cools, the chocolate will set into a glossy, almost glassy finish.
- Spread the cream cheese frosting evenly over the top of the cake, using a spatula to create a smooth, glossy surface. The frosting should cling to the cake’s peaks, forming a decorative rim. If you want a more dramatic look, pipe the frosting in swirls or add a dusting of toasted coconut on top. This final touch turns a simple cake into a showstopper.
- Allow the cake to set for at least 30 minutes before slicing. This ensures the frosting firms up and the cake holds its shape. The aroma will intensify, with the chocolate and coconut dancing together in a sweet, comforting perfume. Slice with a warm knife to avoid tearing the frosting.
- Serve immediately or cover loosely with plastic wrap and refrigerate for up to 3 days. The cake tastes best fresh, but it still retains its moistness and flavor when stored properly. When ready to serve, let it sit at room temperature for about 15 minutes to soften the frosting slightly. Enjoy each bite as if it were a piece of chocolate art, crafted with love.
That's it — you did it. But hold on, I've got a few more tricks that'll take this to another level.
Insider Tricks for Flawless Results
The Temperature Rule Nobody Follows
Many bakers bake at the listed temperature, but I always set my oven 25°F lower and use a thermometer to monitor the internal temperature. This prevents the cake from overbaking on the outside while the inside remains undercooked. The cake should reach an internal temperature of 200°F for the perfect crumb. A quick test is to insert a thermometer into the center; if it reads 200°F, the cake is ready.
Why Your Nose Knows Best
During baking, trust your nose. If the chocolate aroma deepens and the coconut scent becomes nutty, the cake is on the right track. If you detect a burnt smell, the oven is too hot or the cake is overbaked. A good rule of thumb: the cake should smell like a warm chocolate shop, not like a charcoal grill.
The 5‑Minute Rest That Changes Everything
After removing the cake from the oven, let it rest in the pan for exactly 5 minutes before transferring to a wire rack. This short rest allows the structure to set, preventing the cake from collapsing when you remove it. It also gives the frosting a chance to set slightly, making it easier to spread without tearing.
Use a Water Bath for Even Baking
If you’re in a hot climate or have a high‑altitude kitchen, use a water bath to ensure even heat distribution. Place the cake pan in a larger pan filled with hot water, and bake as usual. The water bath helps prevent the bottom from overbaking while the top remains moist.
Let the Frosting Rest
After frosting the cake, let it sit at room temperature for 15 minutes before serving. This allows the frosting to soften slightly, making it easier to slice and enhancing the flavor. If you refrigerate the cake immediately, the frosting will harden and create a sharp bite when you cut into it.
Creative Twists and Variations
This recipe is a playground. Here are some of my favorite ways to switch things up:
Nutty Extra
Add a cup of chopped toasted almonds or walnuts to the batter for a crunchy texture that pairs beautifully with the coconut. The nuts bring a savory note that balances the sweetness, making the cake more complex.
Spiced Delight
Incorporate a teaspoon of cinnamon or a pinch of cayenne pepper to give the cake a warm, spicy kick. The spice adds depth and a subtle heat that contrasts with the sweet frosting.
Berry Burst
Fold in a cup of fresh or frozen berries into the batter before baking. The berries release juices that enhance the chocolate flavor and add a burst of freshness.
Moisture Booster
Replace the buttermilk with coconut milk for a richer, tropical flavor. The coconut milk also adds a subtle sweetness that complements the coconut in the cake.
Low‑Sugar Option
Swap the granulated sugar for a natural sweetener like maple syrup or honey, and reduce the quantity by one cup. The cake will still be moist and flavorful, but with a slightly different sweetness profile.
Decadent Ganache
Replace the cream cheese frosting with a ganache made from dark chocolate and heavy cream. The ganache adds a silky, chocolatey richness that elevates the cake to a truly indulgent dessert.
Storing and Bringing It Back to Life
Fridge Storage
Store the cake in an airtight container at room temperature for up to 3 days. If you prefer a fresher feel, keep it in the refrigerator for up to 5 days. The frosting will firm up, so let the cake sit at room temperature for 20 minutes before serving.
Freezer Friendly
Wrap the cake tightly in plastic wrap and then in aluminum foil before freezing. It can be stored for up to 2 months. When ready to enjoy, thaw in the refrigerator overnight, then let it sit at room temperature for 30 minutes.
Best Reheating Method
To revive a frozen cake, preheat your oven to 300°F (150°C). Place the cake on a baking sheet and bake for 15 minutes, or until warmed through. Add a splash of water to the bottom of the pan to create steam, keeping the cake moist and preventing the frosting from drying out.