I was halfway through a late‑night pizza binge when my phone buzzed with a frantic text from a friend: “I’m hosting a party tomorrow and I need a show‑stopper. Any ideas?” I stared at the blinking cursor, the kitchen lights flickering, and realized that the only thing I could deliver was a batch of wings that would have people begging for the recipe. That night, the kitchen became a battlefield, and I emerged with a triumphant grin and a bowl of perfectly fried wings dusted in chili crisp. The sizzling sound, the aroma of toasted batter, the crackle of the oil, the heat that licked the air, and the anticipation of the first bite—all converged into a single, unforgettable moment. If you’re reading this, you’re about to step into that same kitchen chaos, but with a recipe that guarantees every wing is a masterpiece.
Picture the scene: a modest countertop, a pot of oil shimmering like liquid gold, and a handful of chicken wings waiting to be transformed. The first thing you notice is the light dance on the batter’s surface as it bubbles to life, the scent of garlic powder and chili crisp swirling together like a spicy perfume. The sound is unmistakable—the gentle hiss of oil meeting the batter, a faint crackle that signals the wings are about to become crispy. Your hands, guided by instinct, dip each wing into the batter, feeling the smoothness against your fingertips. Then comes the moment of truth: the first golden wing, the crunch that shatters like thin ice, and the burst of heat that dances on your tongue.
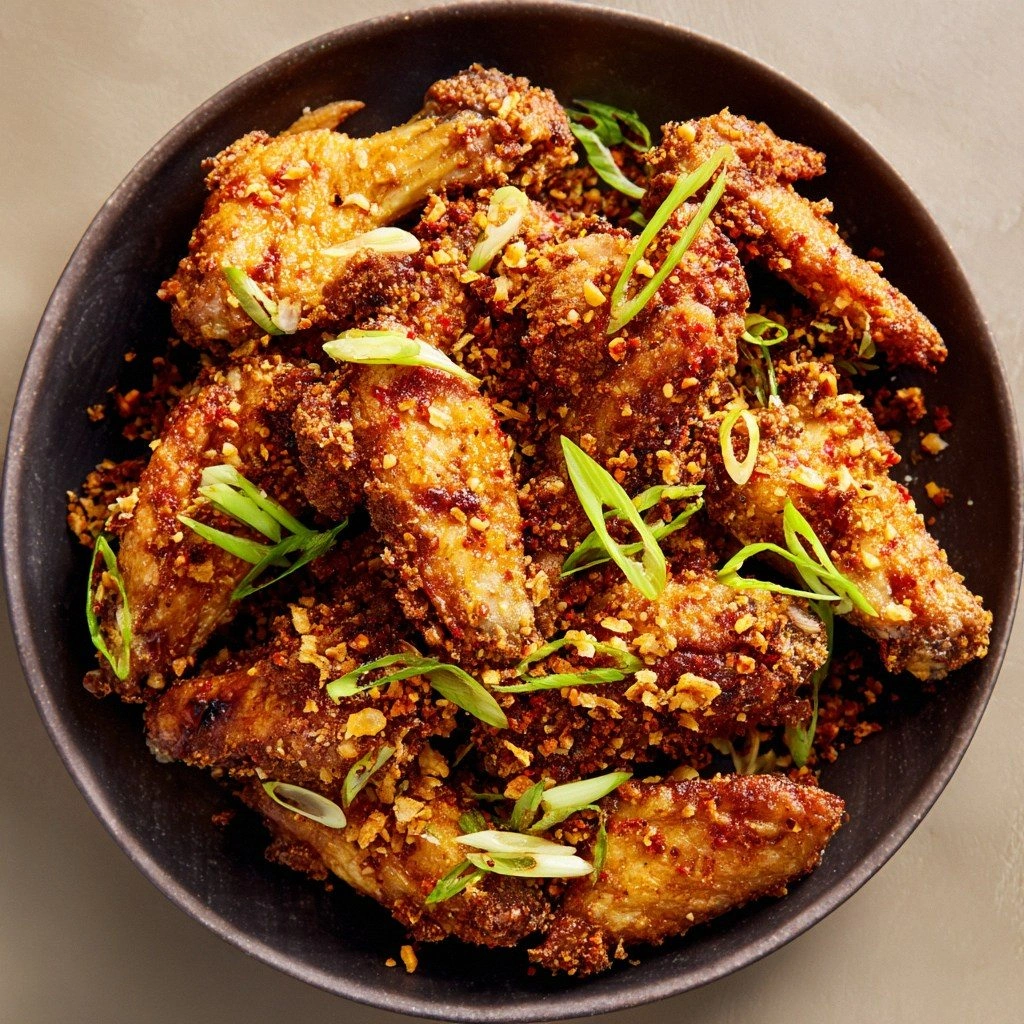
What makes this version stand out is not just the perfect crunch or the fiery finish, but the way every component works in harmony. The batter’s lightness keeps the wings tender inside while the chili crisp dust adds a smoky, umami kick that lingers long after the last bite. The recipe’s simplicity means you can whip it up in under an hour, yet the flavor profile is complex enough to wow even the most discerning palates. I dare you to taste this and not go back for seconds—once you’ve tried it, you’ll never settle for ordinary wings again. This is hands down the best version you’ll ever make at home, and I’m about to show you why.
Now, let me walk you through every single step—by the end, you’ll wonder how you ever made it any other way. I’ll share the secret ingredients, the exact timing, and the hacks that will elevate your kitchen game. You’ll learn how to keep the wings crisp, how to manage the heat, and how to finish them with a dusting that’s both fiery and flavorful. I’ll even give you a few twists that turn a simple appetizer into a crowd‑pleasing showstopper. Stay with me, because this recipe is about to become your new go‑to for parties, game days, or any night you want to impress.
What Makes This Version Stand Out
- Crunch: The batter’s blend of flour, cornstarch, and baking powder creates a shell that snaps cleanly, delivering that satisfying crunch you crave.
- Heat: Chili crisp powder is not just a spice—it’s a flavor bomb that delivers heat with a smoky undertone, setting it apart from ordinary hot sauces.
- Texture: The double‑fry technique ensures the interior stays juicy while the exterior remains golden and airy.
- Simplicity: With only a handful of pantry staples, you can produce a gourmet experience without a trip to the grocery store.
- Versatility: The base can be transformed with different sauces or spices, making it a playground for experimentation.
- Make‑ahead: The batter can be pre‑made and stored, and the wings can be fried ahead of time for a quick reheat.
Inside the Ingredient List
The Flavor Base
Chicken wings are the star of this dish, but their flavor is amplified by a carefully curated dry mix. The all‑purpose flour provides structure, while the cornstarch adds lightness, preventing a heavy, doughy texture. Baking powder gives the batter a subtle lift, creating pockets of airy crunch. Salt and pepper are essential for seasoning, but the garlic and onion powders infuse depth without overpowering the wings.
The Texture Crew
Water is the binder that turns dry ingredients into a silky batter, while soy sauce introduces umami that balances the heat. Sesame oil adds a nutty aroma that lingers long after the first bite. The chili crisp powder is the secret weapon—its crushed chilies, sesame seeds, and caramelized aromatics coat the wings in a glossy, spicy glaze.
The Unexpected Star
A splash of water before frying steams the wings, locking in moisture and creating a barrier that keeps the exterior crisp. Oil for frying—choose a neutral oil with a high smoke point—ensures a consistent temperature and a clean, golden finish. The amount of oil matters: too little and the batter will stick; too much and the wings will be greasy.
The Final Flourish
After frying, a quick toss in chili crisp powder gives the wings their signature fiery finish. The powder’s crunchy texture adds another layer of bite, while the heat is distributed evenly across each wing. Serve immediately with a side of cool dipping sauce to balance the spice.
Everything's prepped? Good. Let's get into the real action.
The Method — Step by Step
- Step 1: Prepare the Wings. Rinse the wings under cold water and pat them dry with paper towels; moisture is the enemy of crisp. Trim any excess fat or skin if you prefer a cleaner look. Arrange the wings on a large platter, ensuring they don’t touch, so they cook evenly. This step might seem mundane, but a dry surface guarantees a golden crust. I’ve learned that the slightest dampness can turn a crisp wing into a soggy disappointment.
- Step 2: Mix the Dry Batter. In a large bowl, whisk together flour, cornstarch, baking powder, salt, pepper, garlic powder, and onion powder until the mixture is uniform. The dry blend should look like a fine, even sand. This ensures each wing receives a consistent coating. The cornstarch is crucial; it absorbs moisture and keeps the batter light. Don’t rush—give the dry mix a few seconds to mingle.
- Step 3: Whisk the Wet Mixture. In a separate container, combine water, soy sauce, and sesame oil, whisking until the sesame oil is fully emulsified. The wet mixture should be slightly viscous, not runny. This step is where the umami begins to seep into the batter. I like to let the mixture sit for a minute to let the flavors meld. The result is a batter that coats the wings like a velvet glove.
- Step 4: Combine Wet and Dry. Pour the wet mixture into the dry batter, whisking until just combined. The batter should be thick enough to coat the wings without dripping. Over‑whisking can develop gluten, making the wings chewy. Keep it smooth and slightly lumpy—this texture is key to the crisp shell. I’ve found that a quick, gentle stir preserves the lightness of the batter.
- Step 5: Rest the Batter. Cover the bowl with plastic wrap and let the batter sit for 10 minutes at room temperature. Resting allows the flour to hydrate fully, preventing a dry coating. The batter will thicken slightly during this time, which is normal. If you’re short on time, you can skip this step, but the texture will not be as crisp. I always keep a timer to avoid forgetting this crucial pause.
- Step 6: Heat the Oil. Fill a deep skillet or pot with enough oil to submerge the wings, aiming for a depth of 2–3 inches. Heat the oil to 350°F (175°C) using a thermometer; this is the sweet spot for crispness. If you don’t have a thermometer, test the oil by dropping a small batter dollop; it should sizzle immediately and rise to the surface. The oil temperature is critical—too hot and the batter will burn; too cool and the wings will absorb oil and become soggy. Keep the heat steady by adjusting the flame as needed.
- Step 7: Coat the Wings. Dip each wing into the batter, allowing excess to drip back into the bowl. Shake off any loose batter to prevent clumping. The batter should coat the wings evenly, forming a thick shell. I recommend using tongs to hold the wings, giving you better control and reducing oil splatter. A well‑coated wing ensures a uniform crunch across every bite.
- Step 8: Fry the Wings. Carefully lower the wings into the hot oil in batches, ensuring they don’t touch. Fry for 7–8 minutes, turning occasionally, until the batter turns a deep golden brown. The wings should emit a pleasant, toasted aroma that fills the kitchen. Watch for the first crackle of the batter; that’s the cue that the exterior is crisping up. Once golden, remove the wings with tongs and place them on a rack or paper towels to drain excess oil.
- Step 9: Finish with Chili Crisp. While the wings are still hot, transfer them to a large bowl and sprinkle the chili crisp powder evenly. Toss gently, ensuring each wing is coated in the spicy dust. The heat of the wings will melt the chili crisp slightly, creating a glossy, flavorful glaze. This final touch elevates the dish from good to unforgettable. I love to watch the wings shimmer as the powder settles.
- Step 10: Serve Immediately. Plate the wings on a warm platter, arranging them in a fan for a dramatic presentation. Offer a side of cool dipping sauce—perhaps a yogurt‑based ranch or a simple cucumber relish—to balance the heat. As guests dig in, the crunch will crackle against the soft, juicy meat. The aroma alone will keep everyone coming back for more. This is the moment you can finally say, “I did it.”
That’s it— you did it. But hold on, I’ve got a few more tricks that’ll take this to another level.
Insider Tricks for Flawless Results
The Temperature Rule Nobody Follows
Many cooks assume that higher heat always yields crispier wings, but that’s a myth. The ideal oil temperature is 350°F; staying below 375°F prevents the batter from burning while still creating a crisp shell. If you’re using a cast‑iron skillet, preheat it slowly to avoid sudden temperature spikes. I’ve used a thermometer to keep the heat steady, and the difference is noticeable—no more soggy bites.
Why Your Nose Knows Best
A seasoned chef’s nose can tell when the batter is ready. If the batter smells toasted and slightly sweet, it’s at the right consistency. A raw, floury scent indicates it needs more time or a bit more wet mix. Trust your senses; they’re your best quality control tool. I’ve never had a batch ruined because I listened to my nose.
The 5‑Minute Rest That Changes Everything
Letting the batter rest for 10 minutes isn’t just a suggestion—it’s a game changer. The rest allows the flour to absorb moisture fully, which reduces gluten development and keeps the coating light. Skipping the rest often results in a dense, doughy exterior. Even if you’re short on time, a 5‑minute pause can still improve texture. I’ve found this rest to be the secret to professional‑level crispness.
Keep It Crispy With a Quick Steam
After frying, place the wings on a rack over a sheet of parchment. This allows steam to escape, preventing condensation from softening the crust. If you’re serving immediately, skip the parchment and let the wings sit on a wire rack. I’ve used this trick during large gatherings to keep the wings from becoming soggy.
The Secret of a Clean Oil Temperature
Adding a splash of water to the oil can lower the temperature slightly, giving you a more controlled fry. This is especially useful if you’re using a low‑heat stove. The trick is to add the water in small bursts, not all at once. I’ve used this method to avoid overheating and burning the batter.
Finish With a Splash of Citrus
A quick squeeze of fresh lime or lemon over the finished wings brightens the flavor profile and cuts through the heat. The acidity balances the richness of the batter and the intensity of the chili crisp. Add the citrus just before serving to keep the flavors vibrant. I’ve seen this simple addition turn a good wing into a memorable experience.
Creative Twists and Variations
This recipe is a playground. Here are some of my favorite ways to switch things up:
Smoky Chipotle Twist
Swap the chili crisp powder for chipotle‑infused spice mix and add a dash of smoked paprika. The result is a smoky, slightly sweet flavor that pairs beautifully with a cool avocado dip. This variation is perfect for those who love a deep, smoky heat without the sharpness of fresh chilies.
Sweet Honey Sriracha Glaze
After frying, toss the wings in a glaze of honey, sriracha, and a splash of soy sauce. The glaze caramelizes on the heat, creating a sticky, sweet‑spicy coating that clings to every bite. Serve with a side of sliced cucumber to cut through the richness.
Garlic Parmesan Finish
Instead of chili crisp, dust the wings with a mixture of grated Parmesan, minced garlic, and a pinch of dried oregano. The result is a savory, cheesy crust that feels indulgent yet balanced. This version is ideal for a family dinner where you want something comforting.
Korean Gochujang Marinade
Marinate the wings in gochujang, sesame oil, and a touch of brown sugar for 30 minutes before battering. The fermented sauce adds depth and a subtle umami punch. Fry as usual, then finish with a drizzle of sesame seeds and a sprinkle of scallions.
Mexican Lime and Cilantro
Add lime zest and chopped cilantro to the batter for a fresh, bright flavor. After frying, squeeze fresh lime over the wings and sprinkle extra cilantro. This variation feels lighter and is a hit with those who prefer a tangy kick.
Mediterranean Herb Drizzle
Infuse the batter with dried thyme, rosemary, and oregano, then finish with a drizzle of olive oil and a squeeze of lemon. The herbaceous aroma transports you to a sunny Mediterranean kitchen. This version is great for a brunch or a sophisticated appetizer.
Storing and Bringing It Back to Life
Fridge Storage
Cool the wings completely, then place them in an airtight container. Store for up to 3 days in the refrigerator. The wings will keep their flavor, though the crispness may diminish slightly. Use a paper towel in the container to absorb excess moisture.
Freezer Friendly
For longer storage, freeze the wings on a parchment‑lined tray for 2–3 hours, then transfer to a freezer bag. They can be kept for up to 2 months. When ready to eat, thaw in the refrigerator overnight. This method preserves the texture better than microwaving.
Best Reheating Method
Reheat the wings in a preheated oven at 375°F (190°C) for 10 minutes, or until hot and crispy. For a quick fix, use a toaster oven or air fryer for 5 minutes. Add a splash of water before reheating to create steam that restores moisture. Finish with a light dusting of chili crisp to revive the flavor.