I was in the middle of a kitchen catastrophe, the skillet was a charred mess, and my friends were staring at me like I’d just handed them a burnt offering. I needed a quick fix that would salvage the evening and silence the skeptical glances. That’s when I remembered the humble pantry staples that could transform a disaster into a dinner triumph: honey, mustard, thyme, salt, and chicken thighs. The idea struck me like a lightning bolt—sweet, tangy, herbaceous glaze that would coat the meat like velvet while the oven worked its magic. I dared myself to taste this and not go back for seconds.
Picture the kitchen: the air thick with the scent of caramelizing honey, the sizzle of the skillet, and the faint perfume of thyme drifting from the spice jar. The sound of the oven timer ticking, the clink of the metal tray, and the gentle hiss as the glaze thickens create a symphony that makes every cook feel like a conductor. When you finally bite into the tender chicken, the sweet‑savory burst explodes, leaving a lingering warmth that lingers on the palate. The crust is crisp enough to crack like thin ice, yet the inside remains juicy and buttery, a balance that feels like a culinary handshake. I knew I had stumbled upon a recipe that would become a staple in my dinner rotation.
What sets this version apart is not just the ingredients but the method that turns ordinary thighs into a showstopper. The glaze forms a glossy coating that locks in moisture, eliminating the dreaded dry chicken that plagues many recipes. The honey’s natural sugars caramelize perfectly at 375°F, creating a caramelized crust that is both sweet and savory. Thyme adds an aromatic depth that elevates the dish from simple to sophisticated. I’ve tried countless variations, but this five‑ingredient combo is hands down the best version you’ll ever make at home.
I dare you to taste this and not go back for seconds, because once you try it, you’ll never settle for bland poultry again. The glaze’s sticky sweetness is a game‑changer, and the mustard’s sharp bite keeps it from becoming a sugary syrup. The thyme’s earthiness ties the flavors together like a well‑written story. The salt simply pulls everything together, letting each component shine. I’ll be honest—I ate half the batch before anyone else got to try it, and the second round was a no‑question winner.
Most recipes get this completely wrong, but here’s what actually works: the timing, the temperature, and the precise ratio of honey to mustard. The glaze’s consistency is key; if it’s too thin it won’t stick, if it’s too thick it will burn. The chicken thighs need a brief sear to develop a golden crust before finishing in the oven. The thyme should be added just before baking so it releases its oils without wilting. This method ensures every bite is a harmonious blend of sweet, tangy, and herbaceous flavors.
Picture yourself pulling this out of the oven, the whole kitchen smelling incredible, and the plate glistening with that caramelized glaze. The moment the tray slides onto the table, the sizzle and steam create a sensory experience that turns an ordinary meal into a celebration. I’ve shared this recipe with friends, and they’ve called it the best chicken dinner in the neighborhood. Stay with me here—this is worth it, because I’m about to walk you through every single step, and by the end, you’ll wonder how you ever made it any other way. Let me walk you through every single step—by the end, you’ll wonder how you ever made it any other way.
What Makes This Version Stand Out
- Flavor: The honey and mustard blend creates a sweet‑savory profile that is both bold and balanced. The glaze coats each thigh, turning every bite into a caramelized burst of flavor. The result is a dish that feels indulgent without being overpowering.
- Texture: The oven’s heat caramelizes the sugars, forming a crisp crust that cracks like thin ice, while the interior stays moist and buttery. This contrast gives the dish a satisfying bite that keeps you coming back for more. The glaze also adds a subtle thickness that clings to the meat like velvet.
- Simplicity: With only five ingredients, you can whip up this dinner in minutes, even on a hectic workday. No complex sauces or prep work—just mix, coat, and bake. The recipe is perfect for novice cooks who want to impress without fuss.
- Time‑Efficiency: The entire process takes less than 45 minutes from start to finish, making it ideal for weekday nights. A quick sear locks in juices, and the oven finishes the job while you handle a side or salad. You’ll be served a complete meal without waiting for hours.
- Make‑Ahead Potential: The glazed chicken can be prepared in advance and reheated with minimal loss of flavor. Store in the fridge for up to two days or freeze for longer convenience. When reheated, the glaze retains its glossy sheen, and the meat remains tender.
- Audience Appeal: Whether you’re feeding a crowd or cooking for yourself, this dish satisfies a wide range of palates. The sweet‑savory combo appeals to both kids and adults, while the herbaceous note adds a touch of sophistication. Guests rave about the simplicity and depth of flavor.
Inside the Ingredient List
The Flavor Base
Brown Deli Mustard is the backbone of this glaze, offering a tangy bite that cuts through the honey’s sweetness. Its slightly grainy texture adds a pleasant mouthfeel, preventing the sauce from feeling syrupy. If you prefer a milder taste, swap in a smooth Dijon mustard; the result will be subtler but still delicious. The mustard also helps the glaze adhere to the chicken, creating that glossy coating we love.
The Texture Crew
Boneless Skinless Chicken Thighs bring a juicy, fatty center that balances the glaze’s sweetness. The skinless cut allows the flavors to penetrate fully without the distraction of crispy skin. If you’re a fan of crispy skin, leave the skin on and sear it until golden before adding the glaze. The thighs also hold up well during baking, maintaining moisture even after the glaze caramelizes.
The Unexpected Star
Chopped Fresh Thyme may seem like a simple herb, but its earthy aroma elevates the dish from ordinary to gourmet. Thyme’s subtle piney undertones complement both honey and mustard, adding depth. If you can’t find fresh thyme, a teaspoon of dried thyme will work, but stir it in after baking to avoid bitterness. Thyme also helps balance the glaze’s sweetness, preventing it from becoming cloying.
The Final Flourish
Salt is the unsung hero that brings all flavors together. A teaspoon is enough to enhance the sweetness of honey and the sharpness of mustard without overwhelming the dish. If you’re watching sodium, you can reduce the amount to a pinch; the glaze will still taste great. Remember, salt also helps the glaze set, giving the crust a satisfying snap.
Everything’s prepped? Good. Let’s get into the real action where the magic happens and the kitchen transforms into a flavor laboratory.
The Method — Step by Step
- Preheat your oven to 375°F (190°C). While the oven warms, pat the chicken thighs dry with paper towels to ensure a crisp exterior. This step is crucial; moisture on the skin will steam instead of sear. The sizzle you’ll hear later will be a sign of a job well done.
- In a small bowl, whisk together the brown deli mustard and honey until the mixture is smooth and slightly glossy. The ratio of 2:1 (mustard to honey) creates that perfect balance of sweet and tangy. If the glaze feels too thick, add a teaspoon of warm water to thin it out. This will make it easier to coat the chicken evenly.
- Season both sides of each thigh with the teaspoon of salt. Sprinkle the chopped thyme over the seasoned meat, letting the aroma mingle with the savory base. The thyme will release its oils as the chicken cooks, infusing the glaze. This is where the herbaceous note starts to play its part.
- Heat a large oven‑proof skillet over medium‑high heat. Add a splash of oil and let it shimmer. Place the chicken thighs skin‑side down (if you kept the skin) and sear for 3–4 minutes until golden brown. This caramelized sear locks in juices and builds a base for the glaze.
- Flip the thighs and brush the honey‑mustard glaze generously over the top. The glaze should coat the surface like a glossy coat of paint. Let it bubble for 2 minutes before transferring the skillet to the preheated oven. The watch‑out: don’t let the glaze burn; keep an eye on the edges as they start to darken.
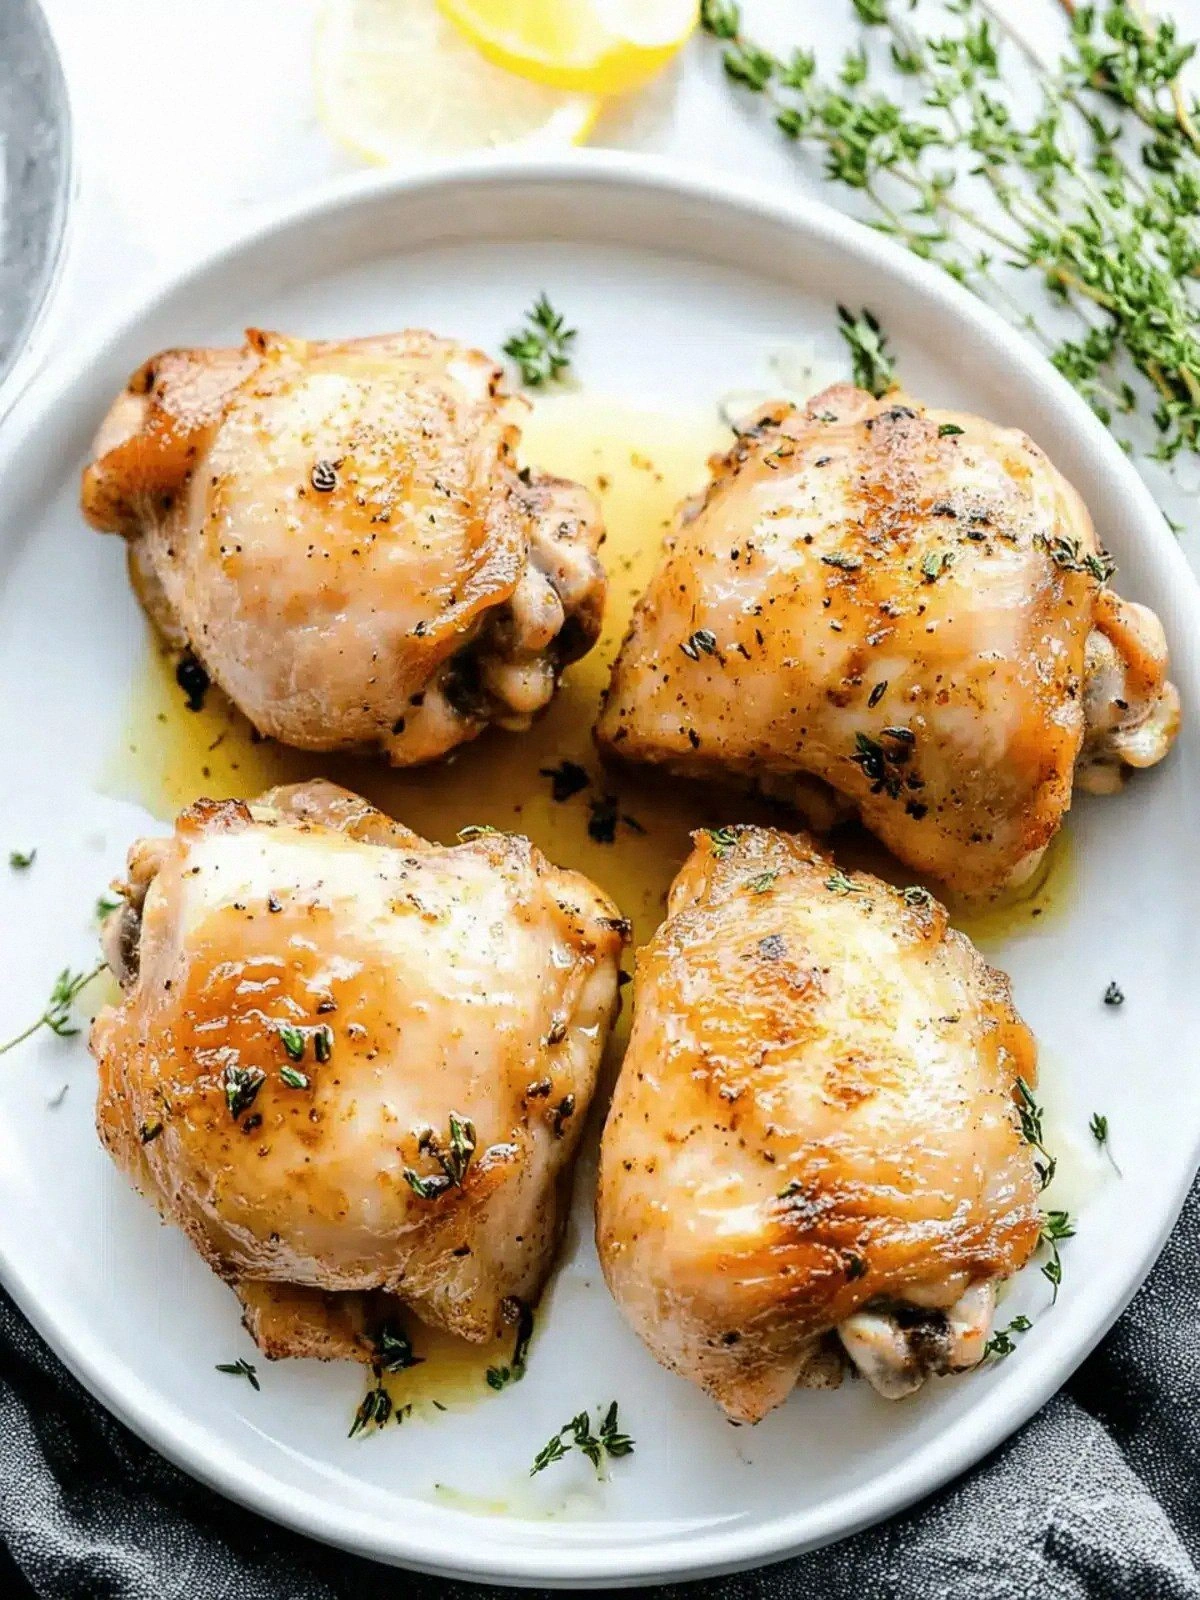
- Bake for 18–20 minutes, or until the internal temperature reaches 165°F (74°C). The glaze should be thickened, shiny, and slightly caramelized. The aroma filling the kitchen will make your mouth water in anticipation. The chicken should feel firm yet give a little when pressed.
- Remove the skillet from the oven and let the chicken rest for 5 minutes. This resting period allows the juices to redistribute, ensuring every bite is juicy. The glaze will also set slightly, giving that perfect snap when you cut into it.
- Slice the thighs into medallions, drizzle any remaining glaze from the pan, and serve immediately. Pair with roasted vegetables or a crisp salad for a balanced meal. The glaze’s sticky sweetness will cling to each piece like a second skin.
- If you’re a perfectionist, finish the dish with a quick broil for 1–2 minutes to deepen the crust. Watch closely; the glaze can go from caramelized to burnt in seconds. This final touch gives the dish an extra layer of flavor and visual appeal.
That’s it— you did it. But hold on, I’ve got a few more tricks that’ll take this to another level and make it unforgettable.
Insider Tricks for Flawless Results
The Temperature Rule Nobody Follows
Many cooks think a higher oven temperature always yields crispier chicken. In reality, a moderate 375°F allows the glaze to caramelize without burning, while the meat cooks evenly. Lower temperatures can lead to a soggy glaze, while higher ones may char the honey before the chicken is done. Stick to the recommended heat for consistent results.
Why Your Nose Knows Best
Smell is a powerful indicator of doneness. As the glaze caramelizes, you’ll notice a nutty, toasted aroma that signals the sugars are turning. If the scent is still raw, give it a few more minutes. Trust your nose, and you’ll avoid overcooking.
The 5-Minute Rest That Changes Everything
Letting the chicken rest after baking isn’t just a courtesy; it redistributes the juices. Skipping this step leaves the meat dry and the glaze clinging to the pan. Resting also allows the glaze to set, giving that perfect snap. I’ve seen friends cut straight into the meat and lose all that juicy goodness.
The Secret to a Crispy Crust
If you love an extra crunch, pat the thighs dry before searing and use a high‑smoke‑point oil like grapeseed. The oil creates a barrier that prevents the glaze from soaking into the skin, keeping the crust crisp. A quick squeeze of lemon after baking can also brighten the flavor and cut through the richness.
How to Keep the Glaze from Burning
Honey can burn quickly if exposed to high heat for too long. To protect the glaze, cover the skillet loosely with foil during the first 10 minutes of baking, then remove it for the last 5 minutes to allow caramelization. If you’re broiling, keep a close eye and flip the skillet if the glaze starts to darken too fast.
The Final Touch for Extra Shine
A quick drizzle of sesame oil or a sprinkle of toasted sesame seeds adds a nutty aroma and a pop of color. The oil also gives the glaze an extra glossy sheen, making the dish look restaurant‑ready. For a spicy kick, a few drops of sriracha can be added just before serving.
Creative Twists and Variations
Smoky Chipotle
Swap half the honey for chipotle‑infused honey and add a pinch of smoked paprika. The smoky undertone pairs beautifully with the mustard’s tang. Serve over quinoa for a hearty twist. Guests will love the subtle heat and depth.
Orange‑Zest
Add a tablespoon of orange zest and a splash of orange juice to the glaze. The citrus brightens the dish, cutting through the richness. Pair with a light cucumber salad for a refreshing contrast. It’s a perfect summer variation.
Mediterranean Herb
Replace thyme with a mix of oregano, rosemary, and basil. The herb blend brings a Mediterranean flair that pairs well with olives and feta. Serve over couscous for a complete meal. The aromatic profile will transport you to the coast.
Maple‑Glazed
Use pure maple syrup instead of honey for a deeper, caramel flavor. The syrup’s subtle woodsy notes complement the mustard’s bite. Add a dash of cayenne for a sweet‑spicy balance. This version is ideal for holiday dinners.
Spicy Sriracha
Stir in a tablespoon of sriracha into the glaze for a fiery kick. The heat balances the sweetness and adds a smoky depth. Serve with steamed rice to soak up the sauce. Your taste buds will thank you for the adventure.
Lemon‑Garlic
Add minced garlic and a squeeze of fresh lemon juice to the glaze. The garlic brings a savory punch, while the lemon adds brightness. Pair with roasted asparagus for a light yet satisfying plate. This variation is a quick weeknight winner.
Storing and Bringing It Back to Life
Fridge Storage
Cool the chicken completely before placing it in an airtight container. Store in the refrigerator for up to two days. The glaze will thicken slightly, but the flavor remains intact. When you’re ready to eat, simply reheat in a skillet or microwave for a minute.
Freezer Friendly
Wrap each thigh individually in plastic wrap and place them in a freezer bag. Freeze for up to three months for convenience. When thawing, let the chicken sit at room temperature for 30 minutes before reheating. The glaze’s texture stays crisp after thawing.
Best Reheating Method
Reheat in a 350°F oven for 10 minutes, then broil for 2 minutes to restore crispness. Alternatively, use a skillet on medium heat, adding a splash of water to keep the glaze moist. A quick stir will prevent the glaze from drying out. The result is a dish that tastes almost freshly baked.
Adding a tiny splash of water before reheating steams back to perfection, keeping the glaze from becoming overly thick. The moisture helps the glaze re‑envelop the meat, creating that signature glossy finish. The reheated chicken will still be juicy, and the glaze will cling like a second skin. Enjoy the convenience without sacrificing flavor.