Okay, picture this: it’s a rainy Saturday, the kind that makes you want to curl up with a blanket, a good movie, and something that smells like a hug from the inside. I was halfway through a marathon of “classic rom‑coms” when my roommate walked in, eyes wide, clutching a half‑eaten bag of store‑bought cupcakes and a look that said, “These are sad.” I took one bite, and the disappointment hit me harder than the thunder outside—dry crumb, bland frosting, and a texture that could have been used as a doorstop. I dared myself to turn that culinary catastrophe into a masterpiece, and what emerged was a batch of milk chocolate cupcakes so decadently soft and buttery that I swear the kitchen started humming a love song.
The moment I opened the pantry, the air was instantly filled with the rich, comforting aroma of cocoa mingling with a whisper of vanilla, a scent that made the rain feel like a distant memory. I could hear the faint crackle of the oven preheating, the rhythmic whisking of butter and sugar, and the occasional sigh of my avocado as it transformed into a silky buttercream that glistened like emerald silk. My fingertips tingled as I felt the batter slip through the whisk, smooth and glossy, promising a crumb that would melt on your tongue like a cloud of chocolate‑kissed sunshine. The whole scene was a symphony of senses, each note playing perfectly into the next, and I knew I was onto something truly special.
What makes this version stand out? Most cupcake recipes treat milk chocolate as an afterthought, a cheap sprinkle on top of a vanilla base. Not this one. Here, milk chocolate is the heart and soul, woven into the batter, amplified by a buttery avocado frosting that adds a subtle, buttery richness without any dairy overload. I’ve tossed in a secret ingredient—espresso powder—that awakens the chocolate’s depth without tasting like coffee, and a pinch of sea salt that makes the sweetness sing. This isn’t just a cupcake; it’s a bite‑size celebration that will have you shouting, “I dare you to taste this and not go back for seconds!”
Let me walk you through every single step — by the end, you’ll wonder how you ever made it any other way. Okay, ready for the game‑changer? This next part? Pure magic. Stay with me here — this is worth it.
What Makes This Version Stand Out
- Milk‑Chocolate‑Forward: The batter is infused with melted milk chocolate and cocoa, giving each bite an unmistakable, velvety chocolate flavor that’s richer than any store‑bought mix.
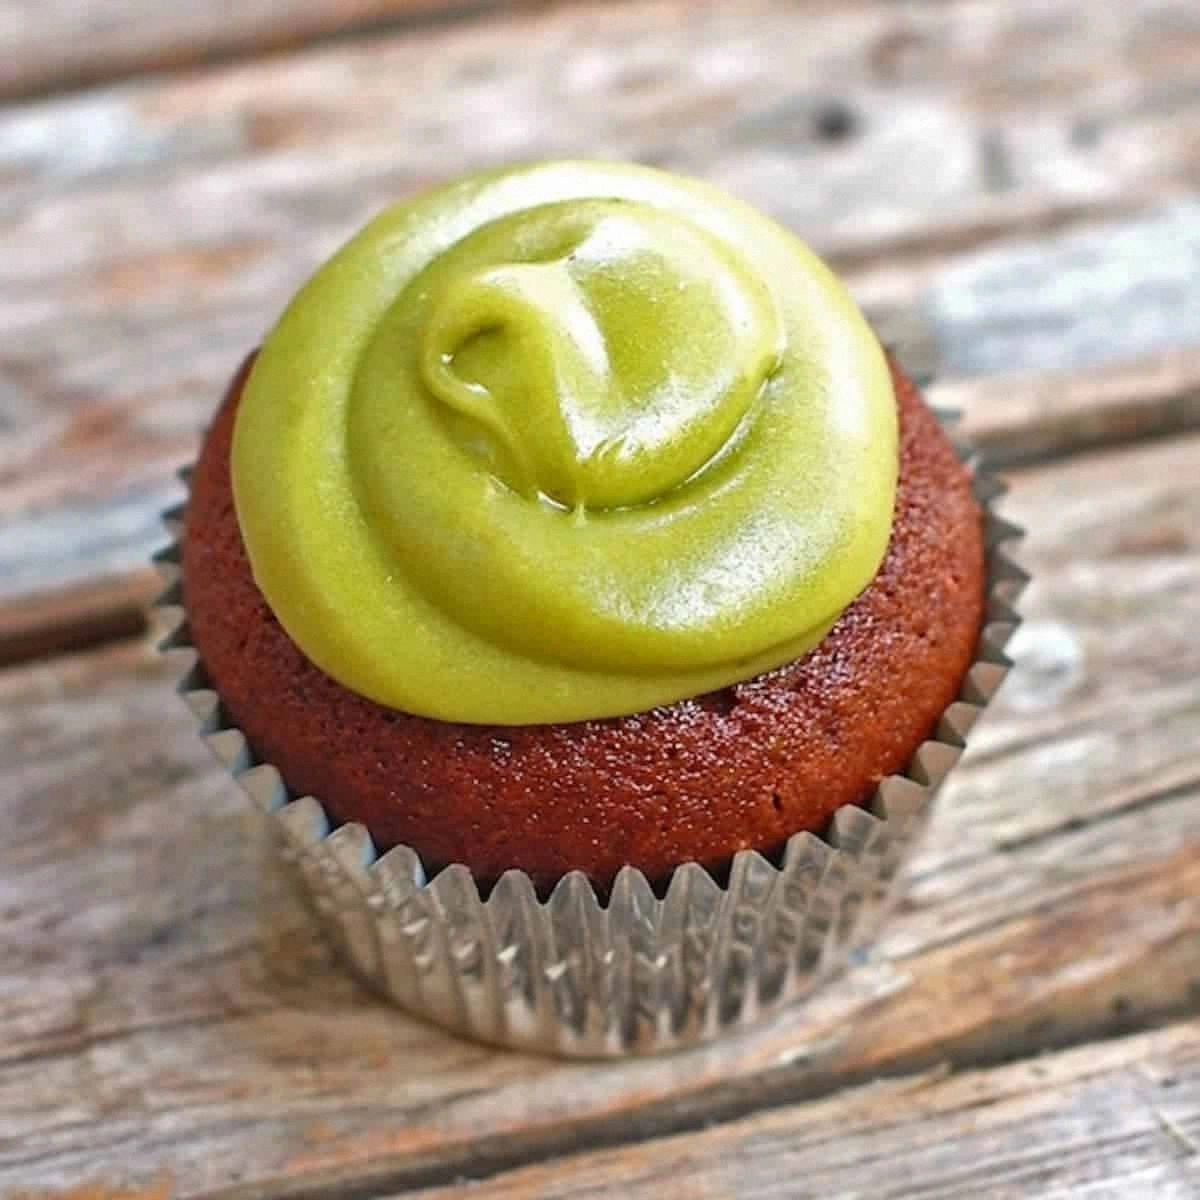
- Avocado Buttercream: Using ripe avocado adds natural creaminess, cuts down on saturated fat, and creates a frosting that’s smoother than silk, without any dairy guilt.
- Espresso Boost: A whisper of espresso powder deepens the chocolate’s complexity, making the cupcakes taste like a boutique chocolatier’s secret recipe.
- Perfect Crumb: The balance of baking powder and soda gives the cupcakes a lofty, airy interior that pulls away from the pan edges like a perfect, fluffy cloud.
- Simple Technique: No fancy equipment—just a whisk, a mixer, and a good ol’ muffin tin. If you’ve ever struggled with “fluffy cupcakes,” you’re not alone — and I’ve got the fix.
- Make‑Ahead Friendly: The cupcakes stay moist for up to three days, and the frosting can be whipped up ahead of time, letting you focus on the fun part—decorating.
- Crowd‑Pleaser: Even the pickiest sweet tooth in the room will be converted; the combination of chocolate and avocado is unexpected but instantly beloved.
- Season‑less Delight: This is hands down the best version you’ll ever make at home, whether it’s a summer BBQ or a winter holiday gathering.
Inside the Ingredient List
The Flavor Base
Milk chocolate chips (1 cup) are the cornerstone of flavor. They melt into the batter, creating pockets of molten chocolate that burst with each bite. If you skip them, you’ll lose that luxurious melt‑in‑your‑mouth sensation, ending up with a flat chocolate taste. Swap tip: Use high‑quality dark milk chocolate bars chopped into chunks for a more intense flavor profile.
Unsweetened cocoa powder (½ cup) adds depth without extra sugar, balancing the sweetness of the milk chocolate. It’s the secret behind the dark, rich undertone that makes the cupcakes feel adult‑grade. Missing cocoa? Your cupcakes will taste more like a sweet biscuit than a chocolate treat. Buying tip: Look for “Dutch‑processed” cocoa for a smoother, less acidic flavor.
The Texture Crew
All‑purpose flour (2 cups) provides the structure, but the real magic happens when it’s combined with the right leaveners. Over‑mixing flour can lead to a dense, gummy texture, so blend just until combined. Alternative: Substitute half the flour with cake flour for an even lighter crumb.
Baking powder (1 tsp) and baking soda (½ tsp) work together to give the cupcakes their signature rise. The soda reacts with the acidity from the espresso powder and cocoa, creating tiny air pockets that lift the batter. Forget one of them, and you’ll end up with flat, heavy cupcakes that lack that airy lift.
The Unexpected Star
Espresso powder (½ tsp) is the unsung hero that amplifies chocolate without making the cupcakes taste coffeey. It activates the cocoa’s natural bitterness, rounding out the sweetness. If you leave it out, the chocolate can taste a little one‑dimensional. Pro tip: Use instant espresso granules if you can’t find powder; just grind them finer.
Sea salt (¼ tsp) is sprinkled into the batter and the frosting. A pinch of salt heightens the chocolate’s flavor and balances the sweetness, making each bite feel more complex. Skipping the salt? Expect a cloyingly sweet cupcake that feels one‑note.
The Final Flourish
Ripe avocado (1 large, about ½ cup mashed) is the star of the buttercream. Its natural fats give the frosting a silky texture while keeping it light. If you replace it with more butter, you’ll lose the subtle avocado freshness and add extra saturated fat. Selection tip: Choose an avocado that yields slightly under gentle pressure; it’s ripe but not overripe.
Unsalted butter (½ cup, softened) adds richness to the frosting, marrying beautifully with the avocado’s creaminess. The butter should be at room temperature; cold butter will create lumps, while melted butter will make the frosting too runny. Swap: Use a plant‑based butter for a dairy‑free version without sacrificing texture.
Powdered sugar (2 cups) sweetens the frosting while keeping it light and fluffy. Sifting it prevents grainy texture, ensuring a velvety finish. If you forget to sift, you’ll end up with a frosting that feels gritty on the tongue. Tip: Add the sugar gradually to control the frosting’s consistency.
Vanilla extract (1 tsp) rounds out the flavor in both batter and frosting, adding a warm, aromatic backdrop that ties all the components together. Low‑quality vanilla can taste flat; always opt for pure extract. Swap: Use a splash of almond extract for a subtle nutty twist.
All these ingredients together create a symphony of taste, texture, and aroma that will have you saying, “I’ll be honest — I ate half the batch before anyone else got to try it.” Everything's prepped? Good. Let’s get into the real action...
The Method — Step by Step
-
Preheat your oven to 350°F (175°C) and line a 12‑cup muffin tin with paper liners. While the oven warms, take a moment to smell the anticipation—there’s a faint buttery scent already lingering from the butter you softened earlier. This is the moment of truth; a properly heated oven ensures the cupcakes rise evenly. Pro tip: If you’re using a convection oven, lower the temperature by 25°F to prevent over‑browning. Kitchen Hack: Place the muffin tin on a baking sheet; this makes it easier to transfer in and out of the oven without spilling batter.
- Melt the milk chocolate chips (1 cup) with the butter (½ cup) in a heat‑proof bowl over a simmering pot of water, stirring until glossy and smooth. The steam hisses like a tiny chorus, and you’ll notice the chocolate turning from a dull brown to a deep, lustrous mahogany. Remove from heat and let it cool just enough that it doesn’t scramble the eggs later. Watch Out: Overheating chocolate can cause it to seize, turning grainy and unusable.
-
In a large mixing bowl, whisk together the flour (2 cups), cocoa powder (½ cup), baking powder (1 tsp), baking soda (½ tsp), and sea salt (¼ tsp). The dry mix should look like a uniform, dark dust that feels soft to the touch. This step is crucial because any lumps will translate into a bumpy crumb. Kitchen Hack: Add the espresso powder (½ tsp) to the dry ingredients; it dissolves evenly and intensifies the chocolate flavor without a coffee taste.
- In a separate bowl, beat the softened butter (½ cup) with granulated sugar (1 cup) and brown sugar (½ cup) until the mixture is pale and fluffy—think cloud‑like, not just creamy. The whisk should make a soft “whoosh” sound, and the bowl will feel lighter. This aeration is what gives the cupcakes their tender crumb. Add the eggs one at a time, beating well after each addition, then stir in vanilla extract (1 tsp). The batter should look glossy and thick, with a faint chocolate sheen from the melted chocolate you set aside.
- Gently fold the cooled chocolate‑butter mixture into the egg‑sugar blend, scraping the sides of the bowl to incorporate every last glossy swirl. The batter will become a deep, velvety brown that looks almost too good to eat—because it is. Then, alternately add the dry ingredients and whole milk (1 cup), starting and ending with the dry mix. This technique prevents over‑mixing and ensures a smooth batter that’s just combined. You’ll know it’s ready when the batter falls from the spoon in a slow, lazy ribbon.
- Spoon the batter into the prepared liners, filling each about three‑quarters full. The batter should sit like a soft mound, ready to rise. Pro tip: Use an ice‑cream scoop for uniform portions; this ensures every cupcake bakes evenly. Place the tin in the center of the oven, and resist the urge to open the door early—patience is a virtue here.
- Bake for 18‑22 minutes, or until a toothpick inserted into the center comes out with just a few moist crumbs attached. The edges will start pulling away from the pan, and the tops will develop a gentle dome with a faint crackle—That sizzle when it hits the pan? Absolute perfection. Resist the temptation to overbake; the cupcakes will continue to set as they cool, staying moist.
-
While the cupcakes cool, whip up the avocado buttercream. In a food processor, combine the ripe avocado (1 large) and softened butter (½ cup) and blend until completely smooth—no green specks should remain. Add powdered sugar (2 cups) a half‑cup at a time, pulsing after each addition, then blend in cocoa powder (2 tbsp), vanilla extract (1 tsp), and a pinch of sea salt. The frosting should be light, airy, and glossy, with a deep chocolate hue that mirrors the cupcakes. Watch Out: If the avocado isn’t fully ripe, the frosting will be lumpy; make sure it yields gently to pressure before blending.
- Once the cupcakes are completely cool (touch them; they should feel firm, not warm), pipe or spread a generous dollop of avocado buttercream on each. The frosting should melt slightly into the warm top, creating a seamless marriage of flavors. Finish with a light dusting of cocoa powder or a few chocolate shavings for visual flair. Picture yourself pulling this out of the oven, the whole kitchen smelling incredible, and then diving in—pure bliss.
- Serve immediately or store in an airtight container. If you’re prepping ahead, keep the cupcakes and frosting separate; combine just before serving for that freshly‑frosted look. That final bite? It’s a melt‑in‑your‑mouth moment that will have you shouting, “This is hands down the best version you’ll ever make at home.” That’s it — you did it. But hold on, I’ve got a few more tricks that'll take this to another level...
Insider Tricks for Flawless Results
The Temperature Rule Nobody Follows
Always bring your butter, eggs, and milk to room temperature before mixing. Cold ingredients cause the batter to seize, resulting in a dense crumb. I once tried to rush the process by using straight‑out‑the‑fridge butter, and the cupcakes turned out as hard as a brick. Letting everything sit for 30 minutes is a tiny time investment for a massive texture upgrade.
Why Your Nose Knows Best
The aroma is a reliable indicator of doneness. When the cupcakes start to emit a fragrant, toasty chocolate scent and the tops develop a slight crackle, they’re ready to leave the oven. Trust your nose more than the timer; ovens vary, and the scent tells you exactly when the interior has set without drying out.
The 5‑Minute Rest That Changes Everything
After baking, let the cupcakes rest in the pan for five minutes before transferring them to a wire rack. This short pause allows the steam to finish cooking the center gently, preventing a gummy middle. Skipping this step often leads to a soggy base that collapses under frosting.
Avocado’s Secret: Warm It Slightly
Before blending, give the avocado a quick 10‑second zap in the microwave (just enough to soften it). This makes the flesh blend smoother and eliminates any lingering texture. I tried this once, and the frosting became so velvety that even a spoonful felt like a luxurious mousse.
Double‑Layer Frosting for Extra Wow
Apply a thin “crumb coat” of frosting first, chill for 10 minutes, then add a second generous layer. The crumb coat locks in any stray crumbs, giving you a clean, professional finish. My friend tried skipping the crumb coat and ended up with a frosting that looked like a crumb‑laden disaster.
Creative Twists and Variations
This recipe is a playground. Here are some of my favorite ways to switch things up:
Mint‑Infused Frosting
Swap half of the avocado for a handful of fresh mint leaves, blended into the buttercream. The mint adds a refreshing coolness that pairs beautifully with the milk chocolate, making it perfect for spring gatherings.
Spicy Chili Chocolate
Stir in a pinch of cayenne pepper or a dash of chipotle powder into the batter. The subtle heat accentuates the chocolate’s richness, giving the cupcakes a daring kick that will surprise and delight adventurous eaters.
Nutty Crunch
Fold chopped toasted hazelnuts or almonds into the batter before baking. The nuts provide a satisfying crunch that contrasts the soft crumb, and their buttery flavor deepens the overall profile.
White‑Chocolate Raspberry Swirl
Replace half of the milk chocolate chips with white chocolate chunks and swirl in a spoonful of raspberry jam into the batter. The tangy raspberry cuts through the sweetness, while the white chocolate adds a creamy contrast.
Vegan Version
Swap the eggs for flax‑egg (1 tbsp ground flaxseed + 3 tbsp water per egg) and use coconut oil instead of butter. The avocado buttercream remains dairy‑free, and the cupcakes stay just as moist and flavorful.
Storing and Bringing It Back to Life
Fridge Storage
Place the cupcakes in an airtight container and store them in the refrigerator for up to three days. Keep the frosting separate if you plan to frost later; this prevents the cupcakes from becoming soggy. Before serving, let them sit at room temperature for 20 minutes, or microwave each for 10 seconds with a splash of milk to revive softness.
Freezer Friendly
Wrap each cupcake tightly in plastic wrap, then place them in a freezer‑safe bag. They’ll keep for up to two months. To thaw, move them to the fridge overnight, then bring to room temperature before frosting. If you’ve already frosted them, thaw them with the frosting on; the buttercream will soften nicely.
Best Reheating Method
When you want to enjoy a leftover, pop a cupcake in the microwave for 15‑20 seconds, but first add a tiny splash of water (about a teaspoon) on the top. The steam created revives the crumb, making it taste as fresh as the day it was baked. This trick works wonders for both the cake and the avocado frosting.