Introduction
Picture this: I was standing in a cramped kitchen, the fridge humming like a tired old car, when my friend dared me to make the ultimate Nashville Hot Chicken Sandwich. I thought, “Sure, why not?” The moment I cracked the first chicken breast, the scent of buttermilk and cayenne flooded the room, turning the ordinary into a culinary fireworks show. My neighbor’s radio was blasting country tunes, and the aroma of hot sauce made the whole neighborhood smell like a summer festival. I laughed, grabbed the skillet, and the kitchen became a battlefield where flavor and heat clashed in a delicious duel.
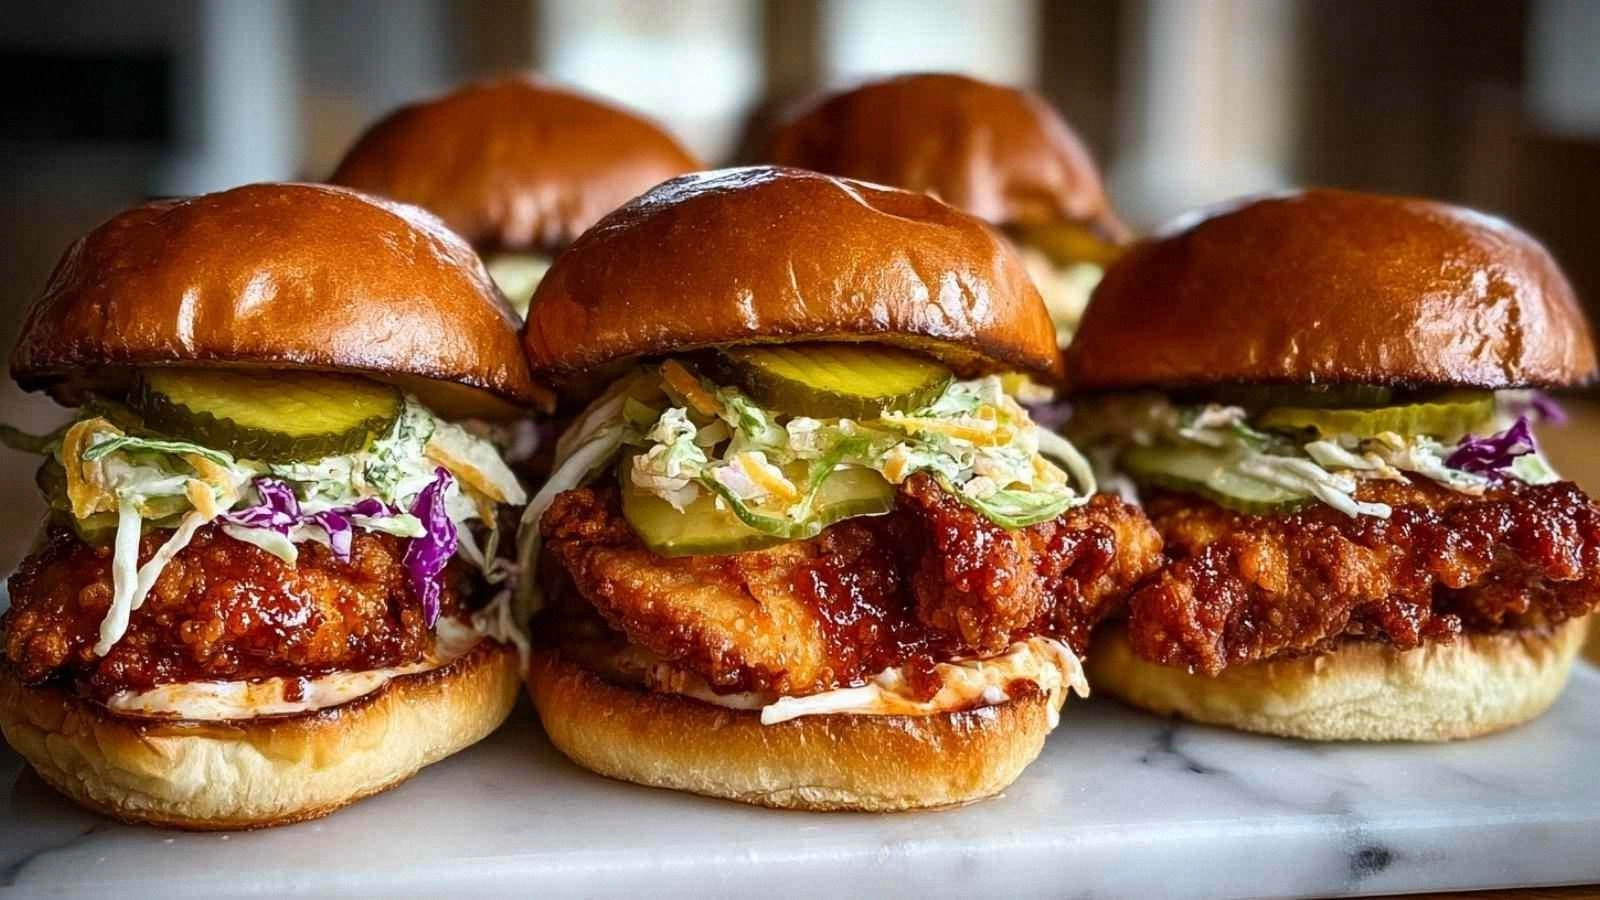
The first bite was a revelation. The chicken was juicy, the coating crackling like a fresh snowflake, and the heat was a gentle, rolling wave that lingered on the tongue. The coleslaw added a sweet, creamy contrast, while the dill pickle chips injected a tangy bite that cut through the spice. It was a symphony of textures and flavors, a dance of heat and coolness that made my taste buds do a double tap. I could taste the smoky undertones of the cayenne, the buttery crispness of the fried crust, and the subtle sweetness of the brown sugar. It was an explosion of sensations that left me craving a second, third, and fourth sandwich.
This version is not just a copy of a restaurant recipe; it’s a reimagined masterpiece that balances heat with harmony. I’ve tweaked the batter to achieve the perfect crisp, introduced a double layer of spice for depth, and added a secret ingredient that keeps the chicken moist without compromising the crunch. The result is a sandwich that feels like a hug, a bold shout, and a warm memory all at once. It’s hands down the best version you’ll ever make at home, and it will change the way you think about fried chicken forever.
What sets this recipe apart is a technique that most cooks overlook: marinating the chicken in a buttermilk and cayenne mixture for a full hour, then letting it rest in a seasoned flour bath that’s been double-poured. This method locks in moisture while creating a buttery, spicy crust that holds the heat without burning the batter. The result is a sandwich that delivers a punch of flavor with every bite, and it’s so satisfying that I dare you to taste this and not go back for seconds.
Let me walk you through every single step — by the end, you'll wonder how you ever made it any other way. The next sections will reveal the secrets, the hacks, and the tweaks that make this sandwich a culinary triumph.
What Makes This Version Stand Out
- Heat Precision: The blend of cayenne and paprika is calibrated to give a steady burn that doesn’t overwhelm the palate. It’s a controlled heat that builds gradually, allowing the flavors to mingle.
- Moisture Lock: Marinating in buttermilk and hot sauce for an hour creates a tender interior that stays juicy even after deep frying.
- Crunch Factor: Double-pouring the seasoned flour creates a double-thick crust that snaps like a fresh potato chip, giving an audible cue that you’re eating something special.
- Flavor Layering: The brown sugar and garlic powder in the coating add a subtle sweetness and depth that counterbalances the heat.
- Make‑Ahead Friendly: The chicken can be marinated and coated up to 24 hours in advance, making it a perfect crowd‑pleaser for parties.
- Customizable: Swap the coleslaw for a slaw of your choice or add a drizzle of honey for a sweet‑spicy twist. The base is flexible enough to accommodate your taste.
- Visual Appeal: The golden crust and the vibrant red of the hot sauce create an eye‑catching dish that’s as Instagram‑worthy as it is delicious.
- Ingredient Quality: Using high‑quality, fresh spices and a good cut of chicken makes the difference between an average sandwich and an unforgettable one.
Alright, let's break down exactly what goes into this masterpiece…
Inside the Ingredient List
The Flavor Base
The heart of this sandwich beats in the buttermilk and hot sauce. The buttermilk’s acidity tenderizes the chicken, breaking down proteins so the meat stays tender after frying. The hot sauce introduces a baseline heat that’s amplified by the cayenne pepper. If you skip the hot sauce, the sandwich loses that signature kick and feels flat. For those who love extra heat, add a dash of Sriracha to the buttermilk mix; it’s a subtle way to intensify the flavor without overpowering the rest.
The Texture Crew
Flour, garlic powder, paprika, cayenne pepper, salt, and black pepper form the crunchy armor that protects the juicy interior. The double-pouring technique ensures that the coating is thick enough to hold the heat and crisp up to a satisfying crunch. If you’re short on flour, you can substitute cornstarch for a lighter texture, but the classic all-purpose flour gives that nostalgic fried‑chicken feel. Remember to sift the flour to avoid clumps; clumps can make the crust uneven.
The Unexpected Star
The brown sugar and a pinch of baking soda might look like minor players, but they’re the secret to that caramelized edge that glistens like a sunrise. The sugar caramelizes during frying, creating a subtle sweetness that balances the cayenne’s bite. Baking soda helps neutralize the acidity from the buttermilk, ensuring the coating doesn’t turn out too soggy. If you’re avoiding sugar, a teaspoon of honey can work as a substitute, but be prepared for a slightly different caramelization.
The Final Flourish
The buns, coleslaw, and dill pickle chips add the finishing touches that transform the sandwich from a fried chicken plate to a complete meal. The buns should be toasted until golden; this adds a crunchy bite and prevents them from becoming soggy when soaked in the sauce. The coleslaw’s tangy creaminess cuts through the heat, while the dill pickle chips offer a briny crunch that complements the spices. If you prefer a lighter version, replace the coleslaw with a simple slaw of shredded cabbage, lemon juice, and a touch of mayo.
Everything's prepped? Good. Let's get into the real action…
The Method — Step by Step
- First, combine the buttermilk, 0.5 cup hot sauce, 1 tbsp cayenne pepper, 1 tbsp brown sugar, 1 tsp garlic powder, and 1 tsp paprika in a large bowl. Stir until the sugar dissolves and the mixture is smooth. Cover and refrigerate for at least 30 minutes, allowing the flavors to meld and the chicken to tenderize.
- While the chicken marinates, prepare the flour mixture in a separate shallow dish. Add 2 cups all-purpose flour, 2 tbsp garlic powder, 2 tbsp paprika, 3 tbsp cayenne pepper, 2 tsp salt, and 1 tsp black pepper. Whisk until well combined. This seasoned flour will create the crispy, spicy coating that locks in the heat.
- Once the chicken is marinated, remove each breast and let the excess liquid drip off. Then, dredge the chicken in the seasoned flour, pressing the coating onto every surface. For an extra crunch, double-pour: dip the coated chicken back into the buttermilk mixture, then back into the flour again. This two‑step process ensures a thick, flavorful crust.
- Heat 1 cup vegetable oil in a deep skillet or Dutch oven to 350°F (175°C). Test the temperature by dropping a small piece of bread into the oil; if it sizzles and turns golden in 60 seconds, you’re ready. Carefully slide the coated chicken into the hot oil, cooking 5–6 minutes per side until the internal temperature reaches 165°F (74°C). The crust should be a deep amber, and the chicken should emit a savory aroma.
- Remove the chicken from the oil and let it rest on a wire rack for 5 minutes. This step allows the juices to redistribute, preventing the sandwich from becoming soggy. While the chicken rests, toast the hamburger buns on a skillet or in a toaster until they’re golden and slightly crisp.
- Once the buns are toasted, spread a thin layer of mayonnaise on the bottom bun. Layer the coleslaw, then place the hot chicken breast. Add a handful of dill pickle chips on top of the chicken for that briny crunch. Finish with a drizzle of hot sauce or a sprinkle of extra cayenne if you’re feeling daring.
- Press the top bun gently onto the sandwich and serve immediately. The heat from the chicken will keep the bun warm, and the crunchy coating will remain crisp until the very last bite. If you’re serving a crowd, keep the sandwiches on a warmed platter to maintain their texture.
- For a quick side, toss a handful of fresh cilantro or parsley into the coleslaw; the herbs add a fresh pop that balances the heat. If you prefer a dairy‑free option, swap the mayo for avocado or a dairy‑free yogurt.
- Enjoy your Nashville Hot Chicken Sandwich while the flavors are at their peak. If you’re still craving more, add a side of sweet potato fries or a simple green salad to round out the meal.
That's it — you did it. But hold on, I've got a few more tricks that'll take this to another level…
Insider Tricks for Flawless Results
The Temperature Rule Nobody Follows
Maintaining a consistent oil temperature is crucial for a crispy coating. Use a deep‑dish thermometer and aim for 350°F. If the oil is too hot, the outside will burn before the inside cooks; if it's too cool, the coating will soak up oil. I once fried a chicken at 300°F and it came out soggy and pale. The trick is to let the oil come to a rolling boil, then reduce the heat slightly before adding the chicken.
Why Your Nose Knows Best
Before you start frying, let the chicken sit at room temperature for 15 minutes. Your nose will tell you when the oil is hot enough: a sharp sizzle and a faint, caramelized scent mean it’s ready. If you’re in a hurry, a quick test is to drop a small piece of bread into the oil; if it turns golden in 60 seconds, you’re good to go.
The 5-Minute Rest That Changes Everything
After frying, let the chicken rest on a wire rack for at least five minutes. This step allows the juices to redistribute, preventing a dry bite. I once served chicken straight from the fryer and it was dry and tough. The rest period turned it into a melt-in-your-mouth experience.
Double‑Dipping for Extra Crunch
For an ultra‑crunchy coating, double‑dip the chicken in the flour mixture. Dip it in the buttermilk, then back into the flour, and repeat once more. The extra layer of flour creates a thicker crust that holds the heat and remains crispy even after the sandwich is assembled.
Finish with a Final Drizzle
Right before serving, drizzle a thin line of hot sauce over the chicken. This final splash adds a burst of heat that’s visible and audibly satisfying. It also prevents the sauce from soaking into the bun, keeping the sandwich from becoming soggy.
Creative Twists and Variations
This recipe is a playground. Here are some of my favorite ways to switch things up:
Spicy Buffalo Twist
Swap the hot sauce in the batter for buffalo sauce and add a handful of blue cheese crumbles to the coleslaw. The tangy, creamy bite pairs perfectly with the heat.
Sweet and Smoky BBQ
Use a smoky BBQ sauce in place of the hot sauce and mix in a tablespoon of molasses into the flour. The result is a sweet, smoky sandwich that feels like a Southern summer.
Vegan Version
Use a plant‑based chicken substitute and a dairy‑free mayo. Keep the spice blend the same for authenticity. The vegan version still delivers that signature crunch and heat.
Crunchy Avocado Layer
Add sliced avocado between the chicken and coleslaw. The creamy avocado balances the heat and adds a buttery texture.
Ginger‑Infused Variation
Incorporate minced fresh ginger into the buttermilk mixture and add a dash of soy sauce to the flour. The ginger adds a bright, aromatic note that cuts through the richness.
Storing and Bringing It Back to Life
Fridge Storage
Store the assembled sandwiches in an airtight container for up to 2 days. Keep the buns on the side to prevent them from getting soggy. When ready to eat, reheat in a skillet for 2 minutes to restore crispness.
Freezer Friendly
Wrap each sandwich individually in foil and freeze for up to 3 months. Thaw overnight in the refrigerator before reheating. For best results, use a microwave on low heat for 1 minute, then finish in a skillet.
Best Reheating Method
Reheat in a preheated oven at 375°F for 10 minutes, or use a toaster oven for a crispier finish. Add a splash of water to the bottom of the pan to create steam, which keeps the bun from drying out.