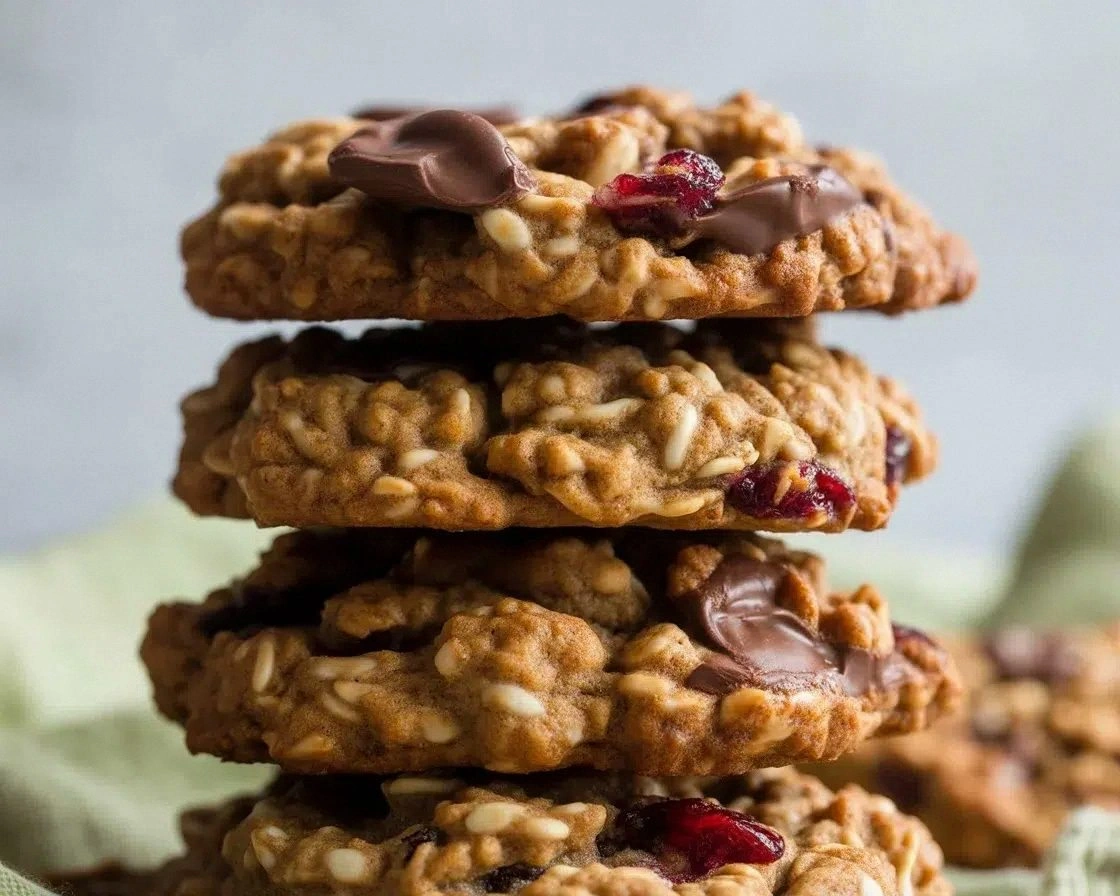
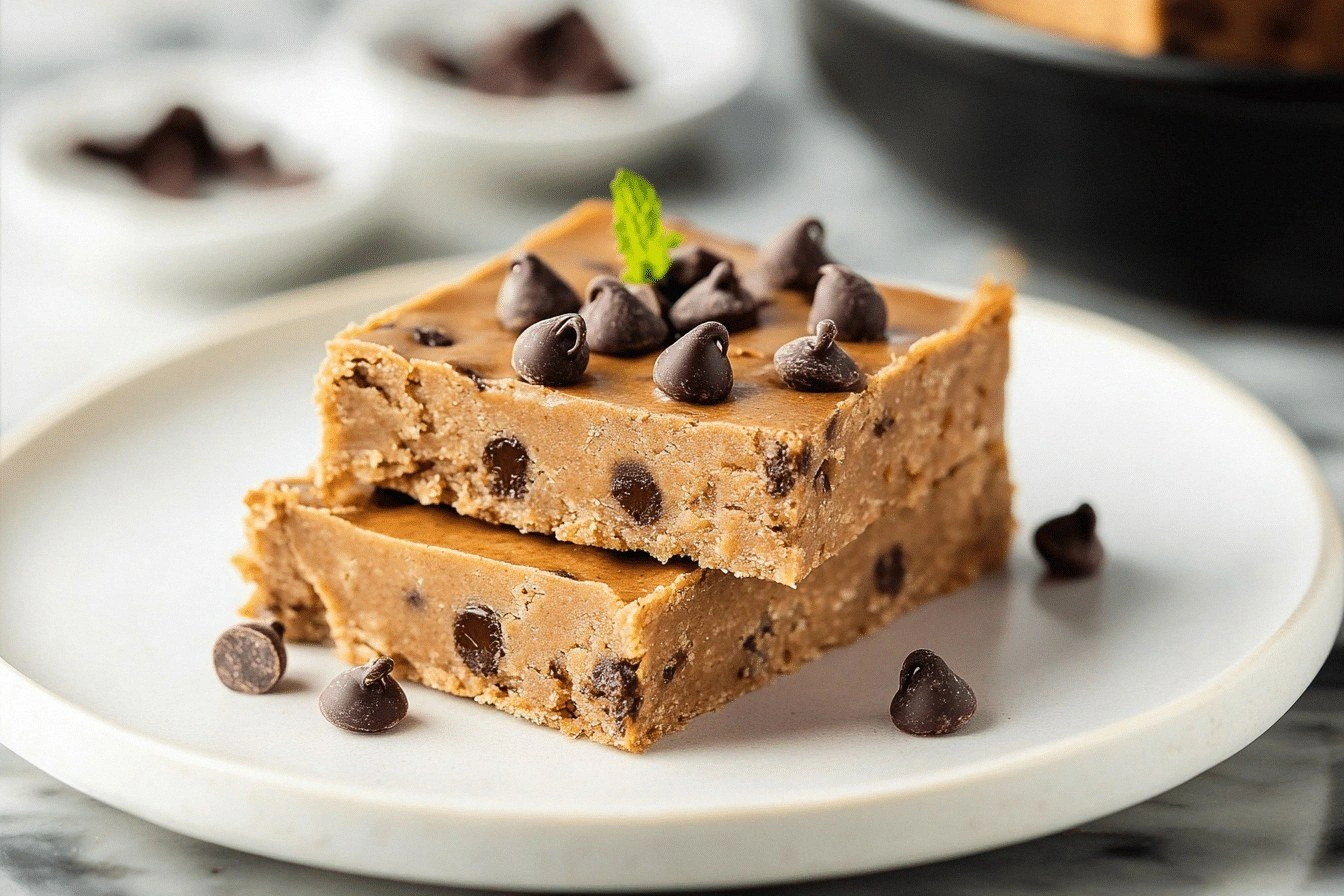
I remember the night I was scrambling to make a quick snack after a late‑night coding marathon. The pantry was a chaotic maze of jars and packages, and I reached for the peanut butter, the honey, the rolled oats, and a handful of chocolate chips. I thought, “Why not combine them all?” The result was a sticky, chocolatey, peanut‑butter‑laden mixture that, when pressed into a pan, turned into the most satisfying, no‑bake bar I’ve ever tasted. If you’re still on the fence about making bars that don’t require an oven, I dare you to taste this and not go back for seconds.
Picture the kitchen: the air is thick with the scent of toasted oats, the buttery sweetness of honey, and the faint, nutty aroma of peanut butter. The sound of the spoon scraping the bowl is almost hypnotic, and the texture of the mixture is silky, yet it clings together like a gentle hug. When you press it into the pan, the edges begin to firm up, forming a golden crust that cracks slightly when you lift a piece. The first bite is a burst of creamy peanut, followed by a chewy oat foundation, and then a delightful explosion of chocolate chips that melt into the center. Every chew delivers a balanced sweetness that isn’t overpowering, and the final note is a subtle hint of vanilla that lingers on the palate.
What makes this version stand out is that it’s a no‑bake wonder that still feels like a gourmet treat. I’ve experimented with countless variations, and none have captured the harmony of flavors and textures like this one does. The peanut butter provides creaminess, the honey binds everything together, the oats give that hearty chew, and the chocolate chips add a touch of indulgence without drowning the other ingredients. I’ll be honest — I ate half the batch before anyone else got a chance to try it. That’s the power of this recipe: it’s so irresistible that you’ll find yourself reaching for more before the timer even starts.
Most recipes get this completely wrong. They either over‑cook the oats, use too much honey that makes the bars sticky, or forget the pinch of salt that deepens the flavor profile. I’ve learned that the key is to keep the mixture at a gentle simmer, then let it cool just enough so it can be pressed without cracking. And if you’re worried about the bars not holding together, just remember that the chia seeds or flaxseeds add a subtle crunch and extra nutrition, but they’re optional. The result is a bar that’s chewy, yet firm enough to bite through without falling apart.
If you’ve ever struggled with making bars that stay together, you’re not alone — and I’ve got the fix. The trick is to use a heavy‑bottomed saucepan and stir constantly, so the mixture doesn’t scorch. I’ve also discovered that a splash of milk or water can help the mixture bind better if you’re using a low‑sugar honey. And the best part? It’s a make‑ahead recipe that stays fresh in the fridge for a week or in the freezer for months. Picture yourself pulling this out of the freezer, the whole kitchen smelling incredible, and you can just pop a bar in your mouth and feel that comforting, nostalgic taste of a childhood snack.
What Makes This Version Stand Out
- Taste: The balance of salty, sweet, and nutty flavors creates a complex profile that satisfies both sweet and savory cravings. The honey’s natural sweetness complements the peanut butter’s richness, while the chocolate chips add a satisfying burst of chocolate.
- Texture: The combination of chewy oats, creamy peanut butter, and crunchy chocolate chips results in a multi‑layered mouthfeel that keeps each bite interesting. The optional seeds add an extra crunch that contrasts beautifully with the smooth base.
- Simultaneous Sweetness: The honey or maple syrup provides a natural binder, eliminating the need for refined sugar or artificial sweeteners. The result is a wholesome treat that still feels indulgent.
- Make‑ahead Friendly: The bars can be prepared a day in advance and stored in an airtight container, making them perfect for busy mornings or on‑the‑go snacking.
- Ingredient Quality: Using high‑quality natural peanut butter and raw rolled oats ensures the bars are both nutritious and flavorful. The chocolate chips should be dark or milk, depending on your preference.
- Speed: The entire process takes less than 45 minutes, and you don’t need to preheat an oven. It’s the quickest way to get a homemade bar that tastes like a candy store favorite.
- Visual Appeal: The bars have a glossy, slightly caramelized surface that looks as good as it tastes, making them a great addition to a brunch spread or a dessert platter.
- Versatility: You can easily swap the chocolate chips for dried fruit, nuts, or even a swirl of peanut butter for a different flavor profile.
Alright, let's break down exactly what goes into this masterpiece…
Inside the Ingredient List
The Flavor Base
Peanut butter is the star of this recipe, providing creaminess, a rich nutty flavor, and a protein punch that keeps you energized throughout the day. Choosing a natural, unsweetened peanut butter ensures the bars stay balanced and not overly sweet. If you prefer a different nut flavor, almond or cashew butter will also work, but the texture may shift slightly.
Honey or maple syrup is the binding agent that turns the dry ingredients into a cohesive, moldable dough. The honey’s floral notes add depth, while maple syrup offers a subtle earthiness. If you’re avoiding honey, agave nectar is a decent alternative, though it’s sweeter and can make the bars a bit too sweet.
The Texture Crew
Rolled oats are the backbone of the bars, providing a chewy, hearty base that’s both fiber‑rich and satisfying. They absorb the liquid and create a structure that holds the bars together. For a finer texture, you can pulse the oats in a food processor to make them more like instant oats, but that changes the chew.
Mini chocolate chips add bursts of chocolatey goodness without overwhelming the other flavors. They melt slightly into the mixture, creating pockets of molten chocolate that add a luxurious feel. Dark chocolate chips give a richer, less sweet experience, while milk chocolate chips keep it classic and kid‑friendly.
The Unexpected Star
Chia seeds or flaxseeds are optional but add extra crunch, omega‑3 fatty acids, and a subtle nutty flavor. They also help bind the mixture, making the bars firmer. If you’re allergic or simply don’t like the texture, feel free to omit them; the bars will still hold together well.
The Final Flourish
Vanilla extract enhances the overall flavor and aroma of the bars, giving them a warm, comforting scent that’s reminiscent of home baking. Even a small amount—just a splash—can elevate the taste profile significantly. Salt is the secret ingredient that balances sweetness and deepens the flavor profile; a pinch is all you need.
Everything's prepped? Good. Let's get into the real action…
The Method — Step by Step
- Gather all ingredients and set them out on the counter. Having everything at arm’s reach saves time and prevents the temptation to rummage through the pantry mid‑cook. Measure 1 cup of natural peanut butter, 1/4 cup honey, 2 cups rolled oats, 1 cup mini chocolate chips, 2 tablespoons chia seeds, 1 teaspoon vanilla extract, and a pinch of salt. If you’re using maple syrup, replace the honey with an equal volume.
- Heat a medium‑sized saucepan over medium heat. Add the peanut butter and honey, stirring until the mixture is smooth and begins to thicken. The honey should be fully incorporated, creating a glossy, golden‑brown hue. Watch the mixture closely; it should not bubble or scorch.
- Once the peanut butter and honey are well blended, pour in the vanilla extract and a pinch of salt. Stir until the vanilla is fully dispersed; this step ensures the flavor is even throughout the bars. The mixture will have a slightly syrupy consistency, ready for the dry ingredients.
- Lower the heat to medium‑low and add the rolled oats and chia seeds. Stir continuously to prevent the oats from sticking to the bottom of the pan. This step is critical: the oats need to absorb the liquid and coat themselves in the peanut‑honey mixture.
- Cook for about 5 minutes, or until the oats are tender and the mixture has thickened to a paste‑like consistency. The aroma will shift from raw to toasted, and you’ll notice a faint nutty scent rising. If the mixture starts to dry out, add a splash of milk or water to keep it moist.
- Remove the pan from heat and let it cool for a minute or two. Then fold in the mini chocolate chips, ensuring they’re evenly distributed. The heat from the mixture will slightly melt the chips, creating pockets of molten chocolate that will harden as the bars cool.
- Press the mixture firmly into a greased 9x9‑inch baking dish or a lined silicone pan. Use a spatula or the back of a spoon to smooth the surface and create even edges. The bars should be pressed tight enough that they hold together but not so tight that they become compacted and lose texture.
- Place the pan in the refrigerator for at least 30 minutes, or until the bars are firm and set. The cold will help the peanut butter solidify, giving the bars a clean, sliceable texture. Once firm, remove the pan and cut the bars into squares or rectangles, depending on your preference.
That's it — you did it. But hold on, I've got a few more tricks that'll take this to another level. The bars can be customized with a variety of add‑ins or flavor tweaks, and you can store them in ways that keep them fresh and delicious for weeks.
Insider Tricks for Flawless Results
The Temperature Rule Nobody Follows
Many people think the mixture can be left at a high heat for a long time, but that usually leads to a dry, overly browned product. The sweet spot is around 170°F (77°C); at this temperature the peanut butter and honey meld without burning. If you don’t have a thermometer, look for a glossy sheen and a light golden color as cues.
Why Your Nose Knows Best
The aroma of the mixture is a reliable indicator of progress. When the oats are toasted and the honey has caramelized, you’ll notice a warm, nutty scent that signals the mixture is ready for the next step. A faint, sweet smell means you’re still early; a strong, burnt scent means you’re overcooking.
The 5‑Minute Rest That Changes Everything
After removing the pan from heat, let the mixture sit for exactly 5 minutes before adding the chocolate chips. This pause allows the oats to fully absorb the liquid and the mixture to thicken, preventing the chocolate from sinking to the bottom. I’ve tried skipping this step, and the bars ended up uneven and soggy.
Keep It Cool with a Cold Pan
If you’re in a hot kitchen, pre‑cool the baking dish in the fridge before pressing the mixture. A cold pan helps the bars set faster and reduces the chance of the mixture sliding off. It also gives the bars a slight snap when you break them, adding to the sensory experience.
Add a Splash of Water for Reheating
If you need to reheat a bar, add a tiny splash of water to the pan, cover, and microwave for 10–15 seconds. The steam will bring the bar back to its original chewy texture without drying it out. I’ve found this trick works better than just microwaving a dry bar, which often becomes rubbery.
Creative Twists and Variations
This recipe is a playground. Here are some of my favorite ways to switch things up:
Nutty Crunch Explosion
Swap the chia seeds for chopped almonds or walnuts. The added crunch complements the chocolate chips and gives the bars a more complex texture. The nuts also provide a richer flavor profile.
Maple‑Infused Delight
Replace the honey with pure maple syrup and add a pinch of ground cinnamon. The maple’s earthiness pairs beautifully with the chocolate, while the cinnamon adds a subtle warmth that makes the bars feel like a fall treat.
Cocoa‑Powdered Swirl
Stir in 2 tablespoons of unsweetened cocoa powder after the oats have cooled. The cocoa adds a deep chocolate flavor without extra chips, and the bars become a darker, more indulgent version.
Fruit‑Forward Bars
Add dried cranberries or chopped dried apricots to the mixture. The fruit provides a sweet, chewy bite that contrasts nicely with the nutty base. Make sure the fruit is chopped finely so it distributes evenly.
Spiced Sensation
Incorporate a teaspoon of ground ginger or a pinch of cayenne pepper for a subtle kick. The spice adds depth and keeps the bars from feeling too sweet. This variation is especially good for a winter snack.
Chewy Caramel Bars
Add a tablespoon of caramel sauce to the mixture before adding the chocolate chips. The caramel melts into the bars, giving them a gooey center that feels like a dessert treat. The combination of caramel, peanut butter, and chocolate is irresistible.
Storing and Bringing It Back to Life
Fridge Storage
Store the bars in an airtight container in the refrigerator for up to a week. The cold environment keeps the peanut butter solid, ensuring the bars remain firm and sliceable. If the bars become slightly soft, give them a quick chill before serving.
Freezer Friendly
Wrap each bar individually in plastic wrap or parchment paper before placing them in a freezer bag. They can be frozen for up to 3 months without losing flavor or texture. When ready to eat, let them thaw at room temperature for 10–15 minutes.
Best Reheating Method
To reheat a frozen or chilled bar, add a splash of water to the pan, cover, and microwave on medium for 10–15 seconds. The steam restores moisture, making the bars chewy again. Avoid microwaving without water, as this can dry out the bars.