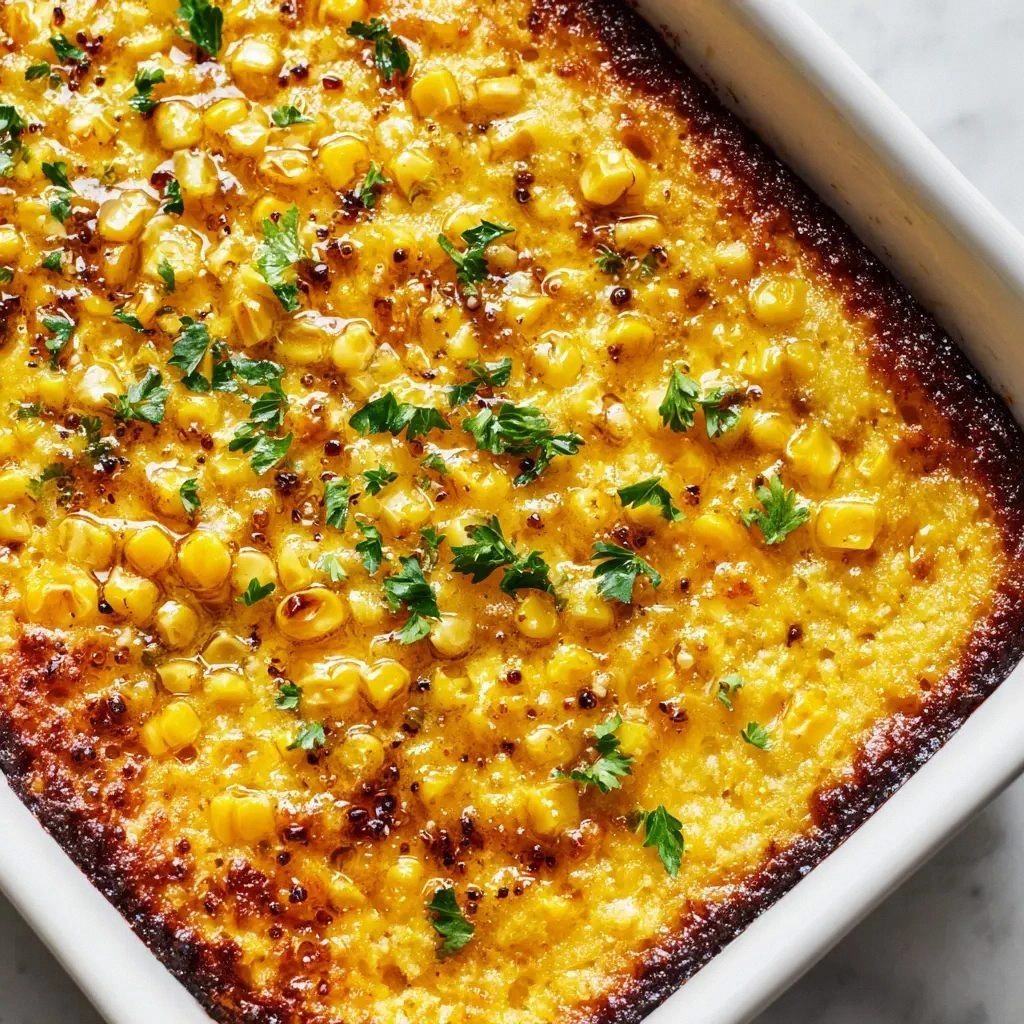
Picture this: I’m standing in my kitchen, a pot of boiling water on the stove, a handful of corn kernels in hand, and a friend daring me to turn a humble side dish into something that will make everyone at the table swoon. I’ve been chasing that perfect honey‑glazed corn for months, and yesterday I finally cracked the code. The moment the sweet syrup kissed the corn, the whole room filled with a caramelized aroma that made my mouth water before I even tasted it.
I’m not just talking about a simple glaze; this is a symphony of textures and flavors. The kernels burst with a gentle crunch, the honey gives a glossy sheen, and the buttery base creates a velvety coating that feels like a warm blanket on your taste buds. I could not stop myself from sampling the first bite—half the batch vanished before anyone else even had a chance to try it. That’s the kind of confidence I want to share with you.
What sets this recipe apart is that it turns an ordinary corn dish into a show‑stopper with minimal fuss. Think of it as a culinary “cheat code”: a single glaze that elevates the sweetness of the corn, a buttery crust that locks in moisture, and a sprinkle of parsley that adds a fresh finish. I dare you to taste this and not go back for seconds. Trust me, this is hands down the best version you’ll ever make at home.
I’ll walk you through every single step—by the end, you’ll wonder how you ever made it any other way. The trick lies in the balance: the right amount of honey, just enough butter to create that golden crust, and a dash of fresh parsley to cut through the richness. And, spoiler alert, there’s a little secret ingredient that most people overlook—cream‑style corn, which adds a silky texture that’s absolutely essential.
What Makes This Version Stand Out
- Flavor: The honey glaze is a caramelized sweetness that pairs perfectly with the natural corn flavor, creating a depth that’s both comforting and indulgent.
- Texture: A buttery, slightly crisp top contrasts with the tender corn kernels inside, giving you that satisfying bite every time.
- Ease: The recipe requires just a handful of ingredients and a single baking dish, making it a breeze to prepare even on busy weeknights.
- Versatility: It works as a side dish, a main course for vegetarians, or a crowd‑pleaser at potlucks.
- Make‑Ahead: You can assemble the casserole, refrigerate it, and bake it later—perfect for meal prep.
- Ingredient Quality: Using fresh, high‑quality corn and real honey elevates the dish beyond store‑bought alternatives.
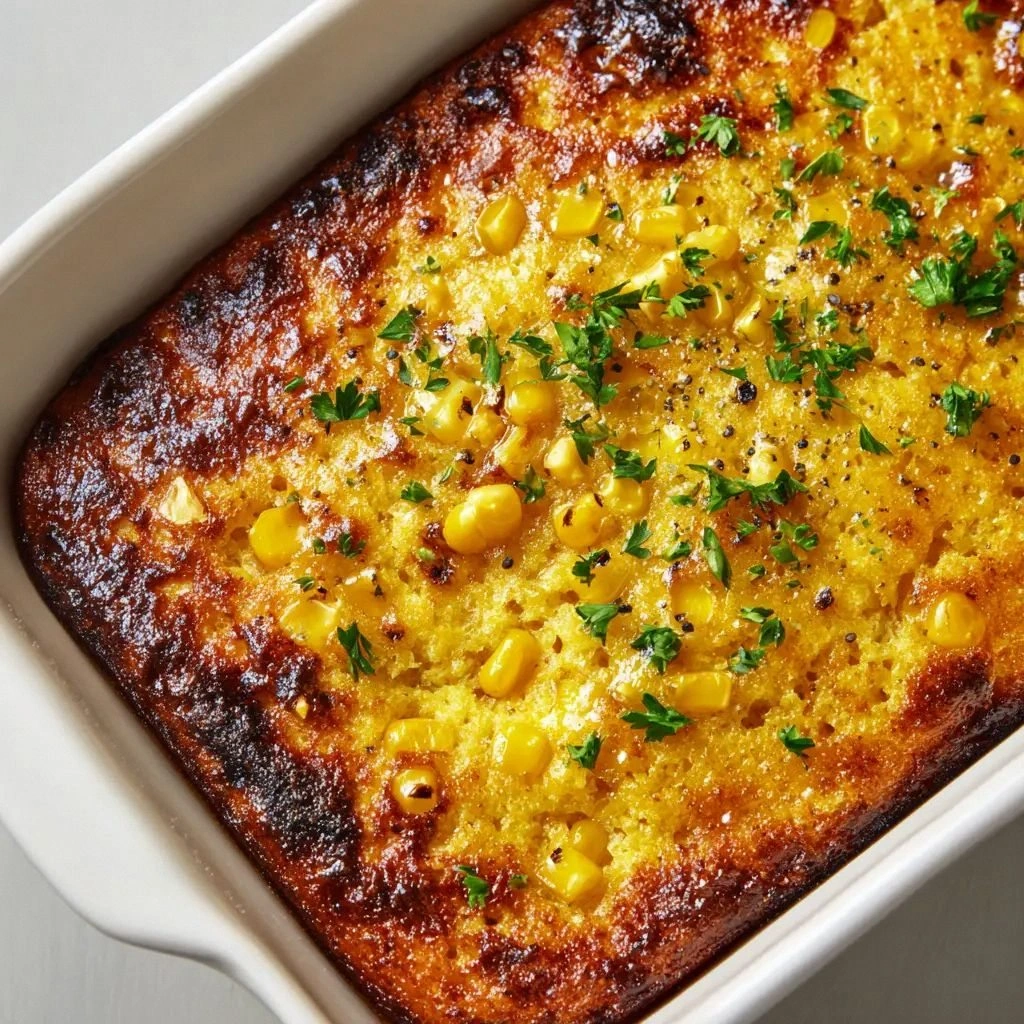
- Visual Appeal: The golden glaze and fresh parsley garnish make it Instagram‑ready.
- Health‑Friendly: While indulgent, it still offers protein from eggs and cream, and the honey provides natural sweetness.
Alright, let’s break down exactly what goes into this masterpiece…
Inside the Ingredient List
The Flavor Base
The honey is the star that gives this dish its sweet, caramelized character. A tablespoon of pure, unfiltered honey brings a subtle depth that canned corn can’t match. If you’re looking for a less sweet version, try using maple syrup instead; it adds a different nuance but still creates that glossy finish. The baking powder ensures the casserole rises slightly, giving it a light, airy quality that contrasts the dense corn.
The Texture Crew
Cornmeal and all‑purpose flour form the backbone of the casserole’s structure. The cornmeal adds a rustic crunch while the flour creates a smooth batter that binds everything together. Skipping either would result in a mushy dish that loses the signature bite. If you’re gluten‑free, swap the all‑purpose flour for a 1:1 gluten‑free blend; the texture will remain similar.
The Unexpected Star
Cream‑style corn isn’t just a filler—it’s a silky, almost custard‑like component that adds richness and keeps the casserole moist. Think of it as the secret sauce that prevents the dish from drying out. If you can’t find canned cream corn, you can blend fresh corn kernels with a splash of milk and a pinch of salt to mimic the texture.
The Final Flourish
Unsalted butter in two forms—half a cup for the batter and a tablespoon for the glaze—creates a decadent, golden crust. The butter’s fat content melts into the corn, giving a luscious mouthfeel. Fresh parsley flakes finish the dish with a bright, herbal note that cuts through the richness. A half teaspoon of coarse ground black pepper adds a subtle heat that balances the sweetness.
Everything’s prepped? Good. Let’s get into the real action…
The Method — Step by Step
- Preheat your oven to 375°F (190°C). Grease a 9x13‑inch baking dish with a tablespoon of butter, then set it aside. This pre‑greasing step ensures the casserole doesn’t stick and gives a buttery base that the glaze will cling to.
- In a large mixing bowl, whisk together the yellow cornmeal and all‑purpose flour. Add the baking powder, salt, and black pepper. Stir until the dry ingredients are evenly distributed; this prevents clumps and ensures a uniform batter.
- In a separate bowl, beat the eggs with the sour cream until smooth. Then stir in the honey, the remaining butter, and the parsley flakes. The mixture should be glossy and thick enough to coat the back of a spoon.
- Pour the wet mixture into the dry ingredients and stir until just combined. The batter will be slightly lumpy—don’t overmix, or the casserole will become tough.
- Fold in the canned sweet corn kernels, the cream‑style corn, and the second tablespoon of butter. The butter will melt into the mixture, creating pockets of rich flavor.
- Transfer the batter into the prepared baking dish, spreading it evenly with a spatula. The batter should sit at least an inch deep to allow for a golden crust.
- Place the dish in the oven and bake for 30 minutes, or until the top is golden brown and a toothpick inserted into the center comes out clean. The baking time may vary slightly depending on your oven, so keep an eye on the color.
- Remove from the oven and let it cool for 10 minutes. The glaze will set, creating a slightly crisp, caramelized edge that’s pure magic.
- Serve warm, garnished with extra parsley if desired. The dish is best enjoyed fresh but can be reheated with a splash of water to restore moisture.
That’s it—you did it. But hold on, I’ve got a few more tricks that will take this to another level…
Insider Tricks for Flawless Results
The Temperature Rule Nobody Follows
Many people bake at 400°F, which can cause the top to burn while the inside remains undercooked. Stick to 375°F for even heat distribution. If you’re using a convection oven, lower the temperature by 25°F to avoid over‑browning.
Why Your Nose Knows Best
Before you pull the casserole out of the oven, inhale the aroma. A sweet, buttery scent means it’s ready. If you smell a sharp, metallic tang, it’s a sign the honey is burning—lower the heat or remove the dish.
The 5‑Minute Rest That Changes Everything
Let the casserole sit for exactly five minutes after baking. This rest period allows the glaze to set, giving that perfect snap when you cut into it. A rushed cut will produce a sticky mess.
Add a Touch of Citrus
A squeeze of fresh lemon juice right before serving brightens the dish, cutting through the richness and adding a subtle zing. It’s a simple tweak that elevates the flavor profile.
Use a Silicone Baking Mat
If you’re concerned about sticking, line the dish with a silicone mat. It ensures a clean release and gives a slightly crisp edge to the casserole.
Creative Twists and Variations
This recipe is a playground. Here are some of my favorite ways to switch things up:
Spicy Sriracha Kick
Stir in a tablespoon of sriracha into the batter for a spicy, smoky undertone that pairs beautifully with the honey’s sweetness. Great for those who like a little heat.
Cheesy Corn Casserole
Add a cup of shredded cheddar cheese to the top before baking. The cheese will melt into a gooey, golden layer that complements the buttery crust.
Smoked Paprika Twist
Replace the black pepper with smoked paprika for a deep, earthy flavor that adds depth and a hint of smokiness.
Herb‑Infused Variation
Swap the parsley for a mix of thyme, oregano, and basil. The aromatic herbs give the dish a Mediterranean flair.
Gluten‑Free Version
Use a gluten‑free flour blend and cornmeal to keep the dish safe for those with celiac disease or gluten intolerance. The texture remains similar, and the flavor profile stays intact.
Vegan Adaptation
Replace the eggs with a flaxseed “egg” (1 tablespoon ground flaxseed + 3 tablespoons water). Use plant‑based milk in place of sour cream and a vegan butter alternative. The result is a creamy, indulgent casserole that’s entirely plant‑based.
Storing and Bringing It Back to Life
Fridge Storage
Cool the casserole completely, then cover tightly with plastic wrap or foil. Store in the refrigerator for up to 3 days. When reheating, cover with foil to keep the top from drying out.
Freezer Friendly
Place the cooled casserole in a freezer‑safe container, seal, and freeze for up to 2 months. Thaw overnight in the fridge before reheating. A splash of milk or water can help restore moisture.
Best Reheating Method
Reheat in a preheated oven at 350°F (175°C) for 15–20 minutes, or until warmed through. Add a tiny splash of water before reheating to create steam that brings the casserole back to its original moistness.