I was standing in my kitchen, mid‑panic, after a friend dared me to reinvent the classic grilled cheese using only the veggies I had left from a summer garden. The zucchini were staring at me from the counter, glossy and green, begging for a purpose beyond a wilted salad. I imagined a sandwich that would crunch like a fresh‑cut potato chip, melt like a buttery dream, and still deliver that comforting, gooey cheese pull we all worship. The first attempt was a soggy mess—zucchini water turned my pan into a swamp, and the cheese clung to the pan like a stubborn ex‑partner. That disaster sparked a fire under me: I would create a version that respects the zucchini’s moisture while harnessing its sweet, earthy notes, and I’d lock in the cheese with a crispy, buttery crust that sings.
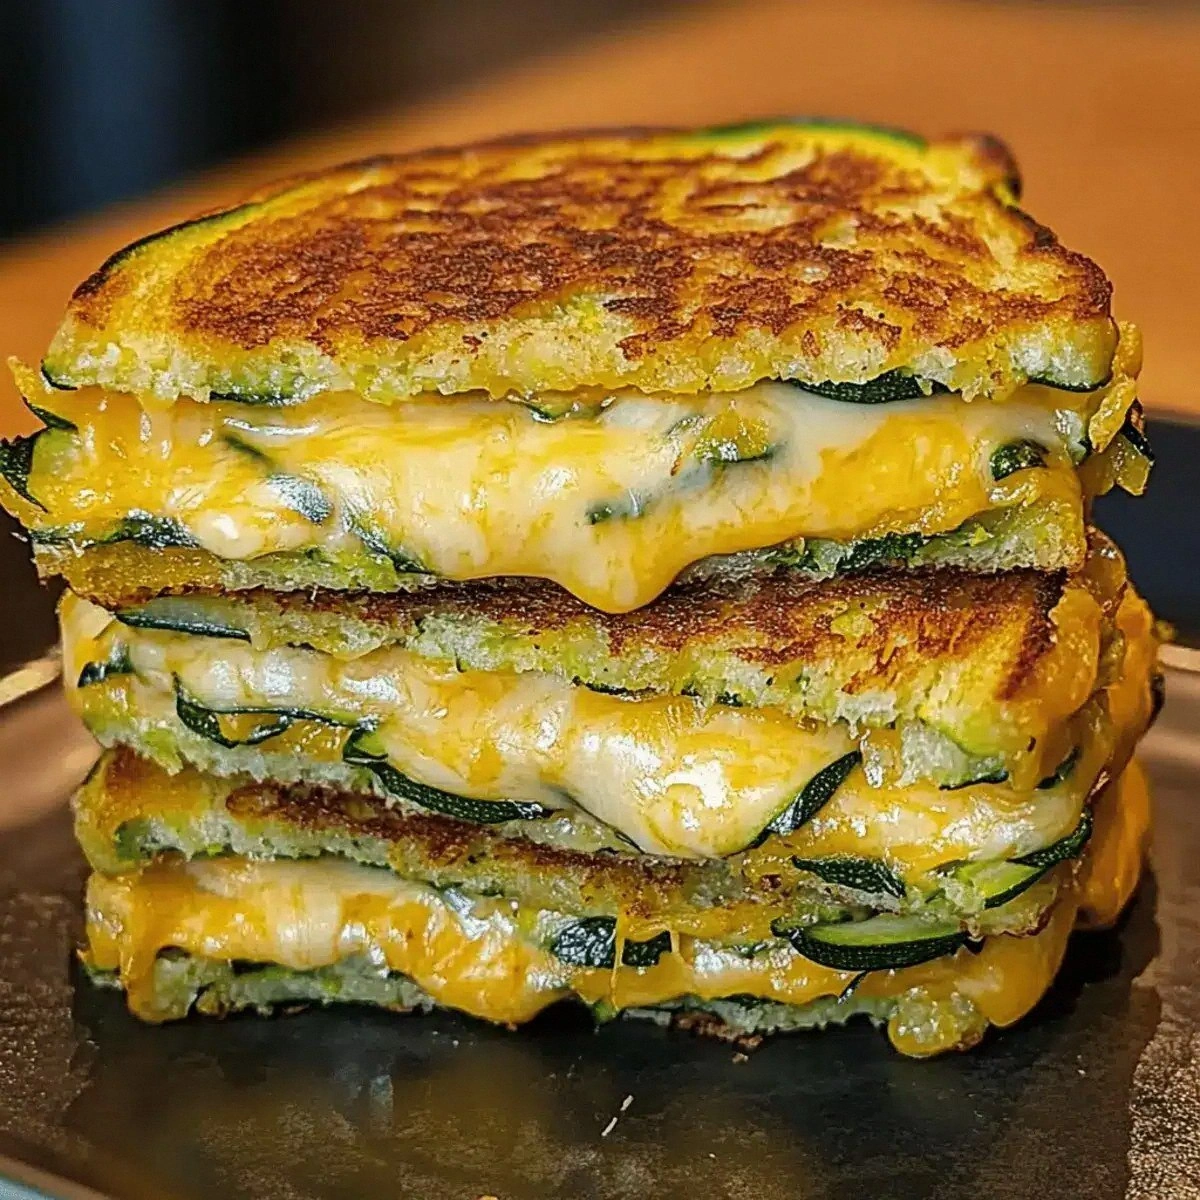
Picture this: the moment the first slice hits the hot skillet, a sizzle erupts, sharp and confident, like a drumroll announcing the main act. The aroma of garlic butter swirls with the faint perfume of fresh zucchini, and the kitchen fills with a buttery, slightly nutty scent that makes your stomach growl in anticipation. As the cheese melts, it becomes a golden river that pools between the layers, while the outer crust turns a deep amber, crunchy enough to crack under your bite but tender enough to give way to the melt inside. The texture is a symphony—crisp edges that shatter like thin ice, a tender, slightly caramelized zucchini interior, and a creamy, cheesy core that stretches like a lazy cat waking from a nap.
Most grilled cheese recipes either drown the zucchini in a soggy mess or completely ignore its potential, treating it as an afterthought. This version, however, embraces the vegetable as the star, using a light coating of egg and cornstarch to create a protective shield that locks in moisture while allowing the outside to crisp to perfection. I’m not just adding zucchini for health points; I’m turning it into a textural powerhouse that elevates the entire sandwich experience. The secret weapon? A dash of Parmesan that adds a subtle umami kick, and a generous slather of garlic butter that gives each bite a rich, aromatic finish.
I dare you to taste this and not go back for seconds. I’ll be honest — I ate half the batch before anyone else got a chance to try it, and that’s a confession I’m willing to make because the flavor is that good. This is hands down the best version you’ll ever make at home, and I’m about to spill every detail, from the precise temperature that makes the crust sing to the tiny tricks that keep the zucchini from turning into a watery disaster. Okay, ready for the game‑changer? Let me walk you through every single step — by the end, you’ll wonder how you ever made it any other way.
What Makes This Version Stand Out
- Flavor Explosion: The blend of garlic butter, Parmesan, and sharp cheddar creates a layered taste that evolves with each bite, delivering a buttery, salty, and slightly nutty profile.
- Texture Triumph: A crisp, golden crust encases tender, lightly caramelized zucchini, producing a contrast that’s both satisfying and surprising.
- Simplicity: Only eight core ingredients, most of which you probably already have, make this a quick weeknight hero without compromising on wow factor.
- Unique Coating: The egg‑cornstarch shield is the secret that prevents sogginess, turning zucchini into a crunchy canvas for cheese.
- Crowd Reaction: Even the pickiest eaters, including kids who claim they “don’t like veggies,” rave about the crispy exterior and melty interior.
- Ingredient Quality: Fresh, firm zucchini and high‑quality cheddar make a world of difference; the cheese should melt smoothly, not clump.
- Cooking Method: Using a skillet rather than a grill lets you control heat precisely, ensuring an even golden crust.
- Make‑Ahead Potential: Prep the coated zucchini slices ahead of time and store them in the fridge; they’ll stay crisp for up to a day, ready for a fast assembly.
Inside the Ingredient List
The Flavor Base
The garlic butter is the aromatic backbone of this sandwich. By melting butter with minced garlic before spreading it on the bread, you infuse each bite with a fragrant, savory depth that pairs perfectly with the mild sweetness of zucchini. If you’re out of garlic butter, a quick mix of softened butter and a pinch of garlic powder will do, but fresh garlic gives that punchy, aromatic snap you crave. Skipping this step would leave the sandwich tasting flat, as the butter is what carries the flavor into the crust.
The Texture Crew
Egg and cornstarch form a protective veil around each zucchini slice. The egg acts as a binder, while the cornstarch creates a light, crispy coating once it hits the hot pan. This duo is the reason the zucchini stays crisp rather than turning soggy. If you’re avoiding eggs, a flax‑egg (1 tbsp ground flaxseed + 3 tbsp water) can substitute, though the texture will be slightly less airy.
The Unexpected Star
Parmesan cheese, though used in a modest ¼ cup, adds a salty, nutty umami note that elevates the whole sandwich. It’s sprinkled into the coating mixture, ensuring every bite has a subtle cheese crunch before the cheddar melts. If you’re allergic to dairy, nutritional yeast can mimic the cheesy, nutty flavor, but you’ll lose the melt‑in‑your‑mouth texture that Parmesan provides.
The Final Flourish
Shredded cheddar cheese is the melting hero that pulls everything together. Its sharpness cuts through the buttery richness, while its meltability ensures those glorious, stretchy cheese strings. For a twist, try a blend of cheddar and mozzarella for extra stretch, but pure sharp cheddar gives the most flavor punch. Skipping the cheddar would turn this into a bland veggie toast, missing the gooey heart that makes grilled cheese iconic.
Everything's prepped? Good. Let's get into the real action...
The Method — Step by Step
Start by washing the zucchini and slicing them lengthwise into thin, uniform strips about ¼ inch thick. Uniformity ensures even cooking; thicker pieces stay soggy while thinner ones burn. Pat the slices dry with a clean kitchen towel, then sprinkle lightly with salt and let them rest for five minutes. This draws out excess water, which we’ll discard later—trust me, this step is the difference between soggy and crisp.
Kitchen Hack: After the five‑minute rest, gently squeeze each slice with a paper towel to remove any lingering moisture before coating.In a shallow bowl, whisk the egg until it’s a uniform golden liquid. In a separate bowl, combine the cornstarch, grated Parmesan, a pinch of pepper, and a dash of salt. This dry mixture will cling to the egg‑wet zucchini, creating that coveted crust. Dip each zucchini slice first into the egg, letting any excess drip off, then roll it in the cornstarch mixture, pressing lightly to ensure an even coat.
Heat a large skillet over medium‑high heat and add the garlic butter. As soon as the butter foams and the garlic releases its perfume, you’ll hear that sizzle we all love. The butter should be shimmering but not browned; if it starts to turn amber, lower the heat a notch. This is the moment of truth—if the butter is too hot, the coating will burn before the zucchini cooks through.
Lay the coated zucchini slices in a single layer, making sure they don’t overlap. Overcrowding traps steam and defeats the whole crisping purpose. Cook for 2‑3 minutes on the first side, watching the edges turn a deep golden brown. Flip carefully with a spatula; the coating should release easily, indicating a perfect crust.
Watch Out: If the coating starts to stick, the pan is too hot—remove the slices briefly, lower the heat, and continue.While the zucchini cooks, toast the bread slices lightly on the same skillet (or a separate pan) until they’re just golden. This pre‑toasting prevents the bread from becoming soggy once the cheese melts. Spread a thin layer of the remaining garlic butter on each slice of bread for extra flavor and a glossy finish.
Now comes the cheesy crescendo: layer the cooked zucchini on one slice of toast, then sprinkle a generous handful of shredded cheddar over the top. The heat from the zucchini will begin to melt the cheese, but we’ll finish the melt in the pan. Top with the second slice of toast, buttered side up.
Return the assembled sandwich to the skillet, pressing gently with a spatula. Cook on medium heat for about 2‑3 minutes per side, or until the cheddar is fully melted and the bread is a deep, buttery gold. You’ll notice the cheese bubbling and the edges of the bread pulling away—those are the visual cues that the sandwich is ready.
Remove the sandwich from the pan and let it rest for a minute. This short rest allows the cheese to set just enough to avoid a runaway ooze when you cut it. Slice diagonally, watch the cheese stretch, and admire the crispy, golden crust. That sizzle when it hits the pan? Absolute perfection.
Kitchen Hack: Use a kitchen ruler to cut the sandwich into equal halves; this ensures each serving gets an even share of cheese and zucchini.
That's it — you did it. But hold on, I've got a few more tricks that'll take this to another level. These insider tips will make sure every bite is as perfect as the first, whether you're cooking for one or feeding a crowd.
Insider Tricks for Flawless Results
The Temperature Rule Nobody Follows
Most home cooks crank the heat up, assuming a hotter pan equals a crispier crust, but that’s a myth. The sweet spot sits at medium‑high (around 350°F/175°C on an infrared thermometer). At this temperature, the cornstarch coating browns evenly without scorching, and the zucchini cooks through without releasing too much water. If you’ve ever burned the outside while the inside stayed limp, this is why. Keep a close eye; a quick flick of the wrist to adjust the flame can make the difference between a golden masterpiece and a bitter char.
Why Your Nose Knows Best
Your sense of smell is a secret weapon in the kitchen. When the garlic butter starts to turn a light amber and releases a nutty aroma, you know the pan is ready for the zucchini. If the scent is still raw or overly buttery, the pan is too cool and the coating will absorb excess fat, becoming soggy. Trust that nose—if you can smell the toasted garlic, you’re in the sweet spot.
The 5‑Minute Rest That Changes Everything
After you assemble the sandwich, give it a brief five‑minute rest before the final sear. This allows the cheese to firm up just enough to hold its shape while still being melt‑ready. Skipping this rest often results in a cheese flood that drips onto the pan, making a mess and diluting the buttery crust. I once rushed this step and ended up with a soggy mess—lesson learned.
Seasoning the Zucchini Early
A pinch of pepper and a dash of salt added to the cornstarch mixture does more than just flavor; it enhances the Maillard reaction, giving the crust a deeper color and richer taste. If you’re a fan of spice, a pinch of smoked paprika or a sprinkle of dried oregano can add an extra layer of complexity without overwhelming the delicate zucchini flavor.
The Butter‑Brush Technique
Instead of slathering the bread with butter, use a silicone brush to apply a thin, even coat. This ensures every corner of the bread gets that buttery sheen without excess pooling, which can make the sandwich greasy. A thin layer also lets the cheese melt uniformly, creating those perfect stretch strings we all love.
Double‑Check the Cheese Ratio
Too little cheddar and you’ll miss the gooey pull; too much and the sandwich becomes a cheese‑only affair, drowning out the zucchini. Aim for a 1:1 ratio of shredded cheddar to zucchini volume. If you love extra cheese, add a final sprinkle of Parmesan just before the final sear for an extra crusty, cheesy edge.
Creative Twists and Variations
This recipe is a playground. Here are some of my favorite ways to switch things up:
Spicy Jalapeño Kick
Finely dice a jalapeño and toss it into the cornstarch coating for a subtle heat that builds as you chew. The heat pairs beautifully with the cool melt of cheddar, creating a balanced bite that will please spice lovers.
Mediterranean Medley
Swap cheddar for feta and add a handful of sun‑dried tomatoes to the zucchini before coating. The salty feta and sweet tomato notes give the sandwich a sun‑kissed, Mediterranean vibe that’s perfect for a summer lunch.
Breakfast Boost
Add a thin slice of cooked bacon or a sprinkle of crumbled breakfast sausage inside the sandwich. The smoky meat adds protein and a savory depth that turns this into a hearty breakfast or brunch option.
Vegan Victory
Replace the egg with a chickpea flour “egg” (1 tbsp chickpea flour + 2 tbsp water) and use vegan butter and plant‑based cheddar. The texture remains crisp, and the cheese melt can be achieved with a high‑quality vegan cheddar slice.
Herb‑Infused Delight
Mix fresh chopped basil or thyme into the garlic butter before spreading it on the bread. The herbaceous aroma lifts the entire sandwich, making it feel fresh and garden‑like.
Storing and Bringing It Back to Life
Fridge Storage
Place the cooked zucchini slices in an airtight container lined with paper towels to absorb any residual moisture. They’ll stay crisp for up to 48 hours. Keep the bread separate, wrapped in a clean kitchen towel, to prevent sogginess.
Freezer Friendly
Layer the coated, uncooked zucchini slices on a parchment sheet and flash‑freeze for 1‑2 hours. Transfer them to a zip‑top bag; they’ll keep for up to 2 months. When ready to use, bake directly from frozen at 375°F for 8‑10 minutes, then proceed with the recipe.
Best Reheating Method
Reheat assembled sandwiches in a preheated skillet over medium heat, adding a tiny splash of water (about a teaspoon) to the pan and covering with a lid for 30 seconds. The steam revives the crust’s crunch while ensuring the cheese melts uniformly without drying out.