The first time I made baked pears with berries, it was a complete accident born from desperation and an almost empty fruit bowl. My dinner guests were arriving in an hour, I'd burned the chocolate lava cakes I was testing, and I needed something that looked intentional and tasted like I'd planned it all along. What started as panic ended with four people literally licking their plates and asking if I could make it again next week. That sizzle when the honey hits the warm pears? Absolute perfection.
Picture this: it's 8 PM on a Tuesday, you're still wearing your work-from-home sweatpants, and suddenly you want something sweet but sophisticated enough to feel like you're treating yourself. Not another bowl of ice cream or a sad cookie. You want something that makes your kitchen smell like a French bakery and tastes like you spent hours crafting it. This is that recipe, and I dare you to taste it and not go back for seconds.
What makes this version different from every other baked fruit recipe out there? We're not just throwing some pears in the oven and calling it a day. We're creating layers of flavor that build on each other like a symphony — the caramelized edges of the pears, the burst of tangy berries, the crunch of toasted walnuts, and that surprising kick from blue cheese that makes everyone ask "what's that amazing flavor?" Trust me, this is hands down the best version you'll ever make at home.
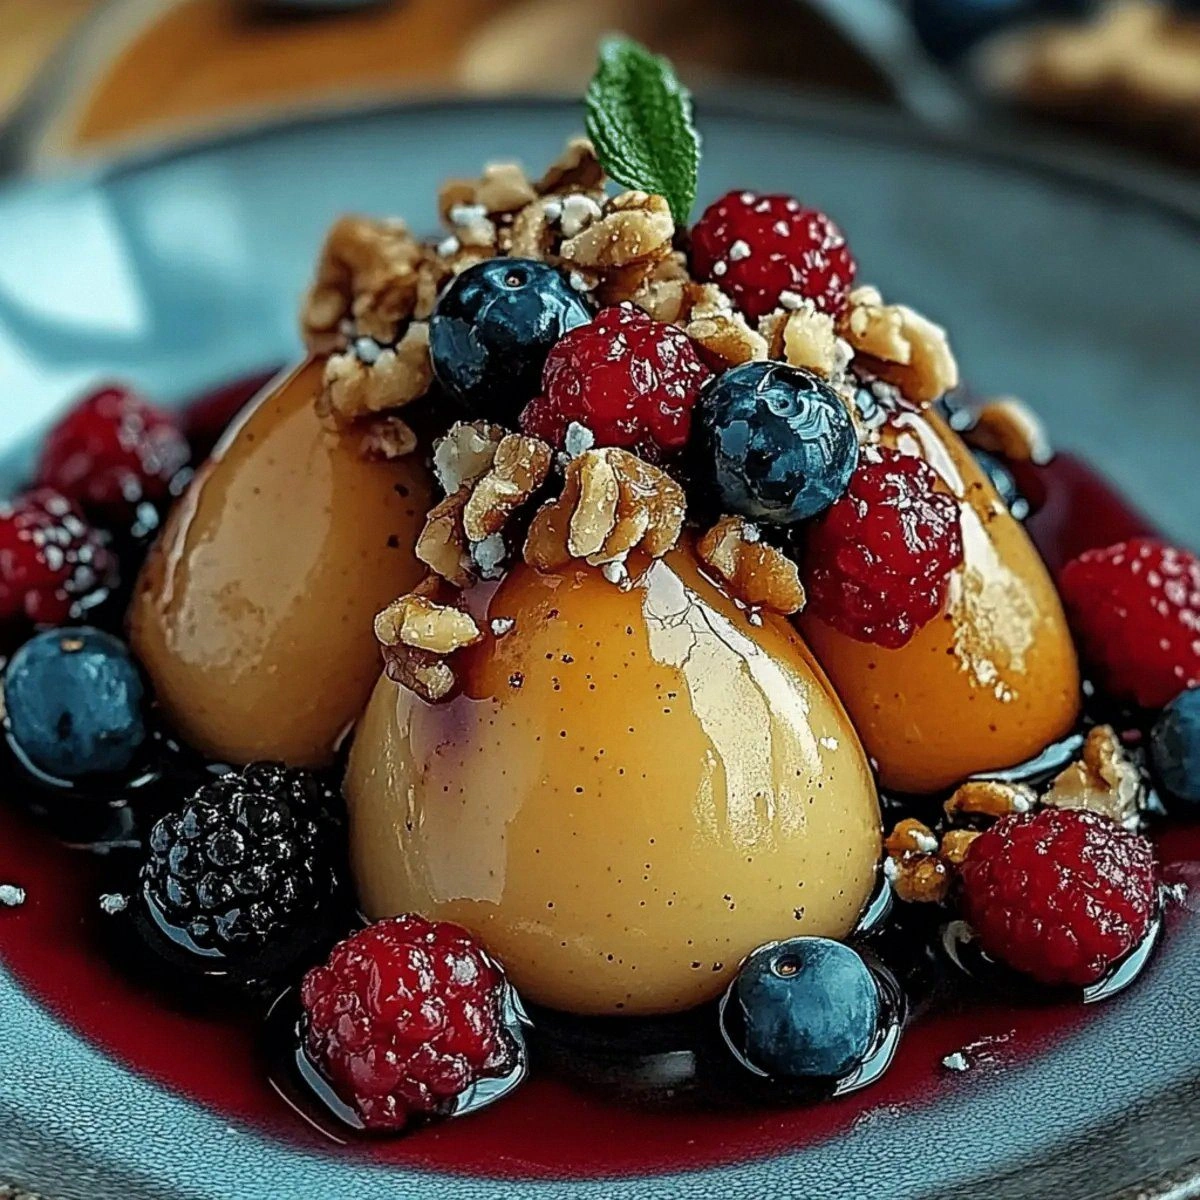
I'll be honest — I ate half the batch before anyone else got to try it. The combination of warm, tender pears with their edges caramelized to deep amber, mixed berries that burst into jammy pockets of flavor, and those crunchy walnuts all brought together with a drizzle of honey and a whisper of thyme? It's the kind of dessert that makes you close your eyes involuntarily when you take the first bite. Let me walk you through every single step — by the end, you'll wonder how you ever made it any other way.
What Makes This Version Stand Out
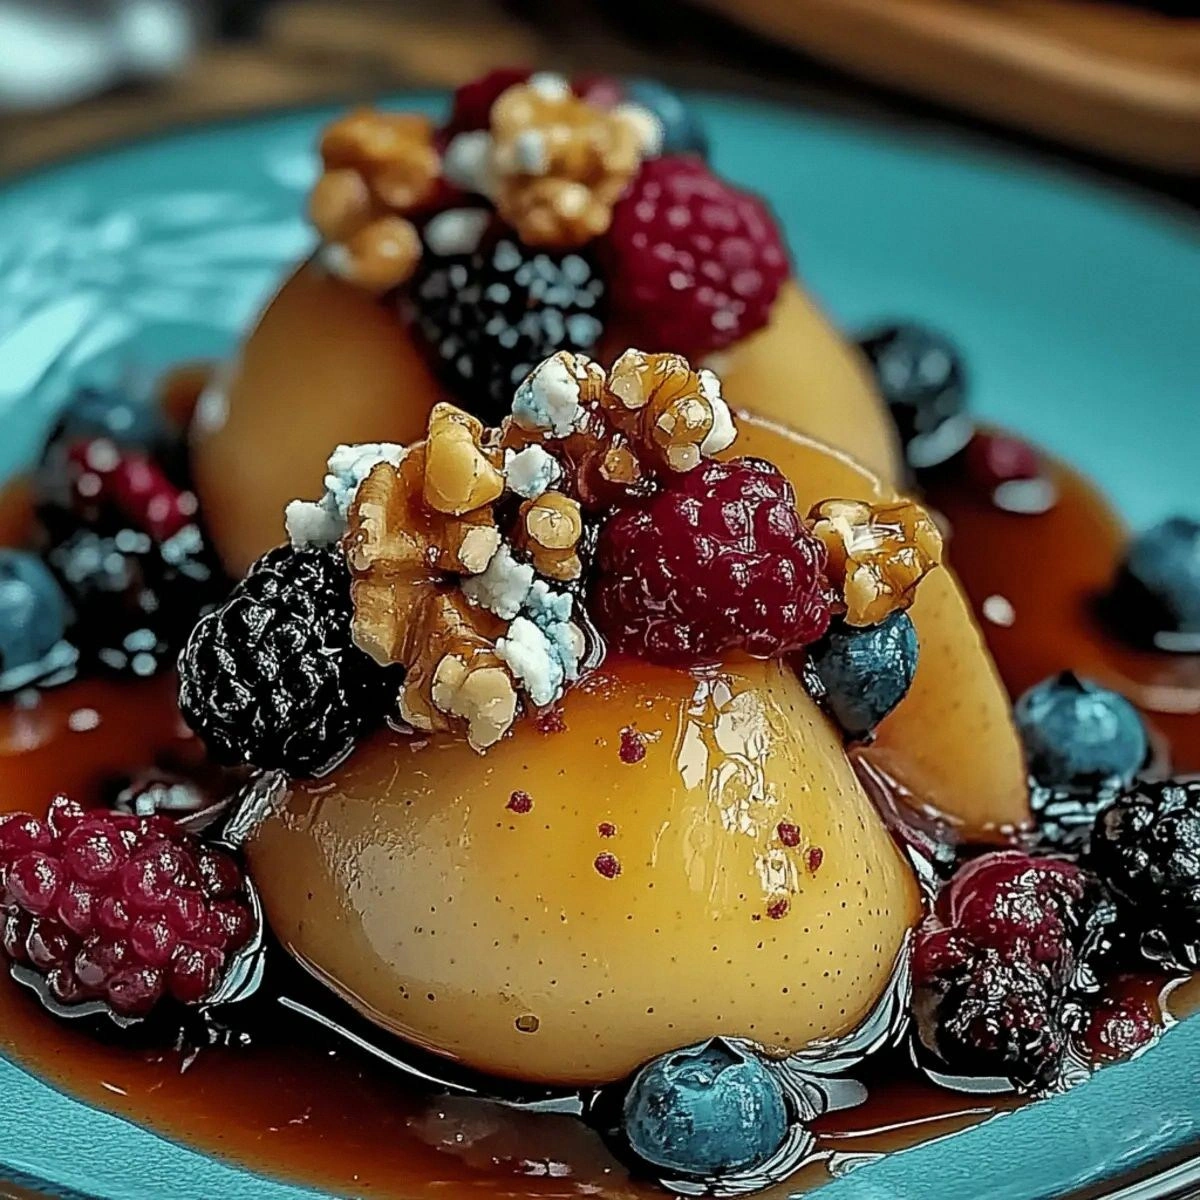
Flavor Bomb: Most recipes get this completely wrong by just baking fruit with sugar. We're layering sweet, tart, creamy, and herbal notes that hit every part of your palate. The blue cheese melts into the warm pears creating this luxurious sauce that coats everything like velvet, while the berries provide bright pops of acidity.
Texture Paradise: Every bite delivers a perfect contrast — soft yielding pears, plump berries that burst between your teeth, crispy edges that shatter like thin ice, and walnuts that add a satisfying crunch. It's not just soft fruit in a bowl; it's a textural adventure that keeps you coming back for more.
Weeknight Simple: Okay, ready for the game-changer? This takes fifteen minutes of actual work time. Fifteen! While your oven preheats, you're already halfway done. Most recipes want you to poach, peel, or perform some other culinary gymnastics. Not here. We're keeping it real and keeping it simple.
Unexpected Elegance: Future pacing moment: picture yourself pulling this out of the oven, the whole kitchen smelling like you've been slaving away for hours. The pears glisten like jewels, the berries have burst into ruby pools, and it looks like something from a Michelin-starred restaurant. Your guests will think you're a culinary genius.
Ingredient Quality Matters: Here's where we separate the amateurs from the pros. We're using ripe but firm pears (not mushy ones), real butter (not margarine), and good honey (not the bear-shaped bottle that's been in your pantry since 2019). The difference is night and day, and your taste buds will thank you.
Crowd-Pleasing Magic: I've served this to picky kids who claim they hate fruit, health-conscious friends who "don't eat dessert," and my Italian grandmother who thinks everything should be tiramisu. They all ask for the recipe. It's that perfect middle ground between virtuous and indulgent.
Make-Ahead Winner: And now the fun part — you can prep everything in the morning, keep it in the fridge, and just pop it in the oven when you need it. The flavors actually get better as they mingle. Most recipes want you to serve immediately or risk soggy disaster. Not this one.
Alright, let's break down exactly what goes into this masterpiece...
Inside the Ingredient List
The Foundation Stars
The pears are obviously the headliners here, but not all pears are created equal. You want ones that can stand up to heat without collapsing into baby food. Bosc pears are my go-to because their dense flesh stays intact while turning honey-sweet in the oven. Anjou works beautifully too, with their smooth texture and subtle citrus notes. Avoid Bartletts for this recipe — they turn to mush faster than ice cream on hot pavement, and you'll end up with pear soup instead of elegant baked fruit.
What happens if you skip the quality pear hunt and just grab whatever's on sale? You'll get decent flavor but zero presentation points, and the texture will be more like chunky applesauce than sophisticated dessert. Trust me, I've been there during my broke college days, and while it tastes fine, it's not the showstopper we're aiming for here.
The Flavor Enhancers
Butter is not optional, and margarine is a crime against dessert. Real butter browns and develops those nutty, toasty flavors that make French pastry chefs weep with joy. As it melts and mingles with the pear juices, it creates this incredible sauce that you'll want to drink straight from the pan. If you're dairy-free, coconut oil works but you'll lose that rich, complex flavor that makes this special.
The honey is your secret weapon for caramelization. Don't use that clover honey that's been sitting in your pantry since the Obama administration. Spring for a good wildflower or orange blossom honey — something with character that will complement the fruit instead of just making everything sticky-sweet. The way it bubbles and thickens in the oven creates these gorgeous lacquered edges on the pears that look like they belong in a food magazine.
The Texture Crew
Walnuts bring the crunch party, but here's where most recipes get lazy — they just throw them in raw. We're going to toast them first, which releases their oils and intensifies their flavor tenfold. The difference between raw and toasted walnuts is like the difference between a flashlight and a lighthouse. If you've ever struggled with bitter, astringent walnuts, toasting is your salvation.
The mixed berries are your little bursts of excitement. Fresh raspberries get jammy and intense, blueberries burst into sweet-tart pockets, and blackberries add that wine-like depth. Frozen works in a pinch, but fresh berries hold their shape better and don't release as much water. If you've ever wondered why your baked fruit ends up swimming in pink juice, it's probably because you used frozen berries straight from the bag.
The Plot Twist
Blue cheese in dessert? Stay with me here — this is worth it. Just a whisper of good blue cheese melts into the warm pears and creates this incredible savory-sweet balance that makes people's eyes go wide with surprise. Don't go overboard or you'll feel like you're eating a cheese plate. We're talking a few crumbles that disappear into the sauce and leave everyone asking "what's that amazing flavor?" If blue cheese really isn't your thing, goat cheese works too, but you'll lose that funky complexity that makes this memorable.
Everything's prepped? Good. Let's get into the real action...
The Method — Step by Step
- Preheat your oven to 400°F and position the rack in the middle. I know, I know — everyone wants to rush this part, but proper temperature is crucial here. While it's heating, grab a baking dish that fits your pears snugly but isn't crowded. Too big and your honey will burn; too small and everything steams instead of roasts. This is the moment of truth where good desserts separate from great ones.
- Cut your pears in half lengthwise and scoop out the cores with a melon baller or teaspoon. Leave the stems on if you want to be fancy, but trim the bottom so they sit flat. Don't peel them — the skin helps them hold shape and adds beautiful color. If you've ever struggled with pears that look like they exploded in the oven, it's because you didn't give them a flat base to sit on. They need to be stable little boats ready to hold all our delicious toppings.
- Brush the cut surfaces with melted butter — this is where the magic begins. The butter will brown and create those gorgeous caramelized edges that make restaurant desserts look so perfect. Season with just a pinch of salt here — it sounds weird but trust me, it amplifies all the sweet flavors we're building. Don't walk away from the stove here because we're about to toast our walnuts while the oven finishes heating.
- Toast your walnuts in a dry pan over medium heat for about 4-5 minutes, shaking frequently. You're looking for them to smell nutty and turn a shade darker, but not burn. This step is non-negotiable — raw walnuts taste like bitter disappointment while toasted ones taste like they were kissed by angels. Chop them coarsely once they're cool enough to handle. If you skip this step, your final dish will taste flat and one-dimensional.
- Arrange your pear halves cut-side up in the baking dish like little canoes waiting for their cargo. Divide the berries among the pear cavities, letting them spill over naturally. Crumble the blue cheese over everything — remember, restraint is key here. Drizzle with honey and scatter fresh thyme leaves. The way the honey pools in the pear cavities? Pure magic.
- Slide the dish into the oven and bake for 25-30 minutes. The pears should be tender when pierced with a knife but not falling apart, and the berries should be burst and jammy. The honey will bubble and thicken, creating this incredible sauce that you'll want to spoon over everything. Your kitchen will start smelling like you've been transported to a French countryside kitchen.
- Remove from the oven and let rest for 5 minutes — this is crucial. The sauce will thicken slightly and the flavors will settle. Sprinkle with the toasted walnuts and drizzle with any remaining honey. Serve warm, perhaps with a dollop of creme fraiche if you're feeling extra fancy. The contrast between the warm fruit and cool cream is absolutely divine.
- Plate them up in shallow bowls or on small plates, making sure to spoon over all those gorgeous pan juices. Garnish with a few fresh thyme leaves for color and that herbal note that ties everything together. These look restaurant-quality but took less effort than ordering takeout. Your guests will think you're a culinary wizard, and honestly, they won't be entirely wrong.
That's it — you did it. But hold on, I've got a few more tricks that'll take this to another level...
Insider Tricks for Flawless Results
The Temperature Rule Nobody Follows
Here's where most home bakers go wrong — they think hotter is better and crank their oven to 450°F, ending up with burnt edges and raw centers. 400°F is the sweet spot where the pears cook through evenly and the honey caramelizes without burning. A friend tried skipping this step once — let's just say it didn't end well. She served up what looked like charcoal briquettes with raw pear centers, and her dinner party turned into a pizza delivery situation.
The other temperature trick? Room temperature fruit bakes more evenly. Pull your pears out of the fridge 30 minutes before cooking. Cold fruit shocks the pan and creates uneven cooking, while room temperature fruit relaxes into the heat and cooks perfectly throughout. It sounds fussy but it's the difference between amateur and professional results.
Why Your Nose Knows Best
Forget timers — your nose is the best kitchen tool you have. When the pears are perfectly done, your kitchen will smell like honey and butter had a beautiful baby with hints of thyme dancing around the edges. If it starts smelling sharp or acrid, you've gone too far and the honey is burning. This next part? Pure magic. The moment you smell that perfect aroma, check your pears — they'll be exactly right.
This sensory checkpoint has saved me more times than I can count. Ovens vary, pears vary, but your sense of smell is remarkably consistent once you know what to look for. That rich, caramel-sweet aroma with herbal undertones means you're in the sweet spot of perfectly cooked fruit and properly caramelized honey.
The 5-Minute Rest That Changes Everything
Stay with me here — this is worth it. Pulling the pears straight from oven to table is tempting, but those five minutes of resting time allow the sauce to thicken and the flavors to meld. The honey-butter mixture transforms from thin and watery to glossy and spoon-coatingly thick. The pears absorb just enough of the juices to become even more flavorful, and everything settles into perfect harmony.
During this rest, the blue cheese melts completely into the sauce, losing its harsh edges and becoming this creamy, tangy element that makes everyone ask for your secret. Skip this step and you'll have watery sauce and harsh cheese flavor. Embrace the wait and you'll have restaurant-quality results that taste like they took hours instead of minutes.
Blue Cheese Without the Fear Factor
Most people think they hate blue cheese because they've only had the aggressive, ammonia-heavy varieties that assault your palate. Good blue cheese, used sparingly, adds depth and complexity without screaming "I'M BLUE CHEESE!" Think of it like anchovies in Caesar dressing — you can't identify it, but you'd miss it if it were gone. Start with less than you think you need; you can always add more next time.
The key is using a mild, creamy blue like Gorgonzola dolce or a young Maytag. Avoid the super-aged, crumbly varieties that taste like a barnyard. And whatever you do, don't use pre-crumbled supermarket blue cheese — it tastes like sadness and sawdust. Buy a small wedge and crumble it yourself. The difference will make you a believer.
Creative Twists and Variations
This recipe is a playground. Here are some of my favorite ways to switch things up:
The Mediterranean Escape
Swap the blue cheese for fresh goat cheese and add a strip of lemon zest to each pear. Replace the walnuts with pistachios and use orange blossom honey instead of regular. The result tastes like you're sitting in a Greek taverna watching the sunset. The goat cheese stays creamy and mild, while the pistachios add this gorgeous green color and buttery richness that makes everything feel special and vacation-worthy.
The Autumn Comfort Version
Add a splash of bourbon to the honey drizzle and swap the mixed berries for fresh cranberries. The cranberries burst into tart pockets that balance the sweet pears perfectly, while the bourbon cooks off but leaves behind this incredible depth that makes people ask if you used vanilla. Add a pinch of cinnamon to the walnuts before toasting for that cozy autumn flavor that makes you want to curl up with a good book.
The Tropical Paradise
Replace the walnuts with toasted coconut flakes and use ripe mango instead of berries. Swap the honey for agave nectar and add a tiny pinch of cardamom. The coconut toasts up golden and fragrant, while the cardamom adds this exotic note that transports you straight to a beach somewhere. It's like taking a tropical vacation without leaving your kitchen.
The Decadent Chocolate Lover
Add a square of dark chocolate to each pear cavity before baking, and swap the walnuts for hazelnuts. The chocolate melts into the pears creating this incredible ganache-like center, while the hazelnuts add that Nutella vibe that makes chocolate lovers weak in the knees. Use a good 70% dark chocolate — anything sweeter gets lost in the honey.
The Breakfast-For-Dessert Remix
Serve the warm pears over vanilla Greek yogurt instead of on their own. The tangy yogurt cuts through the sweetness and adds protein that makes this feel almost virtuous. Top with granola instead of walnuts for that breakfast-crunch vibe that makes it socially acceptable to eat dessert for breakfast. I've been known to make this on Sunday and portion it out for weekday breakfasts that feel indulgent but are secretly healthy.
The Spice Route Adventure
Add a cinnamon stick and two star anise pods to the baking dish. The warm spices infuse everything with this incredible aroma and flavor that makes your kitchen smell like a spice market. Swap the honey for date syrup and add a handful of golden raisins to the berry mix. The result is complex and mysterious, with layers of flavor that reveal themselves slowly with each bite.
Storing and Bringing It Back to Life
Fridge Storage
Leftovers keep beautifully in an airtight container in the fridge for up to four days. The flavors actually deepen and meld overnight, making day-two pears arguably better than fresh ones. Store them in a shallow container so the sauce can distribute evenly, and always spoon some of that liquid gold over the pears before sealing. If you've ever struggled with rubbery leftover fruit, it's because you didn't save enough of the cooking juices.
The key is letting them cool completely before refrigerating. Hot fruit plus cold fridge equals condensation, which equals watery sauce and sad pears. Patience pays off here. Once cool, they'll keep their texture and flavor for days, making them perfect for meal prep or midnight snacking.
Freezer Friendly
Here's some future pacing for you: imagine having this elegant dessert ready to go in your freezer for unexpected guests or sudden cravings. Freeze individual portions in muffin tins, then pop them out and store in freezer bags. They'll keep for two months and reheat beautifully in the microwave or oven. Add a splash of water before reheating — it steams back to perfection, recreating that fresh-from-the-oven texture.
Pro tip: freeze the walnuts separately and add them fresh when reheating. This keeps their crunch intact and prevents them from getting that weird freezer taste that ruins everything. Frozen walnuts are the sad trombone of the dessert world — avoid at all costs.
Best Reheating Method
Microwave works in a pinch — 30-45 seconds on medium power does the trick — but the oven is your friend for best results. 350°F for 8-10 minutes brings back that caramelized edge and warm, cozy feeling. Cover with foil for the first half to prevent over-browning, then uncover to let the edges crisp up again. The difference between microwave and oven reheating is like the difference between a flashlight and a sunset.
If you're feeling fancy, reheat them in individual ramekins with a fresh drizzle of honey and a few new berries. This freshens everything up and makes yesterday's dessert feel like you just made it from scratch. Your guests will never know you're serving leftovers, and honestly, neither will you.