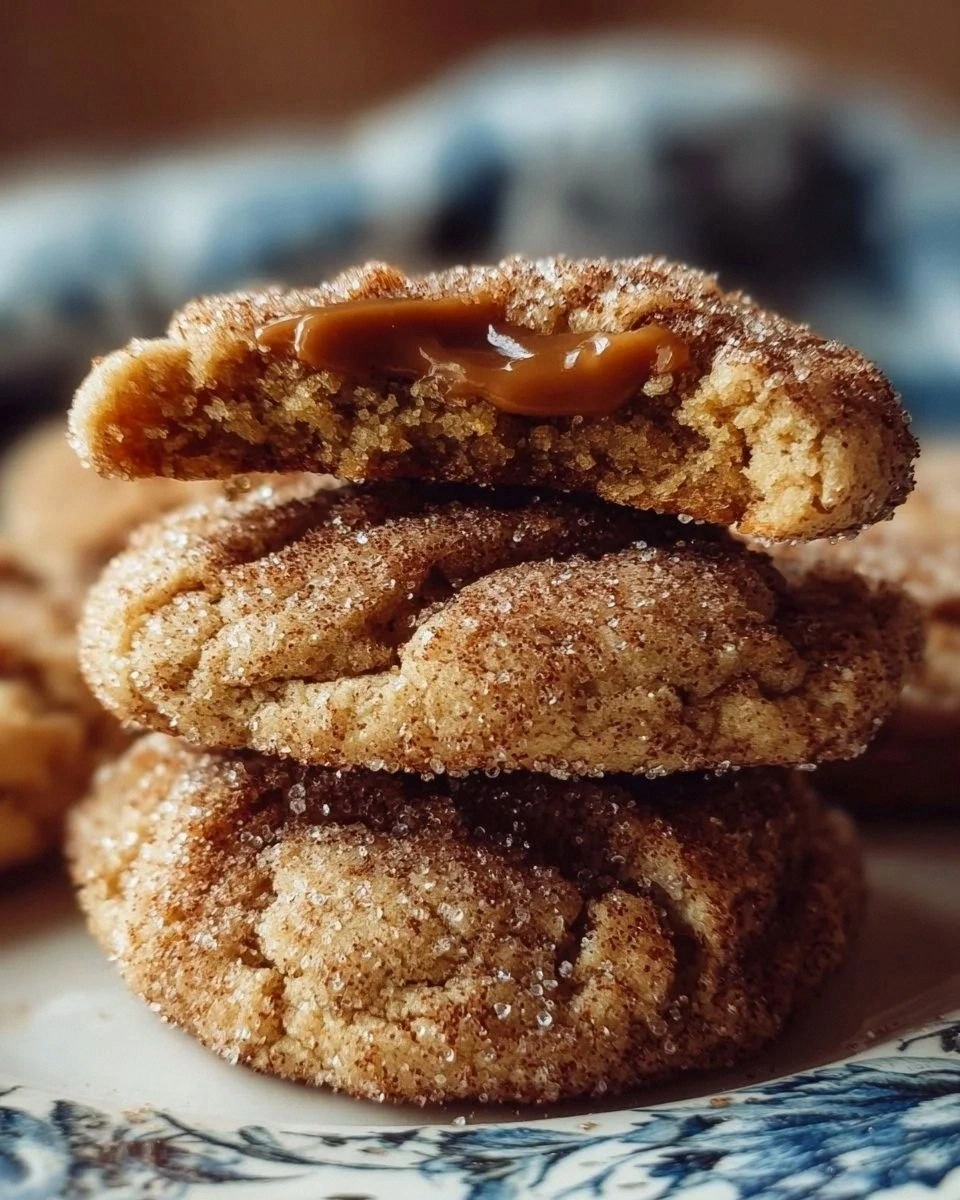
Picture this: a rainy Saturday, the kind that makes you want to hug a blanket and binge‑watch old sitcoms, but the pantry is screaming for something sweet. I was halfway through a bag of plain crackers when a sudden craving for caramel hit me like a bolt of lightning, and I thought, “Why not turn this kitchen misery into a masterpiece?” I rummaged through the cupboards, grabbed the last of the brown sugar, a stick of butter that was practically melting on the counter, and a jar of cinnamon that smelled like a cozy sweater. The result? Brown Sugar Cinnamon Caramel Cookies that are so addictive they could practically be classified as a legal substance.
From the moment the dough hits the mixing bowl, the kitchen fills with a perfume that could make even the most stoic grandparent weep with joy. Imagine the warm, buttery scent of caramel mingling with the sweet, molasses‑rich aroma of brown sugar, all spiked with a whisper of cinnamon that makes your nose tingle like it’s dancing. As the cookies bake, the edges turn a deep amber, crackling softly as if they’re whispering secrets about the perfect bite. The interior stays soft and chewy, with pockets of caramel that melt in your mouth like tiny, sugary fireworks.
What makes this version stand out isn’t just the flavor—it’s the science, the texture, and the sheer joy of eating something that feels like a hug from the inside out. Most recipes either over‑sweeten or under‑spice, leaving you with a cookie that’s either cloying or bland. I’ve cracked the code by balancing the brown sugar’s depth with just the right amount of cinnamon and a surprise burst of caramel bits that give each bite a gooey surprise. The secret? A quick chill of the dough that locks in moisture and creates that coveted chewy‑crisp contrast.
And here’s the kicker: I’m about to share a technique that most bakers overlook—a brief blast of high heat at the start of baking that caramelizes the sugars on the surface, creating a glossy, crackly crust while keeping the middle soft. Trust me, this little trick is the game‑changer that turns good cookies into legendary ones. Let me walk you through every single step — by the end, you’ll wonder how you ever made it any other way.
What Makes This Version Stand Out
- Flavor Fusion: The combination of brown sugar’s caramel notes with cinnamon’s warm spice creates a depth that ordinary cookies lack.
- Texture Harmony: A crisp edge that shatters like thin ice meets a soft, chewy center that stretches with each bite.
- Simplicity: Only nine pantry staples, yet the result feels like it came from a high‑end bakery.
- Unique Ingredient: Caramel bits add pockets of molten sweetness that surprise you mid‑chew.
- Crowd Reaction: I dare you to taste this and not go back for seconds; it’s a proven party‑pleaser.
- Ingredient Quality: Using packed brown sugar and real butter makes the flavor richer than any shortcut.
- Method Magic: The quick chill and high‑heat start are the secret weapons that lock in moisture.
- Make‑Ahead Potential: These cookies stay fresh for days, and you can freeze them for a ready‑to‑enjoy treat.
Inside the Ingredient List
The Flavor Base
First up, the brown sugar—packed tightly, it brings a deep, molasses‑like richness that you can’t get from white sugar. If you skimp on the packing, the cookies will taste flat, like a song missing its bass line. A good swap is dark muscovado sugar, which adds an even more intense caramel flavor, but be prepared for a slightly darker hue. When choosing brown sugar, look for a brand that’s fresh; old sugar can harden and clump, ruining the smoothness of your dough.
The Texture Crew
Unsalted butter, softened to room temperature, is the hero that creates that melt‑in‑your‑mouth feel. If you use melted butter, you’ll end up with a spread that’s too flat and loses that coveted chew. The egg acts as a binder, adding structure while keeping the cookies tender; a large egg is perfect, but if you’re using a smaller one, add a splash of milk to compensate. Vanilla extract (halal‑certified) adds a subtle aromatic backdrop that lifts the whole flavor profile without stealing the spotlight.
The Unexpected Star
Caramel bits or chopped soft caramels are the surprise element that makes each bite an adventure. They melt slightly during baking, leaving pockets of gooey sweetness that contrast beautifully with the crunchy edges. If you can’t find caramel bits, try chopping up a slab of soft caramel candy—just make sure the pieces are bite‑size. The cinnamon, measured at a full teaspoon, brings warmth and a hint of spice that pairs perfectly with the brown sugar, turning the flavor into a cozy blanket for your palate.
The Final Flourish
All‑purpose flour provides the structure needed to hold the cookie together while staying tender. The 1½ cups amount ensures the dough isn’t too sticky, but if you prefer a slightly denser cookie, add an extra two tablespoons. Baking soda, at just a half‑teaspoon, creates a gentle lift that gives the cookies a subtle puff without making them cake‑like. Finally, a pinch of salt (¼ teaspoon) balances the sweetness and enhances every other flavor, proving that even the smallest ingredient can make the biggest impact.
Everything's prepped? Good. Let's get into the real action...
The Method — Step by Step
Start by preheating your oven to 375°F (190°C). While the oven warms up, line two baking sheets with parchment paper; this prevents sticking and gives the cookies a uniform bottom color. I always place the sheets on the middle rack for even heat distribution—no hot spots, no uneven browning.
In a large mixing bowl, cream together the packed brown sugar and softened butter until the mixture is light, fluffy, and a shade brighter than the sugar itself. This should take about 2‑3 minutes with an electric mixer on medium speed; you’ll hear a faint whooshing sound as air is incorporated. Power transition: Okay, ready for the game‑changer? Add the egg and vanilla extract, beating just until combined. The dough should look glossy, not wet.
Kitchen Hack: Use a rubber spatula to scrape the sides of the bowl after each addition; this ensures every speck of butter and sugar gets fully incorporated, preventing grainy pockets.In a separate bowl, whisk together the all‑purpose flour, baking soda, ground cinnamon, and salt. Whisking aerates the dry ingredients, which helps them blend more evenly into the wet mixture later on. Once combined, set the bowl aside; you’ll notice a faint cinnamon perfume rise—this is your cue that the flavor base is ready.
Gradually add the dry ingredient mixture to the wet ingredients, stirring with a wooden spoon or the mixer on low speed. Stop mixing as soon as the flour disappears; over‑mixing can develop gluten and make the cookies tough. At this stage, the dough will look a bit shaggy—don’t panic, that’s normal.
Fold in the caramel bits gently, ensuring they’re evenly distributed without crushing them into the dough. Watch Out: If the caramel bits are too soft, they can melt into the dough and lose their distinct pockets of gooeyness. To avoid this, chill the caramel bits for 5 minutes before folding, keeping them firm enough to stay whole during baking.
Watch Out: Over‑mixing after adding caramel bits can cause them to break apart, turning your cookies into a caramel‑swirl mess rather than distinct pockets.Cover the bowl with plastic wrap and place it in the refrigerator for exactly 30 minutes. This chill time solidifies the butter just enough to prevent the cookies from spreading too thin, while also allowing the flour to hydrate fully. While the dough chills, you can clean up your workspace—this is the perfect moment to admire the dough’s glossy sheen.
After chilling, scoop out tablespoon‑sized balls of dough and place them on the prepared baking sheets, spacing them about 2 inches apart. Slightly flatten each ball with the back of a spoon; this encourages an even bake and gives the caramel bits a chance to surface. Power transition: This next part? Pure magic. Sprinkle a tiny pinch of flaky sea salt on top of each cookie for a sweet‑salty contrast that will make your taste buds sing.
Kitchen Hack: Use a small ice‑cream scoop (1‑ounce size) for perfectly uniform cookies; consistency ensures even baking and a professional look.Slide the trays into the oven and bake for 10‑12 minutes, or until the edges turn a deep amber and the centers look set but still slightly soft. The aroma will fill your kitchen like a warm hug, and you’ll notice the tops beginning to crack just a little—this is the sign of a perfect crust forming. Resist the urge to open the oven door early; the sudden temperature drop can cause the cookies to collapse.
Remove the trays and let the cookies cool on the sheets for 3‑4 minutes before transferring them to a wire rack. This brief rest lets the cookies firm up just enough to move without breaking, while still retaining that gooey caramel center. Once cooled, store them in an airtight container, and brace yourself for the inevitable second‑round bake—because you’ll want more.
That's it — you did it. But hold on, I've got a few more tricks that'll take this to another level...
Insider Tricks for Flawless Results
The Temperature Rule Nobody Follows
Never bake cookies straight from the fridge at a low temperature; start with a hot oven (375°F) and then lower it to 350°F after the first 5 minutes. This initial blast caramelizes the sugars, giving you that glossy, crackly crust while the lower temperature finishes the bake gently, preserving chewiness. I once tried baking at a steady 350°F and ended up with pale, soggy cookies—lesson learned.
Why Your Nose Knows Best
When the cookies are about 8 minutes in, start sniffing. If you detect a toasty, caramel‑rich scent, you’re on the right track. The moment the aroma turns slightly nutty, it’s time to pull them out. Trusting your senses beats relying on a timer alone, especially when oven calibrations vary.
The 5‑Minute Rest That Changes Everything
After removing the cookies from the oven, let them rest on the baking sheet for exactly five minutes before moving them. This short pause allows residual heat to finish the bake gently, creating a perfect balance between a crisp edge and a soft center. Skipping this step often results in a cookie that cracks all over when you try to lift it.
Salted Caramel Finish
A pinch of flaky sea salt sprinkled just before baking amplifies the caramel’s sweetness and adds a sophisticated contrast. It’s a tiny detail that turns a good cookie into a gourmet treat. If you’re watching sodium, use a light dusting—too much can overpower the delicate spice.
Freezer‑Friendly Dough
After the initial chill, divide the dough into 1‑inch balls, flash‑freeze them on a tray, then transfer to a zip‑top bag. You can bake straight from frozen; just add an extra minute or two to the baking time. This method ensures you always have fresh‑baked cookies on demand, perfect for unexpected guests.
Creative Twists and Variations
This recipe is a playground. Here are some of my favorite ways to switch things up:
Maple Bacon Bliss
Swap half the brown sugar for pure maple syrup and fold in crisp‑cooked bacon bits. The smoky, salty crunch pairs beautifully with the caramel‑cinnamon base, creating a sweet‑savory masterpiece that’s perfect for brunch.
Chocolate Chip Caramel Fusion
Replace half of the caramel bits with dark chocolate chips. The bitterness of the chocolate balances the sweetness, and the melting chocolate creates ribbons of decadence throughout each bite.
Spiced Pumpkin Delight
Incorporate ¼ cup pumpkin puree and a pinch of nutmeg, reducing the brown sugar by 2 tablespoons. This seasonal twist adds earthy depth and makes the cookies a cozy autumn treat.
Nutty Crunch Variation
Stir in ½ cup toasted chopped pecans or walnuts along with the caramel bits. The nuts add a satisfying crunch and a buttery flavor that complements the cinnamon perfectly.
Vegan Friendly Version
Swap the butter for coconut oil, use a flax egg (1 tbsp ground flaxseed + 3 tbsp water), and choose dairy‑free caramel bits. The texture remains chewy, and the coconut oil adds a subtle tropical note.
Storing and Bringing It Back to Life
Fridge Storage
Place the cooled cookies in an airtight container with a paper towel at the bottom to absorb excess moisture. They’ll stay fresh for up to 5 days, and the cool environment keeps the caramel from getting too sticky.
Freezer Friendly
Layer cookies between parchment sheets in a freezer‑safe zip bag; they’ll keep for up to 3 months. When you’re ready to indulge, let them thaw at room temperature for 10 minutes, then pop them in a 300°F oven for 5 minutes to revive that fresh‑out‑of‑the‑oven crunch.
Best Reheating Method
To revive a day‑old cookie, place it on a microwave‑safe plate, sprinkle a tiny splash of water (about a teaspoon) next to it, and microwave for 10‑12 seconds. The steam generated restores softness while the edges crisp up again—magic in a flash.