
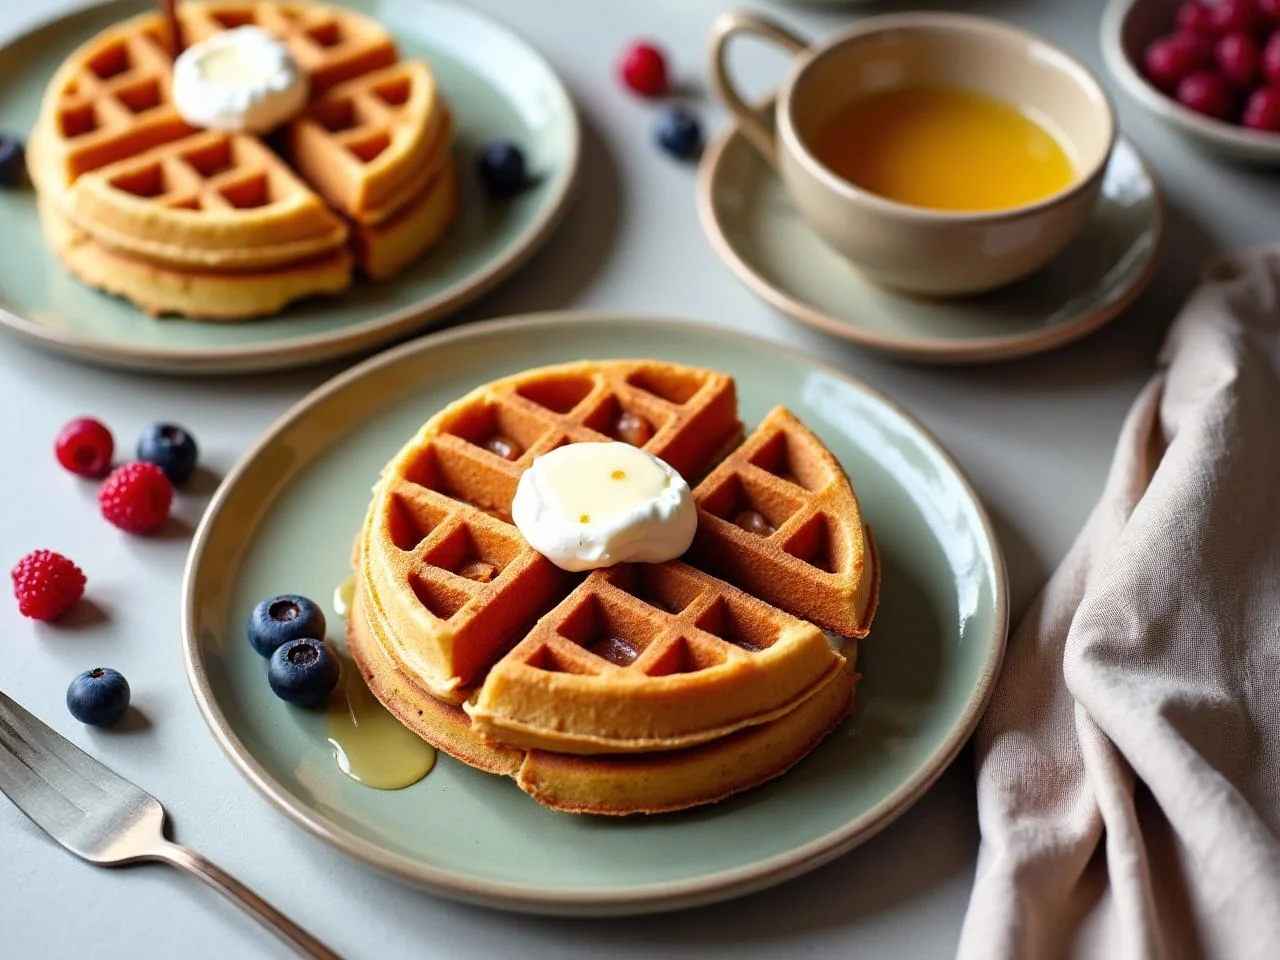
Buttermilk Belgian Waffles
There's something special about a lazy Sunday morning, with the warmth of the sun peeking through the windows and the aroma of freshly baked waffles wafting from the kitchen. As a morning-food enthusiast, I've always been on the quest for the perfect waffle recipe - one that's both easy to make and deliciously satisfying. After countless trials and errors, I'm excited to share with you my secret to making the fluffiest, most tender Buttermilk Belgian Waffles you've ever tasted.
What sets these waffles apart is the combination of buttermilk, which adds a tangy flavor and tenderness, and the right amount of leavening agents, which gives them a light and airy texture. Plus, the recipe is incredibly versatile - you can customize it to your liking with fresh fruits, nuts, or even chocolate chips.
I remember the first time I made these waffles for my family - the look of delight on their faces as they took their first bite was all the motivation I needed to keep perfecting the recipe. Since then, Buttermilk Belgian Waffles have become a staple in our household, and I'm confident they'll become a favorite in yours too.
Whether you're a busy parent looking for a quick and easy breakfast solution or a foodie seeking a new recipe to impress your friends, this recipe is for you. With its simple ingredients and straightforward instructions, you'll be whipping up delicious waffles in no time. So go ahead, give it a try, and get ready to start your day off right with a stack of golden, crispy, and oh-so-delicious Buttermilk Belgian Waffles.
In this recipe, I'll guide you through the process of making Buttermilk Belgian Waffles from scratch, sharing tips and tricks along the way to ensure that your waffles turn out perfectly every time. From the importance of using room temperature ingredients to the secret to achieving the perfect golden brown color, I'll cover it all. So let's get started and make some amazing waffles!
Why You’ll Love This Recipe
- These waffles are incredibly easy to make, requiring just a few simple ingredients and minimal preparation time.
- The recipe is highly versatile, allowing you to customize the waffles to your liking with fresh fruits, nuts, or chocolate chips.
- Buttermilk Belgian Waffles are perfect for busy mornings, as they can be made ahead of time and reheated in just a few minutes.
- The waffles are a great source of protein and fiber, making them a nutritious and satisfying breakfast option.
- The recipe makes a large batch of waffles, which can be frozen and reheated as needed, making it perfect for meal prep.
- The waffles are a crowd-pleaser, and are sure to become a favorite in your household.
- The recipe is budget-friendly, using common ingredients that are likely already stocked in your pantry.
Why This Recipe Works
The key to making perfect Buttermilk Belgian Waffles lies in the combination of the right ingredients and the right technique. The acidity in the buttermilk helps to break down the starches in the flour, resulting in a tender and fluffy texture. Meanwhile, the leavening agents - baking powder and baking soda - work together to give the waffles a light and airy structure.
Another important factor is the temperature of the waffle iron. If it's too hot, the waffles will burn on the outside before they're fully cooked on the inside. On the other hand, if it's too cold, the waffles will be dense and soggy. By heating the waffle iron to the right temperature and cooking the waffles for the right amount of time, you'll achieve a perfectly cooked waffle with a crispy exterior and a fluffy interior.
Finally, the resting time is crucial in allowing the flour to absorb the liquid ingredients and the leavening agents to activate. This step may seem insignificant, but it makes a huge difference in the final texture and flavor of the waffles. By following these simple steps and using the right ingredients, you'll be able to create delicious Buttermilk Belgian Waffles that are sure to impress your family and friends.
In addition to the ingredients and technique, the type of waffle iron used can also affect the final result. A Belgian waffle iron, with its deeper pockets and thicker grids, is ideal for making these waffles. The deeper pockets allow for a thicker batter, which results in a more substantial and filling waffle, while the thicker grids provide a crispy exterior and a fluffy interior.
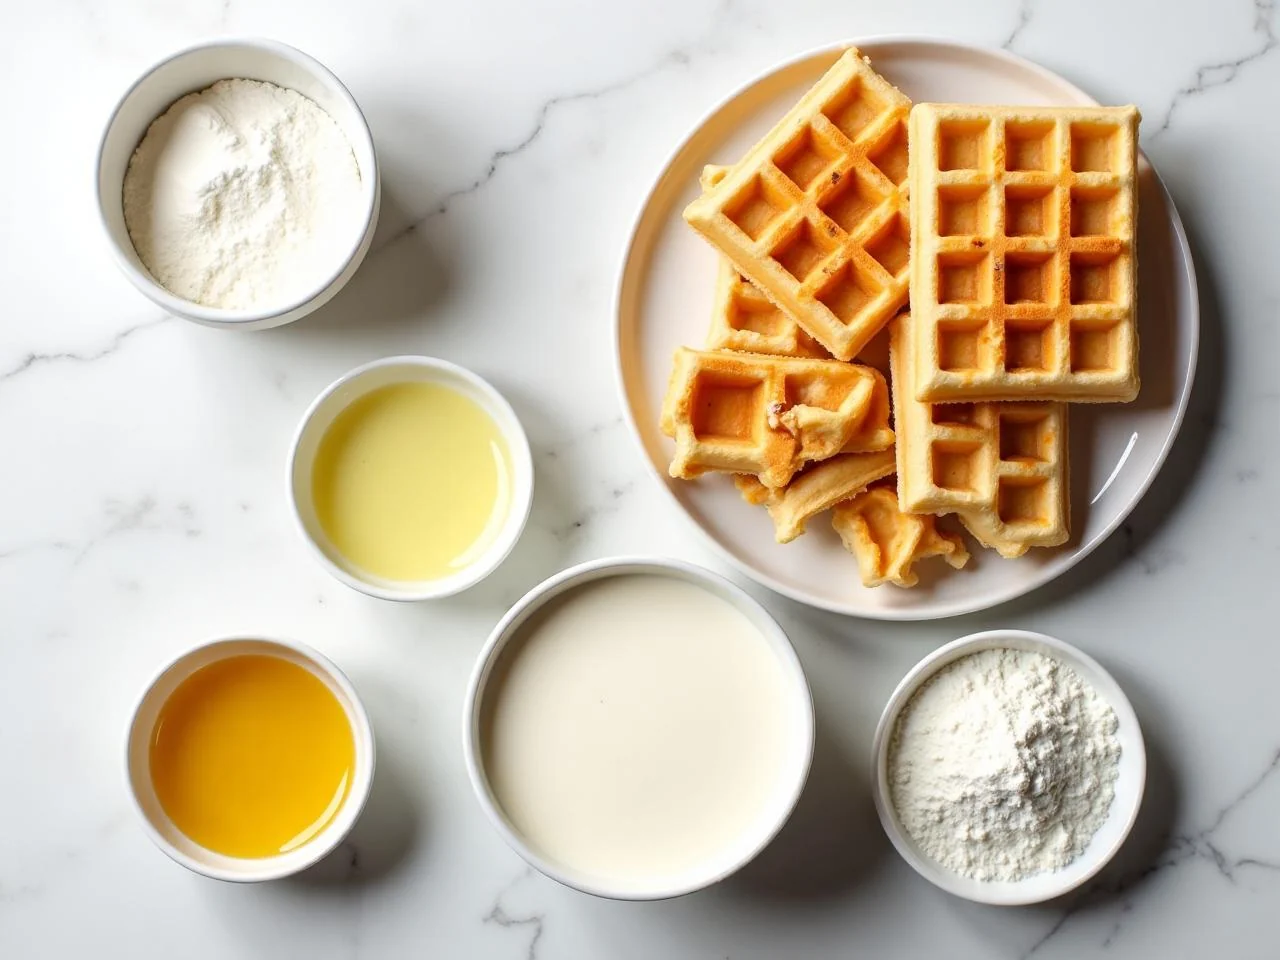
Ingredients You’ll Need
To make these delicious Buttermilk Belgian Waffles, you'll need a few simple ingredients, including all-purpose flour, granulated sugar, baking powder, and buttermilk. The quality of the ingredients is important, so be sure to use fresh and high-quality items to get the best flavor and texture.
When shopping for the ingredients, look for all-purpose flour that is unbleached and unbromated, as this will give your waffles a more natural flavor and texture. Also, be sure to use real buttermilk, as the acidity in the buttermilk is essential to the recipe. If you can't find buttermilk, you can make a substitute by mixing 1 cup of milk with 1 tablespoon of white vinegar or lemon juice.
- 2 cups (250g) all-purpose flourUnbleached and unbromated all-purpose flour is best for this recipe, as it will give your waffles a more natural flavor and texture. Make sure to sift the flour before measuring to ensure accuracy.
- 4 tsp (20g) granulated sugarGranulated sugar adds a touch of sweetness to the waffles, but you can adjust the amount to your taste. You can also use other types of sugar, such as brown sugar or honey, for a different flavor.
- 2 tsp (10g) baking powderBaking powder is a crucial ingredient in this recipe, as it helps the waffles to rise and gives them a light and airy texture. Make sure to use fresh baking powder, as old baking powder can lose its potency and affect the texture of the waffles.
- 1/2 tsp (2g) kosher saltKosher salt adds a touch of flavor to the waffles and helps to balance the sweetness of the sugar. You can also use other types of salt, such as sea salt or table salt, but kosher salt is preferred for its mild flavor and texture.
- 1/2 cup (115g) unsalted butter, meltedMelted butter adds moisture and flavor to the waffles, and helps to create a crispy exterior and a fluffy interior. Make sure to use high-quality unsalted butter for the best flavor.
- 1 cup (235ml) buttermilkButtermilk is a crucial ingredient in this recipe, as it adds a tangy flavor and tenderness to the waffles. If you can't find buttermilk, you can make a substitute by mixing 1 cup of milk with 1 tablespoon of white vinegar or lemon juice.
- 2 large eggsEggs add moisture, richness, and structure to the waffles, and help to create a tender and fluffy texture. Make sure to use fresh eggs for the best flavor and texture.
- 1 tsp (5g) pure vanilla extractVanilla extract adds a touch of flavor and aroma to the waffles, and helps to balance the sweetness of the sugar. You can also use other types of extract, such as almond or coconut, for a different flavor.
- Salt and pepper to tasteSalt and pepper add flavor and depth to the waffles, and help to balance the sweetness of the sugar. Use them sparingly, as they can overpower the other flavors in the recipe.
- Non-stick cooking sprayNon-stick cooking spray is essential for preventing the waffles from sticking to the waffle iron, and helps to create a crispy exterior and a fluffy interior. Make sure to use a high-quality non-stick cooking spray for the best results.
Equipment You’ll Need
How to Make Buttermilk Belgian Waffles
- 1In a large bowl, whisk together the flour, sugar, baking powder, and salt. This will help to combine the dry ingredients and ensure that they are evenly distributed throughout the batter.
- 2In a separate bowl, whisk together the melted butter, buttermilk, eggs, and vanilla extract. This will help to combine the wet ingredients and create a smooth and creamy batter.
- 3Add the wet ingredients to the dry ingredients and stir until just combined. The batter should still be slightly lumpy, as this will help to create a tender and fluffy texture.
- 4Let the batter rest for 10-15 minutes, allowing the flour to absorb the liquid ingredients and the leavening agents to activate. This step is crucial in creating a light and airy texture, and should not be skipped.
- 5Preheat the waffle iron according to the manufacturer's instructions. Make sure the waffle iron is hot before adding the batter, as this will help to create a crispy exterior and a fluffy interior.
- 6Spray the waffle iron with non-stick cooking spray, making sure to cover the entire surface. This will help to prevent the waffles from sticking to the waffle iron and create a crispy exterior.
- 7Using a 1/4 cup measuring cup, scoop the batter onto the center of the waffle iron. Make sure to leave a small border around the edges, as the batter will spread during cooking.
- 8Cook the waffles for 3-5 minutes, or until they are golden brown and crispy. The cooking time may vary depending on the waffle iron and the desired level of crispiness.
- 9Repeat the process until all of the batter has been used, making sure to spray the waffle iron with non-stick cooking spray between each waffle.
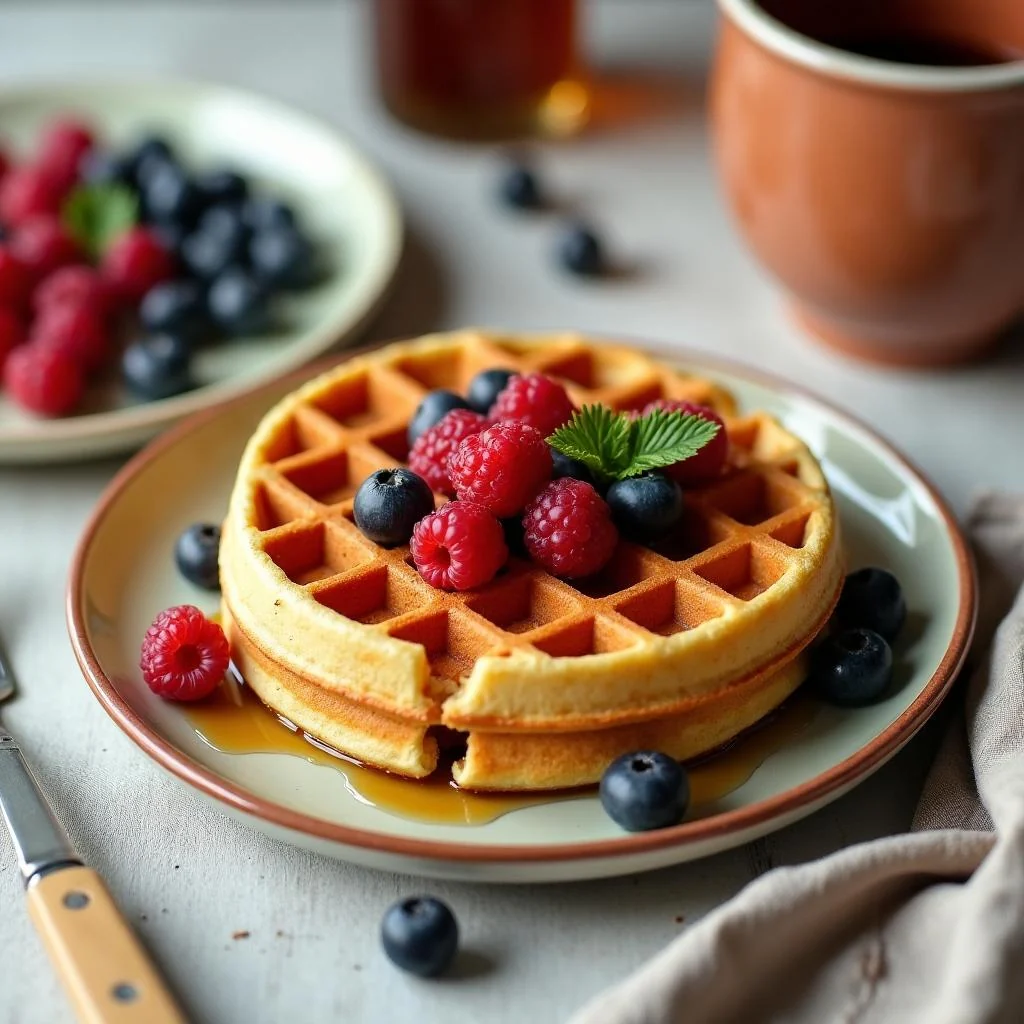
- 10Serve the waffles hot, topped with your favorite toppings such as fresh fruit, whipped cream, or syrup.
- 11If desired, freeze the waffles for later use. Simply place the waffles in a single layer on a baking sheet and freeze until solid, then transfer to a freezer-safe bag or container.
- 12To reheat frozen waffles, simply place them in the toaster or toaster oven and cook until crispy and golden brown.
- 13Tips for making the perfect waffles include using room temperature ingredients, not overmixing the batter, and cooking the waffles at the right temperature.
- 14Common mistakes to avoid include overmixing the batter, cooking the waffles at too high of a temperature, and not using enough non-stick cooking spray.
Expert Tips
- Use room temperature ingredients for the best results.
- Don't overmix the batter, as this can create a dense and tough texture.
- Make sure to cook the waffles at the right temperature, as this will help to create a crispy exterior and a fluffy interior.
- Don't overcrowd the waffle iron, as this can cause the waffles to stick together.
- Use a high-quality non-stick cooking spray to prevent the waffles from sticking to the waffle iron.
- Experiment with different toppings and flavor combinations to find your favorite.
- Consider using a waffle iron with a non-stick surface for easy cleanup and maintenance.
- For an extra crispy exterior, try cooking the waffles for an additional 30 seconds to 1 minute.
Common Mistakes to Avoid
- Overmixing the batter, which can create a dense and tough texture.
- Cooking the waffles at too high of a temperature, which can cause them to burn or become too crispy.
- Not using enough non-stick cooking spray, which can cause the waffles to stick to the waffle iron.
- Not letting the batter rest, which can affect the texture and structure of the waffles.
- Overcrowding the waffle iron, which can cause the waffles to stick together.
- Not using room temperature ingredients, which can affect the texture and consistency of the batter.
Variations and Substitutions
- Add fresh fruit, such as blueberries or bananas, to the batter for added flavor and nutrition.
- Use different types of milk, such as almond or soy milk, for a non-dairy version.
- Add nuts or seeds, such as walnuts or chia seeds, for added crunch and nutrition.
- Use different types of sugar, such as honey or maple syrup, for a different flavor.
- Add a sprinkle of cinnamon or nutmeg on top of the waffles for added flavor.
- Try using a different type of flour, such as whole wheat or oat flour, for a different texture and flavor.
- Add a handful of chocolate chips to the batter for a sweet and indulgent treat.
What to Serve With Buttermilk Belgian Waffles
Buttermilk Belgian Waffles are delicious on their own, but they can also be served with a variety of toppings to enhance their flavor and texture. Some popular toppings include fresh fruit, whipped cream, syrup, and powdered sugar. You can also try adding a sprinkle of cinnamon or nutmeg on top of the waffles for added flavor.
In addition to toppings, Buttermilk Belgian Waffles can also be served with a side of bacon, sausage, or eggs for a hearty and satisfying breakfast. They can also be served with a cup of coffee or tea for a quick and easy breakfast on-the-go.
Make-Ahead, Storage, Freezing and Reheating
Buttermilk Belgian Waffles can be stored in an airtight container at room temperature for up to 2 days. They can also be frozen for up to 2 months and reheated in the toaster or toaster oven. To freeze, simply place the waffles in a single layer on a baking sheet and freeze until solid, then transfer to a freezer-safe bag or container.
When reheating frozen waffles, make sure to cook them until crispy and golden brown. You can also try reheating them in the microwave, but be careful not to overcook them. To reheat in the microwave, simply place the waffles on a plate and cook for 20-30 seconds, or until crispy and golden brown.
In addition to freezing, Buttermilk Belgian Waffles can also be made ahead of time and stored in the refrigerator for up to 24 hours. Simply prepare the batter and store it in an airtight container in the refrigerator, then cook the waffles in the morning. This is a great option for busy mornings, as it allows you to have a delicious and freshly cooked breakfast without having to spend a lot of time in the kitchen.
When storing Buttermilk Belgian Waffles, make sure to keep them in an airtight container to prevent them from becoming stale or dry. You can also try storing them in a paper bag or wrapping them in plastic wrap to keep them fresh.
Frequently Asked Questions
What type of flour is best for Buttermilk Belgian Waffles?
Unbleached and unbromated all-purpose flour is best for this recipe, as it will give your waffles a more natural flavor and texture.
Can I use a different type of milk instead of buttermilk?
Yes, you can use a different type of milk, such as almond or soy milk, but keep in mind that it may affect the flavor and texture of the waffles.
How do I prevent the waffles from sticking to the waffle iron?
Make sure to use a high-quality non-stick cooking spray and spray the waffle iron between each waffle.
Can I freeze the waffles for later use?
Yes, you can freeze the waffles for up to 2 months and reheat them in the toaster or toaster oven.
What is the best way to reheat frozen waffles?
The best way to reheat frozen waffles is to cook them in the toaster or toaster oven until crispy and golden brown.
Can I make the batter ahead of time and store it in the refrigerator?
Yes, you can make the batter ahead of time and store it in the refrigerator for up to 24 hours.
What type of waffle iron is best for this recipe?
A Belgian waffle iron is best for this recipe, as it will give your waffles a deeper pocket and a crisper exterior.
Can I add different toppings or flavorings to the batter?
Yes, you can add different toppings or flavorings to the batter, such as fresh fruit, nuts, or chocolate chips.
Ingredients
- 2 cups (250g) all-purpose flour
- 4 tsp (20g) granulated sugar
- 2 tsp (10g) baking powder
- 1/2 tsp (2g) kosher salt
- 1/2 cup (115g) unsalted butter, melted
- 1 cup (235ml) buttermilk
- 2 large eggs
- 1 tsp (5g) pure vanilla extract
- Salt and pepper to taste
- Non-stick cooking spray
Instructions
- In a large bowl, whisk together the flour, sugar, baking powder, and salt. This will help to combine the dry ingredients and ensure that they are evenly distributed throughout the batter.
- In a separate bowl, whisk together the melted butter, buttermilk, eggs, and vanilla extract. This will help to combine the wet ingredients and create a smooth and creamy batter.
- Add the wet ingredients to the dry ingredients and stir until just combined. The batter should still be slightly lumpy, as this will help to create a tender and fluffy texture.
- Let the batter rest for 10-15 minutes, allowing the flour to absorb the liquid ingredients and the leavening agents to activate. This step is crucial in creating a light and airy texture, and should not be skipped.
- Preheat the waffle iron according to the manufacturer's instructions. Make sure the waffle iron is hot before adding the batter, as this will help to create a crispy exterior and a fluffy interior.
- Spray the waffle iron with non-stick cooking spray, making sure to cover the entire surface. This will help to prevent the waffles from sticking to the waffle iron and create a crispy exterior.
- Using a 1/4 cup measuring cup, scoop the batter onto the center of the waffle iron. Make sure to leave a small border around the edges, as the batter will spread during cooking.
- Cook the waffles for 3-5 minutes, or until they are golden brown and crispy. The cooking time may vary depending on the waffle iron and the desired level of crispiness.
- Repeat the process until all of the batter has been used, making sure to spray the waffle iron with non-stick cooking spray between each waffle.
- Serve the waffles hot, topped with your favorite toppings such as fresh fruit, whipped cream, or syrup.
- If desired, freeze the waffles for later use. Simply place the waffles in a single layer on a baking sheet and freeze until solid, then transfer to a freezer-safe bag or container.
- To reheat frozen waffles, simply place them in the toaster or toaster oven and cook until crispy and golden brown.
- Tips for making the perfect waffles include using room temperature ingredients, not overmixing the batter, and cooking the waffles at the right temperature.
- Common mistakes to avoid include overmixing the batter, cooking the waffles at too high of a temperature, and not using enough non-stick cooking spray.