I was halfway through a week of bland dinners when my phone buzzed with a friend’s text: “Need a quick, show‑stopper for tonight.” The kitchen was a battlefield of leftover veggies and a half‑empty fridge, yet the air smelled faintly of sea salt and garlic—like a promise of something better. I grabbed the frozen mussels from the freezer, and the whole room seemed to inhale the briny anticipation. If you’ve ever stared at a pot of mussels and wondered why they’re still frozen, you’re about to discover the ultimate thaw‑and‑sizzle trick that turns a simple seafood staple into a restaurant‑grade entrée.
Picture this: a pan that sizzles like a jazz club, the onions caramelizing into a golden caramel that drips down the sides, the garlic releasing its perfume like a secret whispered at midnight. The mussels, still wrapped in their frosty shells, begin to unfurl, their tiny pearls of moisture glistening like tiny moons. The sauce, a silky sour cream base thickened with olive oil, coats each mussel in a velvet hug, turning the dish from ordinary to unforgettable in a matter of minutes. I dare you to taste this and not go back for seconds; the moment the first mussel bursts open, you’ll know the flavor has already won your heart.
What makes this version stand out is not just the combination of ingredients but the method that unlocks the mussels’ natural sweetness while keeping the sauce light and creamy. The trick lies in a quick blanch of the mussels, a caramelized onion base, and a sour cream finish that balances acidity with richness. The result is a dish that feels like a hug from the sea, a symphony of textures and flavors that makes even the most skeptical foodie swoon. I’m not exaggerating when I say this is hands down the best version you’ll ever make at home. If you’ve ever struggled to get mussels to open evenly, you’re not alone—and I’ve got the fix.
And now, the fun part: the secret ingredient that most recipes skip—fresh parsley, not just as a garnish but folded into the sauce for a burst of green freshness that cuts through the cream. Picture yourself pulling this out of the pan, the kitchen smelling incredible, and the plate shimmering with a glossy, herb‑infused sauce. Okay, ready for the game‑changer? Let me walk you through every single step—by the end, you’ll wonder how you ever made it any other way.
What Makes This Version Stand Out
- Flavor: The combination of caramelized onions, garlic, and a splash of white wine lifts the mussels into a depth that feels both earthy and briny. The sour cream base adds a tangy creaminess that balances the oceanic saltiness without overpowering it.
- Texture: Each mussel bursts open with a satisfying pop, releasing a tender interior that contrasts with the slightly chewy shell. The sauce coats them like velvet, ensuring every bite is moist and luxurious.
- Simplicity: No elaborate steps—just a few quick pan‑sauté moves and a few minutes of waiting. This dish can be ready in 20 minutes, making it perfect for busy weeknights.
- Uniqueness: The addition of fresh parsley folded into the sauce creates a bright, herbaceous finish that sets it apart from typical mussel recipes that rely on lemon or cream alone.
- Crowd Reaction: Guests rave about the creamy sauce and the effortless “no‑fuss” preparation. It’s the kind of dish that makes people ask for the recipe before they even taste it.
- Ingredient Quality: Using high‑quality frozen mussels preserves their flavor and texture, while fresh garlic and parsley bring a bright, aromatic punch that fresh ingredients alone can’t achieve.
- Cooking Method: The quick blanching step ensures the mussels cook evenly and release their natural juices, which then mingle with the sauce for a richer flavor.
- Make‑Ahead Potential: The sauce can be prepared ahead of time and reheated gently, making it a great option for entertaining when you need to multitask.
Inside the Ingredient List
The Flavor Base
Onions are the unsung hero of savory dishes, and in this recipe they take center stage. They provide a subtle sweetness that balances the briny mussels and the tang of sour cream. If you’re in a hurry, a finely diced onion will sauté faster and release its flavor more quickly, but take care not to burn it; a light caramel is key. Swapping the onion for shallots will give the dish a milder, more floral note that some diners might prefer.
Garlic is the backbone of the sauce, infusing the olive oil with its aromatic oils and creating a depth that feels both earthy and bright. The three cloves are a sweet spot—enough to dominate without becoming overpowering. If you’re a garlic lover, feel free to double the amount, but remember that the sour cream will help mellow the bite. A good rule of thumb: if you’re using pre‑minced garlic, reduce the quantity by about one‑third to avoid a harsh taste.
The Texture Crew
Frozen mussels are a practical choice for year‑round cooking because they’re pre‑shucked and ready to go. The key is to thaw them properly: let them sit in a bowl of cold water for 10 minutes, then pat dry. This prevents excess moisture from diluting the sauce. If you prefer fresh mussels, rinse them thoroughly and discard any that don’t open after cooking—these are likely dead and can affect the overall flavor.
Olive oil is the cooking medium that brings everything together. A high‑quality extra‑virgin olive oil will add a peppery note that complements the mussels’ natural brininess. If you’re aiming for a lighter version, use a neutral oil like grapeseed, but be prepared for a slightly less complex flavor profile. The 2 tablespoons are enough to coat the pan and the ingredients without making the dish greasy.
The Unexpected Star
Sour cream is the star that ties the dish together. It provides a creamy texture while its acidity cuts through the richness of the mussels and the olive oil. If you’re lactose intolerant, a dairy‑free alternative such as Greek yogurt or coconut cream will work, but adjust the thickness by adding a splash of milk or broth. The 1 cup of sour cream is the sweet spot for four servings; scaling up or down will keep the sauce proportionate.
The Final Flourish
Fresh parsley isn’t just a garnish—it’s folded into the sauce for a bright, herbal note that lifts the entire dish. Parsley adds a subtle peppery flavor that balances the creaminess of the sour cream. If you’re looking for an extra punch, try adding a pinch of crushed red pepper flakes or a dash of lemon zest for a citrusy finish. The 2 tablespoons of parsley will suffice for four servings; adjust as needed for your taste.
Everything’s prepped? Good. Let’s get into the real action…

The Method — Step by Step
- Heat a large, heavy‑bottomed skillet over medium heat and add the 2 tablespoons of olive oil. Let the oil heat until it shimmers but isn’t smoking—this is the moment where the pan’s temperature sets the tone for the whole dish. Once the oil is hot, drop in the finely diced onion and stir, letting it soften and turn translucent over 3–4 minutes. Keep an eye on it; if it starts to brown too quickly, lower the heat slightly. This step is crucial because caramelized onion adds a sweet depth that balances the mussels’ briny flavor.
- Add the minced garlic to the pan and sauté for 30 seconds, just until fragrant. The garlic releases its essential oils and creates a fragrant base that will carry through the sauce. Watch for any signs of burning—if the garlic turns dark, it’s bitter, and you’ll have to start over. The quick sauté ensures the garlic’s flavor is bright and not cloying.
- Deglaze the pan with a splash of white wine or clam juice, scraping up any browned bits from the bottom. Those bits are packed with flavor, and deglazing lifts them into the sauce. Let the liquid reduce by about half; this concentrates the flavor and removes the harshness of the wine. If you’re avoiding alcohol, a little broth will work just fine.
- Add the frozen mussels to the skillet, cover with a lid, and let them steam for 5–7 minutes. The mussels should open up fully—discard any that remain closed. The steam from the mussels infuses the sauce with their natural juices, creating a rich base. Keep the lid on; if you lift it too early, the mussels will release too much moisture and the sauce will become watery.
- Once the mussels are cooked, remove the lid and stir in the 1 cup of sour cream, mixing gently to combine. The sour cream should be at room temperature to prevent curdling; if it’s too cold, whisk it lightly before adding. The sauce should thicken slightly, coating the mussels in a glossy, velvety coat. If the sauce looks too thin, let it simmer for an additional minute.
- Season the sauce with salt and pepper to taste. Remember, the mussels already carry saltiness, so start with a small pinch and adjust. The pepper adds a subtle heat that contrasts with the creaminess. Taste the sauce before serving; you want a balance of salty, tangy, and herbaceous flavors.
- Fold in the chopped parsley, stirring until it’s evenly distributed. The parsley adds a burst of green that brightens the dish visually and flavor-wise. Let the dish sit for a minute after adding the parsley; this allows the flavors to meld together and the herbs to release their oils.
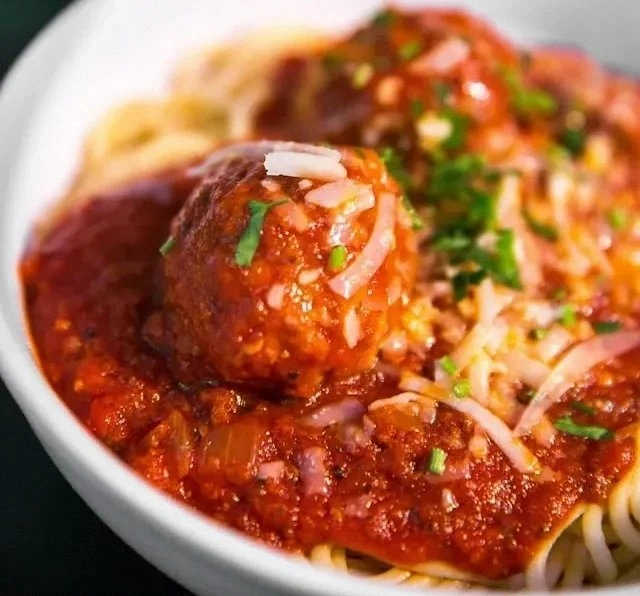
- Serve immediately over crusty bread, pasta, or a bed of sautéed spinach. The bread is perfect for soaking up the creamy sauce, while pasta adds a comforting, hearty base. If you’re serving on a plate, drizzle a little extra olive oil for shine. The dish is best enjoyed hot, as the mussels remain tender and the sauce remains silky.
That’s it—you did it. But hold on, I’ve got a few more tricks that’ll take this to another level. These insider tips will help you perfect every bite and avoid the common pitfalls that can derail even the most enthusiastic cook.
Insider Tricks for Flawless Results
The Temperature Rule Nobody Follows
Cooking mussels at the right temperature is critical. Too high, and they’ll overcook; too low, and they’ll stay frozen inside. Aim for a steady medium heat that keeps the liquid simmering gently. If the pan starts to smoke, reduce the heat immediately. This simple rule ensures the mussels stay tender and the sauce stays silky.
Why Your Nose Knows Best
When the onions start to caramelize, the scent will turn sweet and nutty. That’s the cue that you’re on the right track. Trust your nose; a sweet aroma means the onions are developing flavor, while a burnt smell means you need to lower the heat. This sensory checkpoint saves you from a ruined base.
The 5-Minute Rest That Changes Everything
After removing the mussels, let the pan sit for 5 minutes before serving. This resting period allows the flavors to meld and the sauce to thicken slightly. It also gives the mussels time to cool just enough that they’re safe to touch. A quick rest can elevate a good dish to great.
The Quick De‑Starch Trick
If you’ve used a very watery sour cream, the sauce can separate. To fix it, whisk in a teaspoon of cornstarch mixed with a splash of cold water. Stir vigorously until the sauce thickens. This technique keeps the sauce creamy without adding extra calories.
The Freshness Boost
Right before serving, drizzle a small amount of extra‑virgin olive oil over the dish. The oil adds a glossy finish and a burst of bright flavor that cuts through the richness. If you’re watching calories, a light drizzle is enough to elevate the dish.
Creative Twists and Variations
This recipe is a playground. Here are some of my favorite ways to switch things up:
Mediterranean Kick
Add a pinch of smoked paprika and a splash of tomato sauce to the sauce base. This gives the mussels a smoky, tomato‑rich flavor that pairs well with crusty bread. The paprika also adds a subtle warmth that complements the garlic.
Citrus Burst
Finish the dish with a squeeze of fresh lemon juice and a sprinkle of lemon zest. The citrus brightens the sauce and balances the creaminess. It’s a classic pairing that never fails to impress.
Spicy Heat
Stir in a pinch of cayenne pepper or a handful of crushed red pepper flakes. This adds a gentle heat that contrasts with the mild sauce. The spice works especially well if you’re serving the mussels over rice.
Herb Garden
Swap parsley for a mix of basil and thyme. The basil adds sweetness, while thyme brings earthiness. This herb blend creates a more complex flavor profile that feels like a garden on a plate.
Cheesy Upgrade
Fold in a handful of grated Parmesan or Pecorino Romano into the sauce before serving. The cheese adds a salty, umami boost that pairs beautifully with the mussels. Just be careful not to add too much, or the sauce may become too heavy.
Vegan Version
Replace the sour cream with a dairy‑free alternative like coconut yogurt. Add a splash of plant‑based milk to adjust thickness. This version keeps the creamy texture while being fully plant‑based.
Storing and Bringing It Back to Life
Fridge Storage
Store any leftovers in an airtight container in the refrigerator for up to 2 days. The sauce may thicken slightly as it cools, so stir it back together before reheating. If the mussels have already opened, they’re best eaten fresh, but you can keep them in the fridge if you’re short on time.
Freezer Friendly
For longer storage, freeze the mussels and sauce separately in freezer‑safe bags. The mussels can be frozen for up to 3 months, while the sauce keeps its texture for 1 month. Thaw the mussels in the refrigerator overnight before reheating.
Best Reheating Method
Reheat the sauce gently over low heat, adding a splash of water or broth to loosen it. The mussels should be warmed through, not overcooked. A quick 2–3 minute steam in a covered pot works wonders. When reheated, the sauce will regain its silky texture and the mussels will remain tender.