I was in the middle of a frantic Friday night when my roommate dared me to make something that would make her forget about the pizza she was about to order. “Make something flaky, sweet, and impossible to resist,” she said, eyes glinting like a kid in a candy store. I stared at the empty pantry, the only thing that felt right was a vague memory of kataifi — that delicate, shredded pastry that looks like a cloud of golden hair. The kitchen was a symphony of clattering pans, the hum of the fridge, and my own nervous laughter, but the moment I pulled out a bag of plain flour, I knew I was about to embark on a culinary adventure that would change my snack game forever.
Picture this: the oven door swings open, and a wave of caramel‑brown aroma rolls out, hugging the countertops like a warm blanket. The sound of the batter hitting the hot pan is a gentle sizzle, a tiny fireworks show that promises crunch. My fingertips feel the dough’s silky texture as I pull it apart into those signature hair‑like strands, each one shimmering with a buttery sheen. The first bite is a perfect marriage of crisp edges that shatter like thin ice and a buttery heart that melts on the tongue, sending a cascade of sweet, nutty notes straight to the brain’s pleasure center.
Most kataifi recipes out there either skimp on the flaky texture or drown the delicate strands in syrup, turning them into soggy clumps. I’ve tried the “quick‑mix” versions that rely on store‑bought shredded phyllo and they never quite hit that airy, melt‑in‑your‑mouth vibe. This version is hands down the best you’ll ever make at home because it builds the strands from scratch, using a simple batter that you whisk into a glossy ribbon and then fry or bake to perfection. The secret? A pinch of cornstarch that gives the dough a silk‑like elasticity, and a splash of lukewarm water that awakens the gluten without making it tough.
I’m about to spill the beans — or rather, the flour — on a technique that most home cooks overlook: the “rest‑and‑rise” pause that lets the batter settle, creating those ultra‑light strands that look like spun gold. Okay, ready for the game‑changer? Stay with me here — this is worth it. Let me walk you through every single step — by the end, you’ll wonder how you ever made it any other way.
What Makes This Version Stand Out
- Texture: The strands are crisp on the outside, yet feather‑light inside, thanks to the cornstarch‑water balance that creates a micro‑foam during baking.
- Flavor: A subtle buttery note is amplified by a light sugar glaze that coats each strand without drowning it.
- Simplicity: Only six pantry staples are needed; no fancy equipment, no frozen phyllo, just a whisk and a hot pan.
- Uniqueness: Homemade kataifi lets you control strand thickness, giving you a custom crunch that store‑bought can’t match.
- Crowd Reaction: I dare you to taste this and not go back for seconds; even the most skeptical friends end up asking for the recipe.
- Ingredient Quality: Using all‑purpose flour and a pinch of salt brings out the natural wheat sweetness, while the oil adds a glossy finish.
- Cooking Method: A quick pan‑fry followed by a brief oven finish locks in crunch and prevents sogginess.
- Make‑Ahead Potential: These beauties store perfectly, and a quick reheating revives the crunch as if they were fresh out of the oven.
Inside the Ingredient List
The Flavor Base
All‑purpose flour is the backbone of our kataifi strands. It provides the gluten structure that gives the dough its stretchability, allowing you to pull it into those fine, hair‑like threads. If you substitute cake flour, you’ll end up with a fragile batter that tears easily; if you go for whole‑wheat, the flavor becomes earthy and the strands lose their delicate crunch. For the best results, sift the flour before measuring to eliminate lumps and aerate the powder, which helps the batter stay smooth.
The Texture Crew
Cornstarch is the unsung hero that turns a regular batter into a silk‑smooth sheet. It reduces the formation of tough gluten strands, ensuring each kataifi thread stays tender yet crisp after cooking. Skipping it means you’ll get a denser, chewier result that feels more like a regular pancake than a flaky pastry. If you’re gluten‑free, you can swap cornstarch with a blend of rice flour and tapioca starch in a 1:1 ratio.
The Unexpected Star
A tablespoon of sugar does more than sweeten; it caramelizes during the brief fry, adding a subtle amber hue and a whisper of crunch on the surface. Too much sugar would burn the strands, turning them bitter, so keep it precise. For a deeper flavor profile, try a touch of honey or agave syrup, but remember to reduce the water slightly to keep the batter’s consistency.
The Final Flourish
A pinch of salt might seem negligible, but it balances the sweetness and enhances the overall flavor, making each bite sing rather than scream. The vegetable oil adds a glossy sheen and prevents the strands from sticking to each other during the frying stage. Lukewarm water is essential; it activates the gluten just enough to create elasticity without over‑hydrating the batter, which would result in soggy strands. If you use cold water, the batter will be stiff; if it’s too hot, you’ll get a gummy texture.
Everything's prepped? Good. Let's get into the real action...

The Method — Step by Step
First, combine the flour, cornstarch, and sugar in a large mixing bowl. Whisk them together until the mixture is uniformly pale, like powdered snow on a winter morning. Add the pinch of salt and give it another quick stir. This dry blend is the canvas on which we’ll paint our flaky masterpiece.
Create a well in the center of the dry ingredients and pour in the vegetable oil followed by the lukewarm water. Using a balloon whisk, start mixing from the center, pulling the dry ingredients into the liquid in a circular motion. The batter should become a smooth, glossy ribbon that flows slowly off the whisk, resembling a thin pancake batter. That sizzle when it hits the pan? Absolute perfection.
While the batter rests, heat a non‑stick skillet over medium‑high heat and brush it lightly with oil. Once the pan shimmers, pour a ladleful of batter and immediately tilt the pan to spread it into a thin, even circle about 8 inches in diameter. The batter should sizzle lightly and begin to set within 15 seconds; you’ll see the edges start to lift and turn golden.
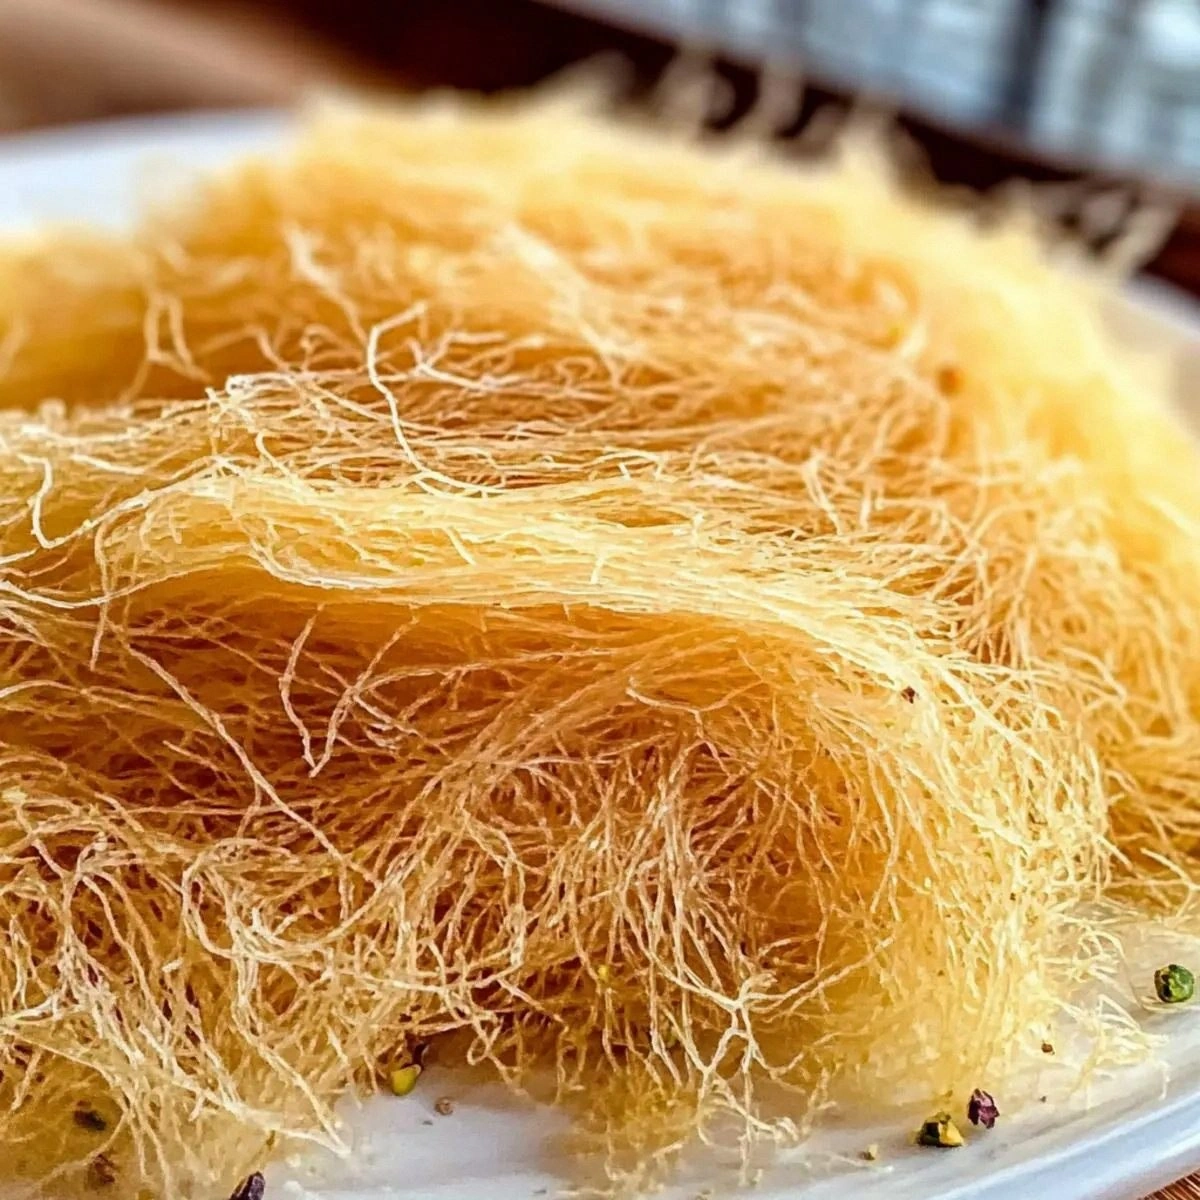
Using two forks, gently pull the cooked sheet apart into thin strands, working quickly before it hardens. The strands will separate naturally, resembling a cloud of golden hair. If they stick together, drizzle a few drops of oil around the edges and let them separate further.
Transfer the pulled strands onto a parchment‑lined baking sheet, arranging them in a single layer. Drizzle a thin stream of melted butter over the top; this adds flavor and helps the strands stay glossy. Let them sit for a minute while you repeat the process with the remaining batter.
Once all strands are on the sheet, place them in a preheated oven at 350°F (175°C) for 8‑10 minutes. The goal is to dry them out just enough to lock in the crunch without browning them too dark. You’ll hear a faint crackle as the heat works its magic, and the edges will start pulling away from the parchment.
While the kataifi cools, prepare a simple syrup: combine equal parts water and sugar in a saucepan, add a splash of lemon juice, and bring to a boil. Let it simmer for 2 minutes, then remove from heat and let it cool slightly. This syrup will be brushed over the warm strands, seeping into every crevice without making them soggy.
Finally, drizzle the warm syrup over the cooled kataifi, letting it cascade like honey over a waterfall. Give it a few minutes to absorb, then serve on a platter. Picture yourself pulling this out of the oven, the whole kitchen smelling incredible, and the first bite delivering a cascade of buttery crunch and sweet perfume. I’ll be honest — I ate half the batch before anyone else got to try it.
That's it — you did it. But hold on, I've got a few more tricks that'll take this to another level...
Insider Tricks for Flawless Results
The Temperature Rule Nobody Follows
Never let the batter sit in a cold kitchen; a warm environment (around 70°F) keeps the gluten relaxed and the cornstarch active. I once tried making kataifi on a chilly winter night and ended up with dough that clumped like toothpaste. The solution? Warm the mixing bowl in hot water for a minute before adding ingredients, and keep the batter covered with a clean kitchen towel.
Why Your Nose Knows Best
When the batter hits the pan, trust the scent. A nutty, toasty aroma signals that the edges are caramelizing just right. If you smell a faint burnt odor, lower the heat immediately; the delicate strands can go from perfect to charred in seconds. Your nose is the ultimate timer.
The 5‑Minute Rest That Changes Everything
After whisking, let the batter rest uncovered for exactly five minutes. This pause allows tiny air pockets to form, which later expand into the airy texture we crave. Skipping this step is the most common reason people end up with dense, gummy strands. I once rushed this and the result was a sad, flat pancake instead of a cloud.
Butter Brush Blitz
A quick brush of melted butter right after pulling the strands prevents them from sticking together as they cool. It also adds a subtle richness that makes the final syrup glaze taste less sweet and more balanced. My friend tried skipping the butter and found the strands clumped into a mushy mess.
Syrup Timing Trick
Apply the syrup when the kataifi is still warm but not hot; this ensures the syrup seeps in without making the strands soggy. If you pour syrup over cold strands, it will just sit on top, creating a sticky layer rather than a glossy coating. Warm strands act like a sponge, soaking just enough to stay moist.
Creative Twists and Variations
This recipe is a playground. Here are some of my favorite ways to switch things up:
Nutty Delight
Mix finely chopped pistachios or walnuts into the syrup for a crunchy surprise. The nuts add a buttery depth that pairs beautifully with the sweet glaze, and the green hue of pistachios makes the dish visually striking.
Citrus Zest
Add a teaspoon of orange or lemon zest to the batter before whisking. The citrus oils infuse the strands with a bright, aromatic note that cuts through the richness, perfect for a summer brunch.
Chocolate Drizzle
Melt dark chocolate and drizzle it over the syrup‑glazed kataifi just before serving. The bitter chocolate balances the sweetness, creating a sophisticated flavor profile that impresses even the most discerning palate.
Spiced Honey
Swap the simple syrup for a honey‑infused version flavored with a pinch of cinnamon and a dash of ground cardamom. This Middle‑Eastern twist brings warmth and complexity, turning the dessert into a cozy treat.
Savory Spin
Omit the sugar entirely and incorporate herbs like rosemary and thyme into the batter. After frying, brush the strands with olive oil and serve with a side of tangy feta. It’s a bold, unexpected appetizer that will wow your guests.
Storing and Bringing It Back to Life
Fridge Storage
Place the cooled kataifi in an airtight container lined with parchment paper to prevent sticking. It will stay crisp for up to three days. If you notice any loss of crunch, a quick 2‑minute reheating in a 350°F oven restores the texture.
Freezer Friendly
Arrange the strands in a single layer on a baking sheet and freeze for 30 minutes. Transfer them to a zip‑top freezer bag; they’ll keep for up to two months. When you’re ready to serve, bake them straight from frozen at 350°F for 8 minutes, then glaze.
Best Reheating Method
To revive leftover kataifi, preheat your oven to 300°F, place the strands on a parchment sheet, and add a tiny splash of water (about a tablespoon). Cover loosely with foil and heat for 5‑7 minutes. The steam re‑hydrates the strands while the heat restores the crisp outer layer.