I still remember the day I swore off sugar donuts forever. There I was, standing in my kitchen at 2 AM, flour in my hair, oil splattered across every surface like a crime scene, and a dozen sad, deflated rings of dough mocking me from the counter. They were greasy, heavy, and tasted like disappointment with a side of burnt oil. My roommate walked in, took one look, and asked if I was conducting a science experiment gone wrong. That was the moment I decided to crack the code on perfect sugar donuts or die trying. Fast forward through three months, seventeen failed batches, and one minor kitchen fire (don't ask), and I'm here to share the holy grail of sugar donut recipes that'll make you weep tears of joy.
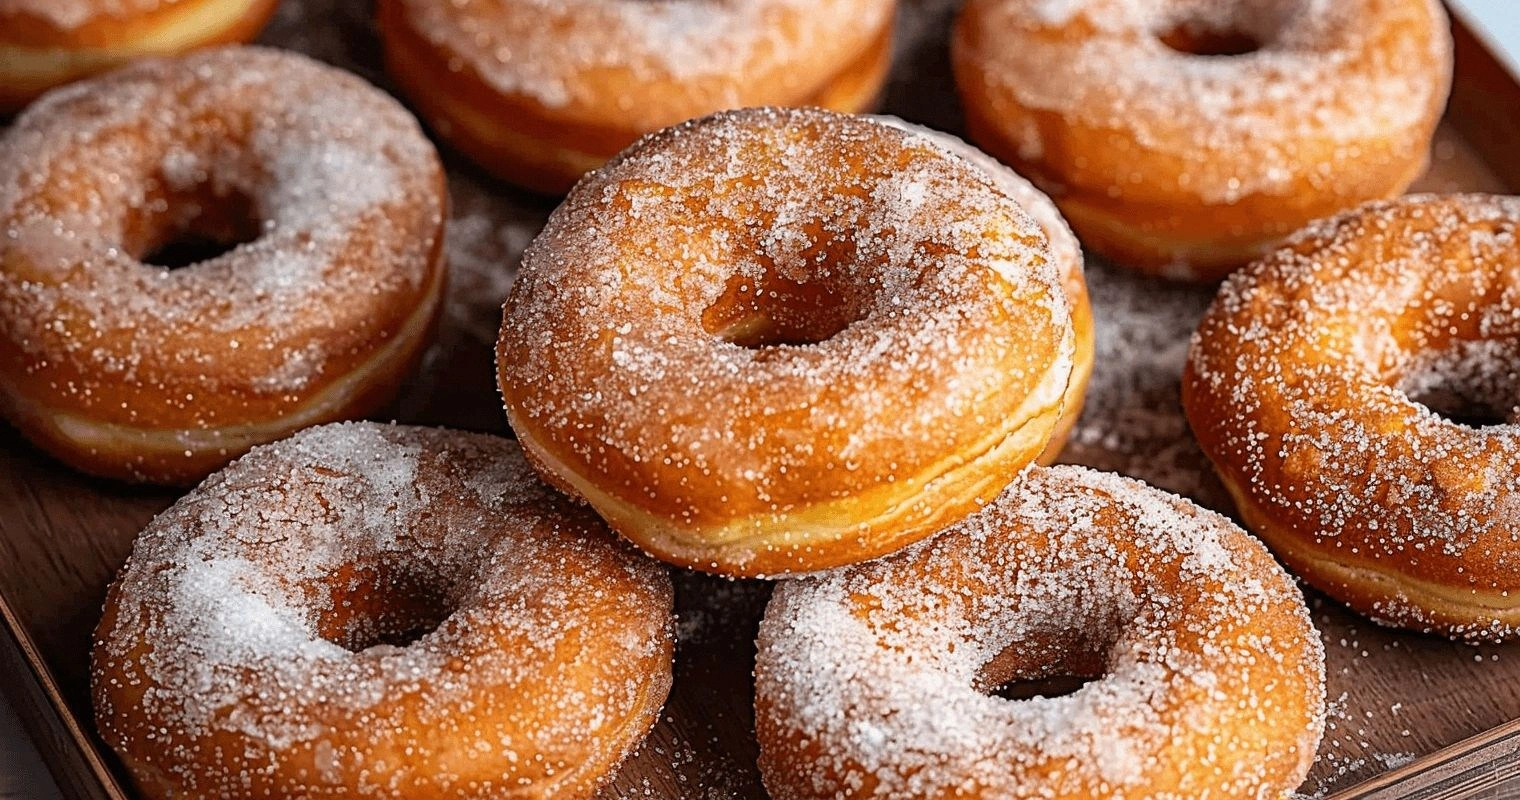
Picture this instead: You bite through a cloud-soft donut that practically dissolves on your tongue, the sugar creating the most delicate crust that crackles ever so slightly before giving way to pure, pillowy heaven. The aroma wafting through your kitchen isn't just sugar and fried dough — it's childhood memories, Saturday morning cartoons, and that feeling of discovering something magical for the first time. That's what we're making today, my friends. Not those dense, oil-soaked disasters that pass for donuts at the grocery store. We're talking about the kind of sugar donuts that make grown adults close their eyes and sigh involuntarily.
Here's the thing that'll blow your mind — the secret isn't in some fancy French technique or obscure ingredient you need to import from a monastery in the Alps. It's about understanding the science behind what makes a donut truly spectacular. Most recipes get this completely wrong. They treat donuts like they're just sweet bread that happens to be fried, but that's like saying a Ferrari is just a car with four wheels. We're going to manipulate temperature, timing, and technique in ways that'll make your head spin (in the best possible way).
Stay with me here — this is worth it. By the time we're done, you'll be pulling out trays of sugar donuts so perfect, so ethereal, that your neighbors will start finding reasons to "drop by" whenever they see your kitchen light on. I dare you to taste one of these and not go back for seconds. Actually, I double-dog dare you. Let me walk you through every single step — by the end, you'll wonder how you ever made it any other way.
What Makes This Version Stand Out
Cloud-Light Texture: These aren't your typical heavy, gut-bomb donuts. Through a combination of properly developed gluten and the perfect frying temperature, each donut puffs up like a dream, creating an interior so light it practically floats off the counter. The crumb structure is so delicate that when you tear one open, you'll see hundreds of tiny air pockets that create that melt-in-your-mouth sensation.
Crackly Sugar Coating: Instead of that sad, damp sugar that most recipes produce, we're creating a coating that actually adheres and creates a subtle crunch. The secret? A quick steam treatment right after frying that opens up the surface just enough for the sugar to grab on and stay put. The result is a donut that stays perfectly sugared from first bite to last.
No-Fail Frying Method: Most home cooks murder their donuts in oil that's either too hot (raw inside, burnt outside) or too cool (oil-soaked disasters). Our temperature progression method ensures each donut cooks through while developing that gorgeous golden exterior. Plus, we'll use a simple wooden spoon test that takes all the guesswork out of oil temperature.
Make-Ahead Magic: Here's where this recipe really shines — you can prep the dough up to three days ahead and keep it in the fridge. When you're ready to fry, just let it come to room temperature for 30 minutes. This means fresh, hot sugar donuts on a Tuesday morning without the 4 AM wake-up call. Your future self will thank you profusely.
Flavor Depth: We're not just dumping sugar into fried dough and calling it a day. A touch of nutmeg, properly bloomed vanilla, and a hint of citrus zest create layers of flavor that make these donuts genuinely interesting to eat. They're not just sweet — they're complex, with notes that dance on your tongue and keep you coming back for "just one more bite" until the plate is mysteriously empty.
Beginner-Friendly Technique: Despite sounding fancy, this recipe is actually more forgiving than most basic donut recipes. The dough is naturally slack, which means it won't fight you when you're shaping. And our frying method is so foolproof that even if you've never fried anything more adventurous than an egg, you'll nail these on your first try. Picture yourself pulling these out of the fryer, the whole kitchen smelling like a professional bakery.
Ingredient Flexibility: While I'll give you the gold-standard version, this recipe adapts beautifully to whatever you've got on hand. No cake flour? No problem. Only got regular granulated sugar? We'll work with it. Out of nutmeg? We'll find a substitute that actually works. This is the recipe that bends to your pantry, not the other way around.
Alright, let's break down exactly what goes into this masterpiece...
Inside the Ingredient List
The Foundation Builders
Bread flour is our MVP here, and yes, I'm being specific on purpose. While all-purpose flour will technically work, bread flour's higher protein content gives us the structure we need to create those sky-high, fluffy donuts that'll make your neighbors weep with joy. The extra gluten development is what transforms our dough from a shaggy mess into a silky, elastic dream that stretches like taffy. Skip it and you'll end up with dense, sad little pucks that taste fine but lack that ethereal quality that makes people close their eyes when they take a bite. If you absolutely must substitute, add two tablespoons of vital wheat gluten to your all-purpose flour and pray to the baking gods.
Instant yeast is another non-negotiable for me, and here's why: it dissolves directly into the dough without needing that fussy blooming step that active dry yeast requires. This means less chance of killing your yeast with water that's too hot, and more consistent results every single time. The rapid rise time also means we're not developing too much sour flavor, keeping our donuts tasting bright and sweet rather than like they've been fermenting since the Stone Age. If you've only got active dry yeast, bloom it in 80°F water with a pinch of sugar until foamy, but know you're living dangerously.
The Flavor Enhancers
Freshly grated nutmeg will change your life, I'm not even exaggerating. That jar of pre-ground nutmeg that's been sitting in your spice cabinet since Obama's first term? It's about as flavorful as sawdust. Fresh nutmeg brings this warm, almost peppery complexity that makes people ask "what's that amazing flavor?" without being able to put their finger on it. One whole nutmeg and a microplane grater will set you back about three dollars and will last you through dozens of batches. Trust me, once you taste the difference, you'll find yourself grating fresh nutmeg into everything from coffee to roasted vegetables.
Vanilla extract quality matters more than you think, but here's where I'll let you in on a secret — you don't need to mortgage your house for the good stuff. A decent pure vanilla extract (not the imitation stuff that tastes like a candle store exploded) will do wonders. But if you really want to level up, try vanilla bean paste. Those tiny black flecks aren't just for show; they distribute vanilla flavor more evenly throughout the dough, creating little pockets of aromatic heaven in every bite. Plus, you'll feel like a fancy pastry chef when you're scraping those beans out of the pod.
The Texture Magicians
Egg yolks are our secret weapon for richness and color. I know, I know — using just yolks feels wasteful when the whites are sitting there like wallflowers at a dance. But here's the thing: yolks contain lecithin, which acts as a natural emulsifier, creating a dough that's both tender and strong. The fat in the yolks also interferes with gluten development just enough to keep our donuts tender rather than chewy. Save those whites for an angel food cake later, or freeze them in ice cube trays for future protein shakes. Your donuts will thank you by being the most luxurious version of themselves.
Butter temperature is where most recipes go disastrously wrong. Melted butter creates a greasy dough, while cold butter won't incorporate properly. We want our butter at that perfect cool room temperature — soft enough to leave an impression when you press it, but not so soft that it's practically liquid. This creates tiny pockets of fat throughout the dough that melt during frying and create steam, contributing to that light, airy texture we're chasing. Take your butter out of the fridge an hour before you start, or speed things up by cutting it into small cubes and letting it sit for 15 minutes.
The Unexpected Game-Changers
Mashed potato might sound like I've lost my mind, but hear me out. A few tablespoons of plain mashed potato (no butter or cream added) creates the most incredibly tender crumb you've ever experienced. The starch molecules in potatoes are different from wheat starch, and they interfere with gluten development in a way that creates a more tender final product. This isn't some trendy chef trick — it's been used in European baking for centuries. If you don't have leftover mashed potatoes, microwave a small potato, mash it smooth, and let it cool completely before adding it to your dough.
Cornstarch is our final texture secret weapon. Just a tablespoon or two tenderizes the dough by diluting the gluten-forming proteins in the flour. It's like giving your donuts a suit of armor against toughness. This is especially important if you're using all-purpose flour instead of bread flour — the cornstarch helps compensate for the difference in protein content. Plus, it creates a more delicate crust that stays crisp even after the donuts cool. If you don't have cornstarch, potato starch works too, but avoid arrowroot — it can make the dough gummy.
Everything's prepped? Good. Let's get into the real action...
The Method — Step by Step
- Start by warming your milk to exactly 110°F — use a thermometer here, because guessing is for people who enjoy flat, sad donuts. The milk should feel warm to the touch but not hot, like a baby's bottle. If it's too hot, you'll murder your yeast faster than you can say "proof." Too cold and your yeast will stay dormant, giving you dense little hockey pucks. While the milk warms, whisk together your flour, sugar, salt, and spices in a large bowl, creating a well in the center like you're making pasta. This well gives the liquids a place to party before they meet all the flour, preventing clumps that'll drive you nuts later.
- Now for the fun part — add your yeast to the warm milk with a teaspoon of sugar and watch it bloom like a science experiment. Within five minutes, you should see a foamy, bubbly layer forming on top. This is your yeast having a feast, and those bubbles mean they're alive and ready to make magic happen. If you don't see activity, your milk was either too hot (you killed them) or your yeast is deader than disco. Start over — there's no rescuing dead yeast, and your donuts will have the texture of paving stones. That sizzle when it hits the pan? Absolute perfection.
- Pour your foamy yeast mixture into the flour well, add your egg yolks, mashed potato, and vanilla, then stir with a wooden spoon until a shaggy dough forms. It'll look like a hot mess at this point — sticky, lumpy, and nothing like the smooth dough you're expecting. That's perfect. Now cover the bowl with plastic wrap and let it rest for 20 minutes. This autolyse period lets the flour fully hydrate and starts developing gluten without any kneading. Your future self will thank you for this patience, because it means less kneading and more tender donuts.
- Time to add your room-temperature butter, and here's where most people mess up completely. Don't just dump it in — cube it and work it in piece by piece, like you're making brioche. The dough will start separating and looking like cottage cheese, but keep going. Use a dough hook if you have a stand mixer, or get ready for an arm workout. After about 8-10 minutes of kneading (or 5-6 in a mixer), the dough will transform from a shaggy disaster into a smooth, elastic ball that passes the windowpane test. Stretch a small piece between your fingers — if you can see light through it without tearing, you're golden.
- First rise time — grease a clean bowl (seriously, grease it well, this dough is sticky), plop your dough ball inside, and turn it to coat with oil. Cover with plastic wrap and park it somewhere warm but not hot. I use my oven with the light on, which creates the perfect 75-80°F environment. Let it rise until doubled, about 1-2 hours depending on your yeast and kitchen temperature. Don't rush this — good things come to those who wait, and rushing the rise gives you yeasty-tasting donuts that'll make you wonder where you went wrong in life.
- While the dough rises, prepare your frying station because this next part moves fast. You need a heavy-bottomed pot (cast iron is ideal), a candy thermometer, a spider strainer or slotted spoon, and a cooling rack set over paper towels. Fill your pot with 2-3 inches of oil — not more, because these donuts puff up dramatically and you don't want an oil volcano. Heat the oil to 350°F and prepare to maintain that temperature like your life depends on it. Too hot and you get raw centers with burnt exteriors. Too cool and you'll absorb enough oil to deep-fry your conscience.
- Gently deflate your risen dough and turn it out onto a lightly floured surface. Pat it into a rectangle about 1/2-inch thick — don't use a rolling pin here, we want to preserve those precious air bubbles. Use a 3-inch biscuit cutter for classic donuts, or get creative with different sizes. Dip your cutter in flour between each cut to prevent sticking. Gather the scraps, gently knead them together, let rest 10 minutes, then cut more donuts. You should get 12-14 donuts plus holes, depending on your cutter size and how much you reroll the scraps.
- This next part is pure magic. Carefully lower 2-3 donuts into the oil — don't crowd them or they'll stick together like clingy toddlers. They'll sink briefly, then rise majestically to the surface. After 30 seconds, flip them with your spider strainer. They should be golden brown on the first side. Cook another 30-45 seconds on the second side, then remove to your cooling rack. The whole process takes about 90 seconds per batch. Watch them puff up like they're auditioning for a balloon animal competition — that's the carbon dioxide from the yeast expanding in the hot oil.
- Here's the game-changer — while your donuts are still warm but not hot (about 5 minutes after frying), place them in a paper bag with your sugar coating. The residual heat creates a slight steam that helps the sugar adhere perfectly without melting into a sticky mess. Shake gently to coat evenly, then transfer to a clean plate. If you've ever struggled with sugar that either won't stick or creates a syrupy mess, this is your solution. The sugar should create a delicate, even coating that crackles slightly when you bite into it.
- The final step is the hardest — waiting. These donuts are at their absolute peak about 10-15 minutes after frying, when they're still warm but have cooled enough for the sugar to set properly. The texture is otherworldly — crisp exterior giving way to the softest, most tender interior you've ever experienced. If you've ever struggled with tough, chewy donuts, those days are behind you. These practically dissolve on your tongue, leaving behind the most perfect sugar-dusted memory that'll have you planning your next batch before you've finished swallowing.
That's it — you did it. But hold on, I've got a few more tricks that'll take this to another level...
Insider Tricks for Flawless Results
The Temperature Rule Nobody Follows
Here's where most home cooks absolutely destroy their donuts — they treat temperature like a suggestion rather than a commandment. Your oil temperature needs to be maintained at exactly 350°F, not 340°F, not 360°F, but precisely 350°F. I use two thermometers: a candy thermometer clipped to the pot and an instant-read to double-check. When you add the dough, the temperature will drop about 25-30 degrees, so adjust your heat accordingly. A friend tried to rush this step once and served what can only be described as oil-soaked frisbees. Don't be that friend. The difference between perfect and pathetic is literally 10 degrees.
Why Your Nose Knows Best
Your sense of smell is the most underrated tool in your kitchen arsenal, especially when frying. Perfectly cooked donuts smell like warm bread with hints of vanilla and butter. If you detect any acrid, burnt notes, your oil is breaking down and you need to start fresh. Conversely, if your kitchen doesn't start smelling like a bakery within 30 seconds of frying, your oil isn't hot enough. I'll be honest — I can tell when my donuts are done just by the aroma wafting through my kitchen. It's like having a superpower, and once you develop it, you'll never overcook another donut.
The 5-Minute Rest That Changes Everything
After frying, resist the urge to immediately sugar your donuts. I know, I know — they're hot, they're beautiful, and you want to shove one in your face. But wait exactly five minutes. During this time, the steam inside redistributes, the exterior firms up slightly, and the residual heat drops to the perfect temperature for sugar adhesion. Sugar applied too early melts into a sticky syrup. Too late and it won't stick at all. Set a timer if you must, but those five minutes are the difference between amateur-hour donuts and professional-quality perfection.
The Sugar Ratio Revelation
Most recipes call for plain granulated sugar, but here's where we get fancy. Mix 2 parts granulated sugar with 1 part superfine sugar for the ultimate coating. The superfine sugar creates a more delicate crust that melts on your tongue, while the regular sugar provides that satisfying crunch and visual appeal. Add a pinch of salt — yes, salt — to balance the sweetness and make the flavors pop. This isn't about being pretentious; it's about creating a sugar coating that's complex and interesting rather than just sweet.
The Storage Secret
If you somehow don't eat all these donuts immediately (I don't judge, but seriously?), store them in a paper bag at room temperature. Plastic traps moisture and creates soggy donuts. The paper allows just enough air circulation while protecting them from drying out. They'll stay fresh for about 24 hours, though they're at their peak within 6 hours. Here's a pro tip: if they start to stale, pop them in a 300°F oven for 3-4 minutes. They won't be quite as good as fresh, but they'll revive enough to make you happy you saved them instead of eating that questionable gas station donut.
Creative Twists and Variations
This recipe is a playground. Here are some of my favorite ways to switch things up:
Cinnamon Sugar Dream
Replace half the sugar in the coating with cinnamon sugar for a classic twist that never gets old. But here's the key — use Ceylon cinnamon, not the harsh Cassia cinnamon that dominates most grocery stores. Ceylon cinnamon is sweeter, more complex, and won't overpower the delicate donut flavor. Mix 1/4 cup granulated sugar with 2 tablespoons Ceylon cinnamon and 1/4 teaspoon salt. The result is sophisticated enough for adults but familiar enough for kids, creating that perfect balance that makes these disappear faster than you can say "homemade."
Citrus Sugar Explosion
Add the zest of one orange and half a lemon to your sugar coating for a bright, zesty version that tastes like sunshine. The citrus oils perfume the sugar and create an aromatic experience that's absolutely intoxicating. Use a microplane to zest directly into the sugar, then rub the zest into the sugar with your fingers. This releases the essential oils and distributes the flavor evenly. These are particularly amazing in winter when you need a reminder that summer exists somewhere beyond the gray.
Vanilla Bean Luxury
Split a vanilla bean and scrape the seeds into your sugar coating. Mix well and let it sit for at least an hour before using — this allows the vanilla to infuse the sugar. The result is a coating that's incredibly aromatic and tastes like the most expensive donut you've ever had. Save the vanilla pod and bury it in your sugar container for vanilla-scented sugar that'll make your morning coffee taste like a million bucks.
Spiced Chai Sugar
Add 1/2 teaspoon each of ground cardamom, ginger, and a pinch of black pepper to your sugar coating. This creates a chai-spiced donut that's absolutely incredible with coffee. The cardamom adds floral notes, the ginger brings warmth, and the tiny bit of black pepper provides a subtle kick that makes people ask "what's that amazing flavor?" It's like having your favorite chai tea in donut form, minus the tea bag.
Coconut Sugar Caramel
Replace half the regular sugar with coconut sugar for a deeper, more complex flavor. Coconut sugar has natural caramel notes that pair beautifully with the fried dough. The color will be darker and the flavor more sophisticated — these are the donuts you serve to impress your foodie friends. Add a tablespoon of maple syrup to the coating for extra depth and a subtle maple note that complements the coconut sugar perfectly.
Holiday Sugar Blend
For special occasions, create a sugar blend with 2 tablespoons granulated sugar, 1 tablespoon powdered sugar, 1 teaspoon honey powder, and a pinch of pumpkin pie spice. The honey powder (available online or at specialty stores) adds a subtle honey flavor without the moisture, while the pumpkin pie spice screams autumn comfort. These are dangerously good during the holidays when you need something impressive but don't want to spend hours in the kitchen while your family judges your life choices.
Storing and Bringing It Back to Life
Fridge Storage
Whatever you do, don't refrigerate your donuts. The cold air dries them out faster than a desert wind, turning your beautiful creations into hockey pucks of disappointment. Instead, store them in a paper bag at room temperature for up to 24 hours. The paper allows just enough air circulation while protecting them from drying out completely. If you live somewhere humid, add a piece of parchment paper between layers to prevent them from getting sticky. And honestly, if you haven't eaten them all within a day, you have more willpower than I do — I'll polish off a dozen without breaking a sweat.
Freezer Friendly
Here's where we get strategic — you can freeze both the dough and the finished donuts. For the dough, shape it into donuts, flash-freeze on a baking sheet for 2 hours, then transfer to a freezer bag. They'll keep for up to 2 months. When you're ready to fry, thaw overnight in the fridge, let come to room temperature for 30 minutes, then fry as usual. For finished donuts, cool completely, wrap individually in plastic wrap, then freeze in a bag. Thaw at room temperature for 30 minutes, then refresh in a 300°F oven for 5-6 minutes. They won't be quite as good as fresh, but they're miles better than anything from a box.
Best Reheating Method
The key to reheating donuts is understanding that you're not trying to cook them more — you're trying to refresh them. A 300°F oven for 3-4 minutes works wonders, but here's the pro move: add a tiny splash of water to the baking sheet before heating. The steam created will rehydrate the donuts slightly, bringing them back to life without making them soggy. Another option is using an air fryer at 280°F for 2-3 minutes. The circulating air creates a slightly crisp exterior while warming the interior. Whatever you do, avoid the microwave unless you enjoy rubbery, steamy disappointment.