I was staring at a half‑baked soufflé that had turned into a sad, collapsed heap. The kitchen smelled of burnt sugar and regret, a scent that felt like a betrayal of my own culinary ambition. In that moment, I thought, “If I can rescue this, I can rescue anything.” The idea of turning a disaster into a dessert is a recipe for redemption, and I was hungry for a redemption story. I grabbed a handful of ingredients from the back of my fridge and decided to give a classic comfort food a caffeinated twist.
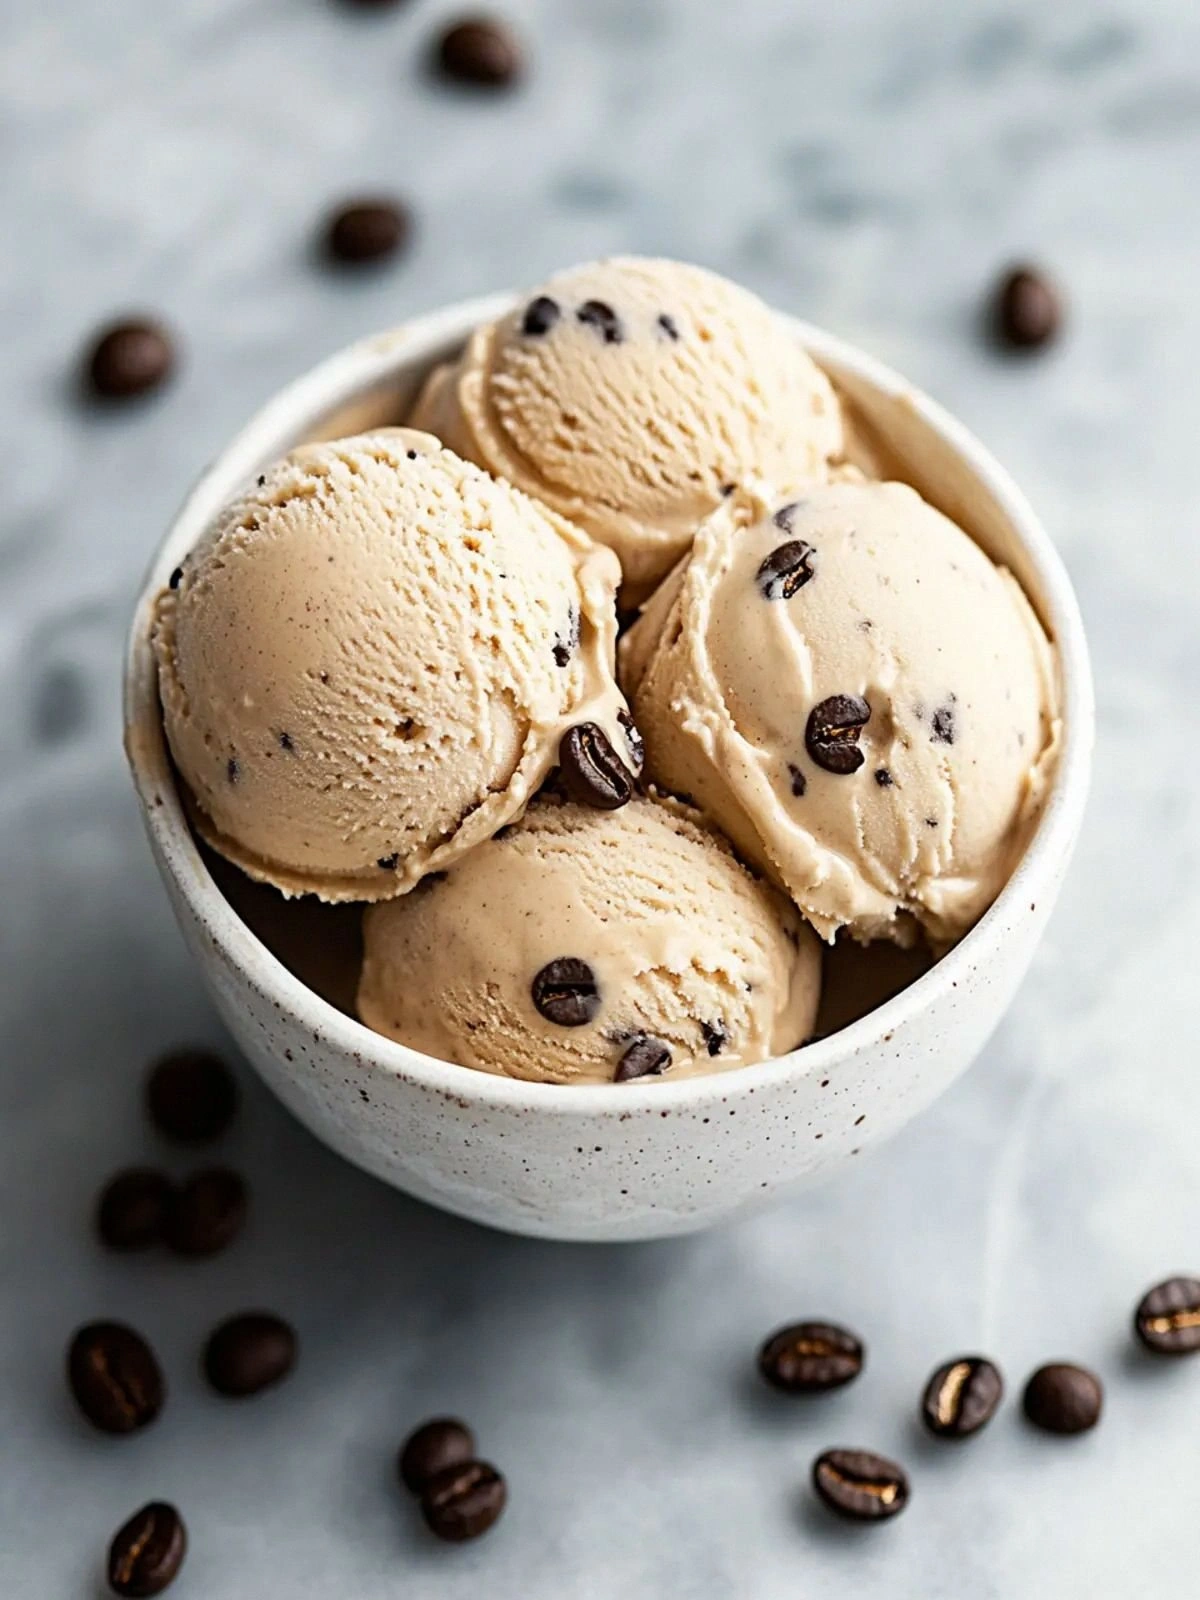
The next thing I craved was something that could soothe the burnt‑sugar sting with a punch of deep, roasted flavor. A few minutes later, my phone buzzed with a notification: a friend had posted a photo of espresso‑infused cottage cheese ice cream that looked like liquid velvet. The image alone made my mouth water—dark chocolate shards glimmered like tiny moons against a creamy backdrop. I could almost hear the faint hiss of the ice cream churn, and the anticipation was a tangible thing that made my stomach growl.
I was determined to make the recipe my own, but I also wanted to keep it simple enough for a weekday night. So I pulled out the essential ingredients: cottage cheese, maple syrup, sugar, instant espresso powder, vanilla, a splash of milk, a pinch of salt, and a generous handful of dark chocolate. I knew that the key to a silky texture would be blending the cottage cheese to a fine paste, and that the espresso would need to be balanced with the sweetness of maple syrup. I was ready to dive into the world of espresso‑infused dairy, and I couldn’t wait to taste the first bite.
The secret sauce, or rather the secret base, is that the cottage cheese’s high protein content gives the ice cream a rich mouthfeel without the heaviness of cream. The espresso powder, when dissolved in a splash of milk, releases a deep, almost bitter aroma that cuts through the sweetness of maple syrup and sugar. The dark chocolate adds a subtle bitterness and a crunchy texture that contrasts beautifully with the smoothness of the mixture. The result? A dessert that feels indulgent, yet is surprisingly light and refreshingly balanced.
I dare you to taste this and not go back for seconds. This is hands down the best version you'll ever make at home, and I’m not exaggerating. The first spoonful will leave you wondering why you ever settled for ordinary ice cream. Picture yourself pulling this out of the freezer, the whole kitchen smelling incredible, and the moment your family’s eyes light up in surprise. Stay with me here—this is worth it. Let me walk you through every single step, and by the end, you'll wonder how you ever made it any other way.
What Makes This Version Stand Out
- Texture: The cottage cheese provides a silky, custard‑like mouthfeel that melts in your mouth like a dream. It’s the secret to a creamy consistency without the need for heavy cream or churners.
- Flavor: The instant espresso powder delivers a bold, roasted depth that balances the maple syrup’s subtle sweetness. The result is a complex profile that lingers on the palate.
- Sweetness: Maple syrup and granulated sugar are perfectly balanced to avoid overpowering the coffee notes. The sweetness is just enough to satisfy a sweet tooth without drowning the espresso.
- Convenience: No special equipment is required—just a blender, a small saucepan, and a freezer. This recipe is a perfect weekend treat that doesn’t demand hours in the kitchen.
- Versatility: The dark chocolate shards add a delightful crunch and a hint of bitterness that pairs wonderfully with the espresso. You can swap them for cocoa nibs or white chocolate if you prefer.
- Nutrition: With 23 grams of protein per serving and a moderate carb profile, it’s a dessert that can fit into a balanced diet while still feeling indulgent.
Alright, let's break down exactly what goes into this masterpiece…
Inside the Ingredient List
The Flavor Base
The instant espresso powder is the star of this dessert, delivering a robust, roasted flavor that cuts through the sweetness. I recommend using a high‑quality espresso powder for a richer taste, as low‑grade powders can taste chalky. If you prefer a milder coffee note, reduce the espresso to ½ tablespoon; the result will be smoother but still distinctly caffeinated. This component also gives the ice cream a subtle color that hints at the chocolate shards that will later dance on top.
The Sweetener Mix
Maple syrup and granulated sugar work together to create a layered sweetness. Maple syrup adds a caramel‑like depth that pairs well with coffee, while sugar ensures the mixture freezes properly by lowering the freezing point. If you’re watching your sugar intake, you can replace the granulated sugar with a sugar substitute that can withstand freezing, but be aware that the texture may change slightly. The ratio of 2 tablespoons maple to 2 tablespoons sugar is a sweet spot that many people find just right.
The Creamy Core
Full‑fat cottage cheese provides the protein and fat needed for a creamy texture. It’s also a great source of calcium and helps keep the ice cream from becoming too icy. If you can’t find cottage cheese, Greek yogurt can be a substitute, but the flavor profile will shift toward tanginess. A pinch of salt balances the sweetness and highlights the espresso’s depth, so don’t skip it.
The Final Flourish
Finely chopped dark chocolate adds both visual appeal and a crunchy contrast to the smooth base. The bitterness of the chocolate complements the coffee, creating a sophisticated flavor profile. For a sweeter twist, you could use milk chocolate, but the dark chocolate’s lower sugar content keeps the dessert from becoming cloying. The chocolate also melts slightly during the freezing process, creating a delightful texture that melts in your mouth.
Everything's prepped? Good. Let's get into the real action…
The Method — Step by Step
- First, combine the cottage cheese, maple syrup, and granulated sugar in a high‑speed blender. Blend on high for 30 seconds until the mixture is completely smooth and free of lumps. The goal is a silky paste that will hold together during freezing. While blending, you’ll notice a subtle, sweet aroma that hints at the espresso coming soon.
- Next, whisk in the instant espresso powder and vanilla extract. Stir until the espresso is fully dissolved and the mixture has a deep, almost chocolatey hue. If the mixture looks too thin, let it sit for a minute to thicken slightly; the protein will set a bit. This step is crucial for distributing the coffee flavor evenly.
- Add the tablespoon of milk to the blender. This small liquid boost helps the mixture freeze more smoothly, preventing ice crystals from forming. Blend for an additional 10 seconds just to integrate the milk, but avoid over‑blending which could make the mixture too runny. The texture should feel thick yet pourable.
- Transfer the mixture to a shallow dish or a zip‑lock bag, and place it in the freezer for 30 minutes. This chilling step helps the mixture set enough that you can fold in the chocolate shards without them sinking to the bottom. While waiting, you can prep the chocolate: finely chop it into small, bite‑size pieces so that each scoop has a burst of chocolate.
- After the initial chill, fold in the dark chocolate shards gently with a spatula. This ensures even distribution and prevents the chocolate from sinking to the bottom. The mixture should feel like a rich, dark custard with specks of chocolate dancing through it. This step is where the texture truly transforms.
- Return the mixture to the freezer for another 2–3 hours, or until it’s firm enough to scoop. If you prefer a softer texture, reduce the freezing time to 1.5 hours. The key is to let the ice crystals form slowly to maintain a creamy mouthfeel. While freezing, keep an eye on the mixture to avoid over‑freezing, which can make it too hard.
- When the ice cream is ready, scoop it into bowls or cones. If you like, garnish with a few extra chocolate shards or a dusting of espresso powder for an extra kick. The presentation is simple yet elegant—just a spoonful of silky, coffee‑laden delight. Serve immediately for the best texture.
That's it — you did it. But hold on, I've got a few more tricks that'll take this to another level. These insider tips will elevate your dessert from good to unforgettable.
Insider Tricks for Flawless Results
The Temperature Rule Nobody Follows
The cottage cheese should be at room temperature before blending. Cold cottage cheese will resist blending and leave lumps. Let it sit out for 10 minutes, and you’ll get a smoother base. This small step can make the difference between a silky scoop and a grainy mess.
Why Your Nose Knows Best
As soon as the espresso dissolves, the kitchen will fill with a roasted aroma that signals the coffee is fully integrated. Trust that scent; if it’s still faint, give it another stir. A strong espresso scent means the flavor will carry through each bite. This is a sensory checkpoint you can’t afford to skip.
The 5-Minute Rest That Changes Everything
After folding in the chocolate, let the mixture rest for 5 minutes before refreezing. This short pause allows the chocolate to settle and the mixture to thicken slightly, preventing the shards from sinking. It also gives the flavors a chance to mingle. A quick rest can elevate the texture to silky perfection.
The Sweetness Balancer
If you find the ice cream too sweet after tasting, simply stir in a pinch of sea salt. The salt will cut the sweetness and bring out the espresso’s depth. This trick works wonders for those who prefer a more balanced dessert. It’s a classic culinary hack that turns a sweet treat into a sophisticated experience.
The Final Touch
Just before serving, drizzle a thin line of maple syrup over the top. It adds a glossy finish and a hint of caramel flavor. The syrup also creates a subtle contrast in color, making the dessert look more appealing. This final flourish is a simple, elegant way to finish the dish.
Creative Twists and Variations
This recipe is a playground. Here are some of my favorite ways to switch things up:
Vanilla Bean Espresso
Swap the vanilla extract for a split vanilla bean. The natural sweetness of the bean enhances the espresso flavor and adds a subtle floral note. It also gives the ice cream a more authentic, artisanal vibe. Try it for a gourmet twist.
Nutty Espresso Crunch
Add chopped toasted almonds or hazelnuts to the mixture before freezing. The crunch contrasts beautifully with the creamy base, while the nutty flavor complements the coffee. This version is perfect for those who love a bit of texture in their dessert.
Coconut Espresso Delight
Replace the milk with coconut milk for a tropical spin. The subtle coconut flavor pairs well with espresso, creating a beachy, exotic dessert. The coconut milk also adds a slight oiliness that keeps the ice cream silky. Serve it in a coconut shell for extra flair.
Berry Espresso Fusion
Blend in a handful of frozen berries before freezing. The berries add a burst of natural sweetness and a pop of color. They also provide antioxidants, making this dessert a little healthier. This variation is ideal for berry lovers.
Dark Chocolate Espresso Truffle
Use dark chocolate instead of chocolate chips and swirl in a swirl of espresso syrup. The result is a truffle‑like texture with a deep coffee flavor. It’s a decadent dessert that feels like a dessert cake. Perfect for special occasions.
Storing and Bringing It Back to Life
Fridge Storage
Store leftovers in an airtight container in the refrigerator for up to 3 days. The ice cream will soften slightly, but it will still taste great. Keep the container sealed to prevent the ice cream from absorbing fridge odors. When ready to serve, let it sit at room temperature for 5 minutes to soften.
Freezer Friendly
If you need to keep it longer, freeze it in a freezer‑safe container for up to 2 weeks. Wrap the container with plastic wrap to avoid freezer burn. When you’re ready to enjoy, allow it to thaw in the refrigerator overnight. The texture will remain smooth and creamy.
Best Reheating Method
To revive a slightly hardened scoop, place it in a microwave-safe bowl and heat on low for 10–15 seconds. Add a splash of milk or cream to help it soften, then stir gently. This quick method restores the creamy texture without melting it into a liquid. The result is a perfectly refreshed scoop.