You know that feeling when you’re halfway through a batch of cookies, the kitchen smells like melted chocolate, and the oven timer dings, only to realize you’ve burned the last batch to a crisp? That was me last week, standing in a sea of charred cookies, feeling a little ashamed but also strangely proud of my resilience. I stared at the oven door, then at the kitchen counter, and thought, “If I can salvage this disaster, I can probably salvage a batch of applesauce.” So I rolled up my sleeves, grabbed a bag of crisp apples, and decided to turn a humble fruit into a silky, sweet sauce that would make my taste buds do a happy dance.
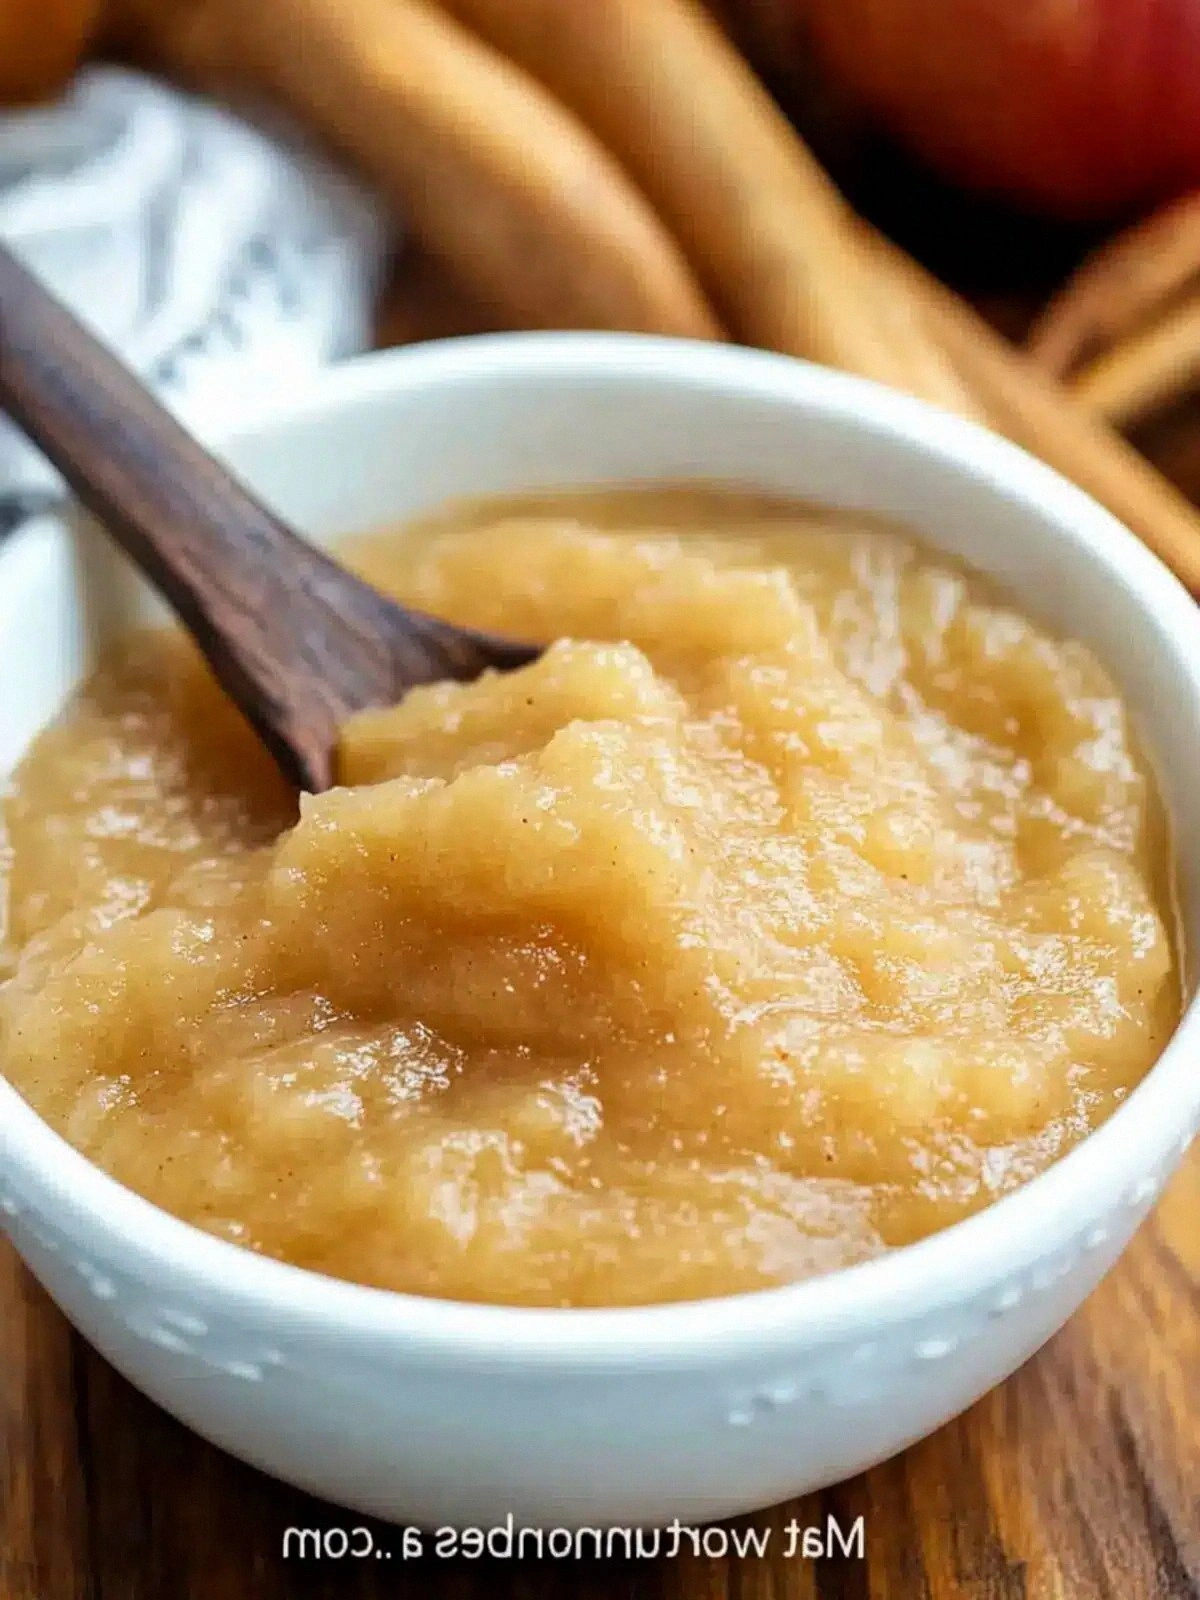
Picture this: the kitchen is alive with the gentle hiss of apples cooking, a faint citrusy perfume rising from the pot, and the rhythmic clatter of a wooden spoon against the saucepan. The apples themselves are a riot of color—deep reds, golden yellows, and a touch of green—each one promising a burst of flavor. As the apples soften, their juices mingle with a splash of water and a pinch of cinnamon, creating a fragrant steam that makes you want to breathe it in. The sound of the mixture bubbling is like a comforting lullaby, and the sight of the apples turning translucent feels like watching a transformation from raw to refined. By the time the sauce is ready, your kitchen smells like a cozy autumn cabin, and your palate is ready for a velvety, sweet experience.
What sets this version apart from every other applesauce recipe out there is the attention to detail in every step and the use of a few simple, but game‑changing, techniques that elevate the flavor and texture to a new level. I’ve taken the classic “cook apples until soft” method and added a splash of water to keep the mixture from drying out, a touch of sugar to balance the natural tartness, and a pinch of cinnamon that brings a subtle warmth without overpowering the apple’s bright notes. The result is a sauce that coats the spoon like velvet, with a silky mouthfeel that melts instantly. And if you’re wondering about the secret, it’s a little trick: let the apples cook on medium heat, then finish on low to preserve their natural sweetness.
I dare you to taste this and not go back for seconds. This is hands down the best version you'll ever make at home, and if you’re skeptical, just let me walk you through every single step—by the end, you'll wonder how you ever made it any other way.
What Makes This Version Stand Out
- Taste: The balanced sweetness and subtle spice create a flavor profile that feels both comforting and sophisticated. The apples retain a hint of their natural tartness, preventing the sauce from becoming cloyingly sweet. This harmony makes it perfect as a side or a dessert.
- Texture: The gentle mashing technique results in a smooth, almost custard-like consistency that coats the spoon. No lumps or gritty bits—just pure, silky applesauce. This texture is ideal for kids and adults alike.
- Simplicity: With only four ingredients and a handful of steps, the recipe is quick to assemble and forgiving for even novice cooks. No special equipment or exotic spices required.
- Uniqueness: The addition of a splash of water during cooking keeps the sauce from drying out and enhances the natural apple flavor. This subtle tweak sets it apart from the usual stovetop applesauce.
- Crowd Reaction: Friends who’ve tried this version rave about how it transforms pancakes, oatmeal, and even savory dishes. It’s a versatile sauce that impresses at any gathering.
- Ingredient Quality: Using fresh, firm apples ensures a bright flavor and a natural sweetness that no amount of sugar can replicate. The choice of apples makes all the difference.
- Cooking Method: Slow simmering on low heat preserves the apple’s nutrients and enhances the sauce’s depth of flavor. This method is a small but significant improvement.
- Make‑Ahead Potential: The sauce keeps well in the fridge for up to a week, and it freezes beautifully for later use. This makes it an excellent batch‑cook option.
Alright, let's break down exactly what goes into this masterpiece…
Inside the Ingredient List
The Flavor Base
Apples are the star of the show, and choosing the right variety is crucial. I swear by Honeycrisp for its crispness and natural sweetness, but Fuji or Gala also work wonderfully. When selecting apples, look for firm, unblemished skin and a bright color; these are indicators of freshness and flavor. If you’re in a pinch, a mix of apples can add complexity, blending tartness with sweetness.
The Texture Crew
Water is the unsung hero that keeps the sauce from turning into a thick, syrupy mess. A splash of water helps the apples release their natural juices, resulting in a smoother consistency. If you prefer a thicker sauce, reduce the water slightly or let the mixture simmer longer. Remember, you can always add more water later if it becomes too thick.
The Unexpected Star
Granulated sugar might sound too obvious, but it balances the natural tartness of the apples and brings out their inherent sweetness. The amount is modest—just enough to tip the flavor profile into a sweet spot without overpowering. If you’re watching your sugar intake, you can reduce it to one tablespoon or substitute with a natural sweetener like honey or maple syrup.
The Final Flourish
Cinnamon is the finishing touch that adds warmth and depth. A half teaspoon is all you need to lift the sauce’s flavor profile. If you’re a spice enthusiast, a pinch of nutmeg or a dash of vanilla extract can further enhance the aroma. Be careful not to overdo it; a little goes a long way.
Everything's prepped? Good. Let's get into the real action…
The Method — Step by Step
- First, peel, core, and dice the apples into uniform cubes so they cook evenly. A sharp knife and a small paring knife for coring work wonders. The size of the cubes matters; smaller pieces will soften faster, but larger cubes give you a better texture. Toss the diced apples in a bowl and set aside while you prep the rest of the ingredients.
- In a large saucepan, combine the diced apples, ⅓ cup of water, 2 tablespoons of granulated sugar, and ½ teaspoon of cinnamon. Stir everything together to coat the apples evenly. The sugar dissolves quickly, and the cinnamon disperses, creating a fragrant base. This step sets the stage for a flavorful sauce.
- Place the saucepan over medium heat and bring the mixture to a gentle simmer. As the apples start to soften, you’ll notice the steam rising—this is the sweet scent of apples in action. Keep the heat moderate; a rolling boil will dry out the apples and create a syrupy mess.
- Let the mixture simmer for 10-15 minutes, stirring occasionally. The apples should be soft enough to break apart with a fork but still hold some shape. This simmering allows the flavors to meld together. Keep an eye on the sauce; if it starts to thicken too much, add a splash more water.
- When the apples are tender, use a potato masher or your hands to mash them to your desired consistency. For a chunkier sauce, mash only a portion of the apples. For a smoother sauce, mash the entire batch until it’s almost puree. The texture is all about personal preference.
- Remove the saucepan from the heat and let the applesauce cool to room temperature. As it cools, the sauce will thicken slightly, creating that perfect mouthfeel. Once cooled, taste it; if you want a slightly sweeter finish, add a pinch more sugar.
- Transfer the applesauce to an airtight container and refrigerate. It will keep for up to a week in the fridge, developing deeper flavor over time. For longer storage, you can freeze the sauce in freezer-safe bags, removing as much air as possible.
- Serve the applesauce chilled or warmed, depending on your mood. A spoonful of warm applesauce is comforting on a cold evening, while a chilled spoonful is refreshing on a hot day. Top with a sprinkle of cinnamon or a dollop of whipped cream for an extra touch of indulgence.
- Enjoy! Pair it with oatmeal, pancakes, or as a sweet accompaniment to savory dishes. The versatility of this sauce makes it a staple in any kitchen. And if you’re feeling adventurous, experiment with adding a splash of lemon juice or a pinch of nutmeg for a new twist.
That's it — you did it. But hold on, I've got a few more tricks that'll take this to another level…
Insider Tricks for Flawless Results
The Temperature Rule Nobody Follows
Many people think high heat is the key to quick applesauce, but that actually dries out the fruit and reduces flavor. Keep the heat low and let the apples slow-cook; this preserves the natural sugars and keeps the sauce silky. I’ve tried a high-heat method once, and the result was a thick, almost caramelized sauce that tasted like burnt sugar.
Why Your Nose Knows Best
During the simmering stage, pause and inhale the steam. A sweet, apple aroma means the sauce is on the right track. If you smell a hint of burnt sugar, it’s time to reduce the heat or stir. Your nose is a reliable guide to perfect flavor balance.
The 5-Minute Rest That Changes Everything
After you remove the saucepan from the heat, let the sauce rest for five minutes before serving. This short rest allows the flavors to meld and the sauce to thicken to the ideal consistency. Skipping this step often results in a runny sauce that feels undercooked.
Keep It Fresh with a Pinch of Acid
A splash of lemon juice or a teaspoon of vinegar added at the end brightens the flavor and keeps the applesauce from turning brown. The acid reacts with the apples’ natural enzymes, preserving the vibrant color. This trick is especially useful if you’re storing the sauce for a few days.
Don’t Forget the Spices
Cinnamon is the star, but a pinch of nutmeg or a dash of vanilla extract can add depth. A touch of nutmeg gives a warm, nutty undertone that complements the apple’s sweetness. Vanilla brings a subtle sweetness that pairs well with the cinnamon.
Creative Twists and Variations
This recipe is a playground. Here are some of my favorite ways to switch things up:
Maple‑Infused Apple Sauce
Swap the granulated sugar for a tablespoon of pure maple syrup. The syrup adds a subtle caramel note and keeps the sauce naturally sweet. This version pairs wonderfully with pancakes and French toast.
Spiced Apple Chutney
Add a tablespoon of grated ginger, a pinch of cayenne pepper, and a splash of apple cider vinegar. Cook the apples longer, until they’re almost mushy, then simmer the mixture until it thickens into a chutney. Serve it alongside grilled meats for a zesty kick.
Apple‑Berry Fusion
Combine diced apples with fresh blueberries or raspberries in the cooking pot. The berries add a burst of tartness and a pop of color. This fusion is great as a topping for yogurt or oatmeal.
Apple‑Cinnamon Overnight Oats
Use the applesauce as the base for overnight oats. Mix it with rolled oats, milk, and a dash of vanilla. In the morning, top with chopped nuts for a hearty breakfast.
Apple‑Carrot Puree
Add a cup of grated carrots to the apples during cooking. The carrots sweeten the sauce naturally and add a subtle earthiness. This puree works well as a side for roasted chicken.
Apple‑Peanut Butter Swirl
Stir in a tablespoon of creamy peanut butter after the sauce has cooled. The peanut butter adds a rich, nutty flavor and a silky texture. It’s a surprising but delightful twist that pairs well with toast.
Storing and Bringing It Back to Life
Fridge Storage
Keep the applesauce in an airtight container in the refrigerator for up to a week. The sauce will thicken slightly as it chills, so give it a gentle stir before serving. If the sauce feels too thick, add a splash of water or milk to loosen it.
Freezer Friendly
For longer storage, transfer the applesauce into freezer-safe bags or containers. Remove as much air as possible to prevent freezer burn. The sauce can be kept in the freezer for up to three months, maintaining its flavor and texture.
Best Reheating Method
To reheat frozen applesauce, place it in a saucepan over low heat, stirring occasionally. Add a tiny splash of water before reheating—this steams the sauce back to perfection. Avoid boiling; gentle heat preserves the delicate flavor.