I'll be honest — the first time I attempted rugelach, I ended up with what looked like tiny pastry explosions all over my kitchen counter. Flour dust hung in the air like morning fog, my dog was licking cream cheese off the floor, and I may have cried a single, dramatic tear into the dough. But that disaster led me down a rabbit hole of obsessive testing, grandmother consultations, and enough butter to make a French baker blush. The result? A rugelach so impossibly tender, so perfectly balanced between flaky and rich, that my neighbor actually proposed marriage after one bite. I'm still considering the offer.
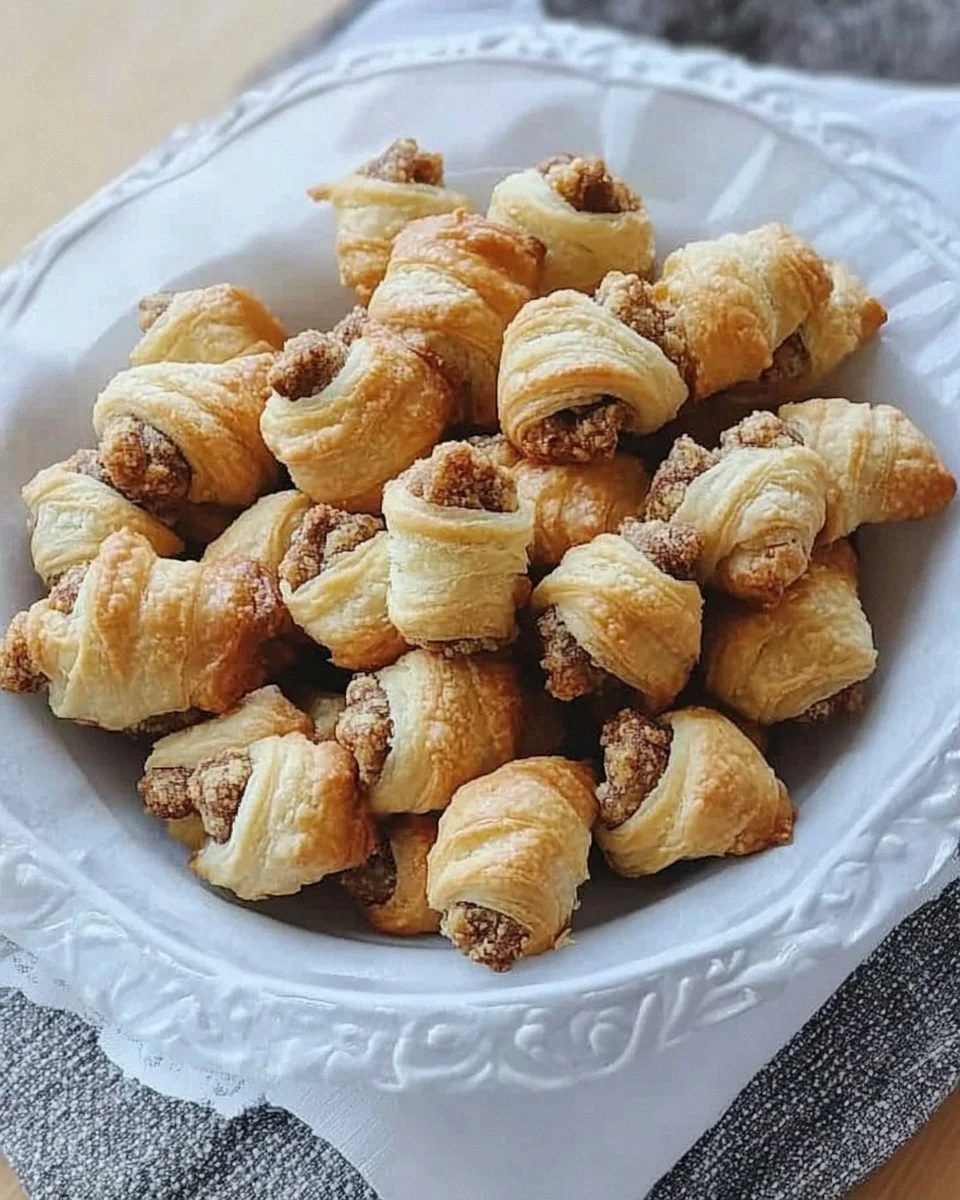
Picture this: it's 2 AM, the house is quiet except for the gentle hum of the refrigerator, and you're standing in your pajamas, pulling a tray of golden crescents from the oven. The scent hits you first — warm butter and vanilla dancing with cinnamon and toasted nuts. You tell yourself you'll wait for them to cool, but who are we kidding? That first bite shatters through layers so delicate they make phyllo look tough, revealing a spiral of sweet filling that melts on your tongue like snowflakes. The edges are caramelized and slightly crisp, the centers tender and yielding, and suddenly you understand why these little Eastern European treasures have been stealing hearts for centuries.
Most recipes get rugelach completely wrong, treating it like some fussy, precious pastry that requires a culinary degree and the patience of a saint. They'll have you chilling dough for days, folding like you're making croissants, or worse — using store-bought puff pastry that turns into a soggy mess. Here's what actually works: a cream cheese dough that's forgiving as your favorite aunt, a filling that stays put instead of oozing out like molten lava, and a technique so simple you'll memorize it after one go. This version delivers bakery-quality results with zero stress, zero fancy equipment, and maximum bragging rights.
The secret weapon? It's not some exotic ingredient or impossible technique — it's understanding that rugelach is basically the love child of pie crust and cream cheese danish, and treating it accordingly. We're talking about dough that rolls out like a dream even when it's cold from the fridge, fillings that stay where they belong, and a final product that stays crisp for days (though good luck having them last that long). Let me walk you through every single step — by the end, you'll wonder how you ever made it any other way.
What Makes This Version Stand Out
Buttery Perfection: This dough contains just enough cream cheese to create tenderness without making it gummy, resulting in layers that shatter delicately while maintaining that rich, satisfying bite that keeps you reaching for more. Most recipes either go too lean (resulting in tough, dry cookies) or too rich (creating a greasy mess), but this version hits the sweet spot that professional bakers guard like state secrets.
Foolproof Technique: Instead of the traditional triangle-rolling method that leaves you with filling everywhere and misshapen cookies, we're using a slice-and-bake approach that gives you perfect spirals every single time. You roll the dough into a circle, spread your filling, cut it like a pizza, and roll from the wide end — even kids can master this method on their first try.
Flavor Explosion: We're not holding back on the good stuff here. Toasted nuts get a quick chop (not too fine — we want texture), dried fruit gets a splash of something special to plump it up, and the filling-to-dough ratio is aggressively generous. These aren't those sad, stingy rugelach you find at bad bakeries with barely a whisper of filling.
Make-Ahead Magic: The dough actually improves with an overnight rest, developing flavor and becoming even easier to work with. You can freeze the rolled logs for up to three months, meaning fresh rugelach is always 15 minutes away. Sunday brunch emergency? You're covered. Tuesday night chocolate craving? Slice and bake.
Customizable Canvas: Once you master the base recipe, the flavor possibilities are endless. Sweet, savory, traditional, modern — this dough plays well with everything from classic cinnamon-walnut to funky blue cheese and fig. I've even made breakfast versions with everything bagel seasoning that disappeared faster than free samples at Costco.
Zero Waste: Every scrap of dough gets used, and any filling that doesn't make it into the cookies becomes tomorrow's yogurt topping or ice cream mix-in. Your kitchen will be cleaner after making these than when you started, which is more than I can say for my attempts at macarons.
Confidence Builder: If you've ever been intimidated by laminated doughs or yeast breads, this recipe will make you feel like a pastry wizard. The dough is forgiving, the results are impressive, and you'll find yourself casually mentioning "Oh, I just whipped up some rugelach" like it's no big deal while your friends' jaws hit the floor.
Inside the Ingredient List
The Flavor Foundation
Cream cheese is the backbone of this operation, and not all bricks are created equal. Full-fat is non-negotiable here — those neufchâtel imposters will give you a dry, crumbly dough that cracks when you look at it wrong. The cream cheese needs to be properly softened (leave it out overnight, don't microwave it into a weird melted mess), because cold cream cheese creates lumps that'll tear your dough when you roll it. If you're in a rush, cube it and let it sit in a warm spot for 30 minutes, stirring occasionally until it's spreadably soft.
Butter plays the supporting role, and European-style with higher fat content makes a noticeable difference in the final flakiness. We're using it cold but pliable — think bendable like modeling clay, not rock-hard from the fridge. Cut it into small cubes first, then let it sit for 10 minutes while you measure everything else. This sweet spot temperature creates layers that puff and separate, giving you those Instagram-worthy flaky edges that make people think you went to pastry school.
The Texture Team
All-purpose flour gets the job done, but here's the thing — different brands absorb liquid differently. King Arthur's higher protein content might need an extra tablespoon of liquid, while White Lily will make a more tender dough. Start with the lower amount and add more only if the dough seems crumbly. We're looking for a dough that comes together in a shaggy mass but isn't sticky — it should feel like play-doh that's been left out for an hour.
The secret ingredient that nobody expects? A teaspoon of lemon juice in the dough. It tenderizes the gluten slightly and adds a brightness that makes the butter taste more buttery and the cream cheese taste more tangy. Don't worry, you won't taste lemon in the final cookies — it just makes everything else taste more like itself. It's like the culinary equivalent of turning up the contrast on a photo.
The Filling Stars
Walnuts toast up better than pecans here because their slightly bitter edge balances the sweet filling, but feel free to use whatever nuts make your heart sing. Toast them properly — spread on a sheet pan at 350°F for 8-10 minutes, shaking once, until they smell like you'd want your house to smell forever. Under-toasted nuts taste bland and slightly green, while over-toasted ones become bitter and sad. You're looking for golden brown with a rich, warm aroma that makes you want to eat them straight off the pan.
Brown sugar melts and caramelizes in a way that white sugar can't match, creating those sticky, chewy bits in the filling that everyone fights over. Dark brown sugar has more molasses and gives a deeper flavor, but light brown works perfectly fine. Pro tip: if your brown sugar has turned into a rock in the back of your pantry, microwave it with a damp paper towel for 30 seconds, or better yet, make your own by mixing white sugar with a tablespoon of molasses per cup.
The Final Flourish
Cinnamon might seem optional, but it's the difference between good rugelach and life-changing rugelach. Use fresh cinnamon (smell it — if it doesn't make you want to bake immediately, it's too old), and don't be shy with it. We're using enough to make its presence known without turning these into cinnamon rolls in disguise. The warmth complements both sweet and nutty fillings, tying everything together like a cozy blanket.
Vanilla extract goes into both the dough and the filling because layering flavors creates depth. Use the real stuff — imitation vanilla tastes like sad birthday cake from a box mix. If you're feeling fancy, scrape in the seeds from half a vanilla bean too. The tiny black specks make people think you really know what you're doing, even if you learned this recipe from someone on the internet who once cried into their dough at 2 AM.
Everything's prepped? Good. Let's get into the real action...

The Method — Step by Step
- Start by beating the cream cheese and butter together until they're completely combined and fluffy — this takes about 2 minutes on medium speed, but don't overbeat or you'll incorporate too much air. You're looking for a mixture that looks like thick frosting, with no visible lumps of cream cheese. Scrape down the bowl twice during this process because cream cheese loves to hide in the corners, refusing to mix properly. This step is crucial because improperly mixed fat creates a dough that's streaky and prone to cracking when you roll it out.
- Add the flour, salt, and lemon juice all at once, then pulse your mixer on low until the dough just starts to come together. It'll look like coarse crumbs at first, but keep mixing and suddenly it'll transform into a cohesive dough that pulls away from the sides of the bowl. This should take no more than 30 seconds — overmixing develops gluten and gives you tough cookies. If the dough seems too crumbly, add ice water a teaspoon at a time, but resist the urge to make it too wet. You want a dough that holds together when squeezed but isn't sticky.
- Turn the dough out onto a lightly floured surface and divide it into four equal portions. I use a kitchen scale for precision because I'm that person, but eyeballing works fine too. Shape each portion into a flat disc (this helps it chill evenly and roll out smoothly later), wrap tightly in plastic wrap, and refrigerate for at least 2 hours or up to 3 days. The dough needs this rest for the flour to fully hydrate and the fats to firm up, making it easier to roll thin without tearing.
- While the dough chills, make your filling by combining toasted nuts, brown sugar, cinnamon, and a pinch of salt in a food processor. Pulse until the nuts are finely chopped but still have some texture — think coarse meal, not powder. Add the vanilla and a tablespoon of melted butter to help everything stick together. The filling should hold its shape when squeezed but crumble easily — if it's too wet, add more nuts; too dry, add another teaspoon of butter. Taste it and adjust the seasoning because this is your chance to make it perfect.
- Roll out one disc of dough on a lightly floured surface into a 9-inch circle, about 1/8-inch thick. The dough should roll easily without sticking — if it starts to crack around the edges, let it warm up for 5 minutes. Brush the surface lightly with melted butter, then sprinkle a quarter of your filling evenly over the dough, pressing gently to help it adhere. Don't go all the way to the edges or your filling will leak out and burn during baking.
- Cut the circle into 8 wedges like you're slicing a pizza — use a pizza cutter for clean cuts and wipe it between cuts if filling starts to stick. Starting from the wide end of each wedge, roll toward the point, stretching the dough slightly as you go to create a tight spiral. Place the cookies point-side down on a parchment-lined baking sheet, spacing them 2 inches apart because they spread slightly. Curve the ends slightly toward the center to form a crescent shape — this isn't just for looks, it helps them bake evenly.
- Repeat with remaining dough and filling, then chill the shaped cookies for 30 minutes while you preheat your oven to 350°F. This final chill helps the cookies hold their shape and creates those distinct layers. Just before baking, brush each cookie with egg wash (one beaten egg with a splash of water) for that glossy, golden finish that makes them look professional. Sprinkle with coarse sugar for extra crunch and sparkle — this is optional but highly recommended if you want Instagram-worthy results.
- Bake for 20-25 minutes, rotating the pan halfway through, until the cookies are golden brown and the bottoms are caramelized. The filling should be bubbling slightly and the edges should be a deep golden color. Don't pull them too early — underbaked rugelach tastes doughy and won't develop those complex caramelized flavors. Let them cool on the pan for 5 minutes (they're fragile when hot), then transfer to a wire rack to cool completely, if you can wait that long.
- Store cooled rugelach in an airtight container at room temperature for up to 5 days, though they'll probably disappear long before then. They actually improve after a day as the flavors meld and the texture settles. For longer storage, freeze the baked cookies for up to 3 months, or better yet, freeze the unbaked logs and slice off fresh cookies whenever the craving strikes. Frozen unbaked cookies can go straight from freezer to oven — just add 2-3 minutes to the baking time.
That's it — you did it. But hold on, I've got a few more tricks that'll take this to another level...
Insider Tricks for Flawless Results
The Temperature Rule Nobody Follows
Here's the thing that separates okay rugelach from life-changing rugelach: temperature control at every stage. Your butter should be cold but pliable, your cream cheese properly softened, and your dough well-chilled before rolling. But here's the twist — let the rolled cookies sit at room temperature for 10 minutes before baking. This relaxes the gluten just enough to prevent cracking and helps the cookies hold their crescent shape instead of springing open like a confused caterpillar. A friend tried skipping this step once and ended up with cookies that looked like they'd been through a windstorm.
Why Your Nose Knows Best
Trust your sense of smell more than the timer when toasting nuts and baking the cookies. Nuts are perfectly toasted when your kitchen smells like you'd pay money for a candle of that scent — usually about 30 seconds before you think they're done, because they keep cooking after you pull them out. Same with the cookies — when you can smell that caramelized butter and toasted sugar aroma wafting from the oven, they're probably done. Visual cues matter (golden brown edges), but your nose is the most reliable indicator of when the Maillard reaction has worked its magic and created those complex, toasty flavors that make people close their eyes when they bite into these.
The 5-Minute Rest That Changes Everything
After rolling your dough circles but before adding the filling, let the dough rest for 5 minutes. This simple pause allows the gluten to relax, preventing the dough from shrinking back when you roll it thin. It seems fussy, but it's the difference between perfectly round circles that roll easily and frustrating ovals that fight you every step of the way. While you're waiting, prep your filling ingredients so everything's ready to go. This tiny investment of time pays off in frustration saved and Instagram-worthy results achieved.
The Secret Weapon for Extra Flaky Layers
Here's a trick I learned from a pastry chef who swore me to secrecy (sorry, Chef): grate a tablespoon of frozen butter directly into the dough after you've mixed it but before you form the discs. This creates tiny pockets of butter that melt during baking, creating extra flaky layers that shatter delicately when you bite into them. Use the large holes of a box grater and work quickly so the butter doesn't melt. This is especially effective if you're using a lower-fat cream cheese or if your kitchen runs warm. The result is bakery-level flakiness that'll have people asking which European bakery you visited.
Why You Should Save the Scraps
Don't you dare throw away those little bits of dough that get trimmed off or the filling that doesn't quite make it into the cookies. Mix the dough scraps with a teaspoon of jam, roll into tiny balls, and bake alongside the rugelach for cook's treats. Any extra filling becomes tomorrow's yogurt topping, ice cream mix-in, or emergency snack straight from the jar. I've been known to sprinkle extra nut filling over oatmeal or stir it into pancake batter. Waste not, want not, and definitely don't let any of this buttery, nutty deliciousness end up in the trash.
Creative Twists and Variations
This recipe is a playground. Here are some of my favorite ways to switch things up:
S'mores Rugelach
Replace the traditional filling with crushed graham crackers, mini chocolate chips, and marshmallow fluff (use sparingly — it melts and makes a mess). The marshmallow caramelizes and creates little pockets of gooey sweetness that'll transport you straight to summer campfires. Add a pinch of smoked salt to really drive home the campfire vibe. Kids go absolutely bonkers for these, and honestly, so do most adults who claim they're "not really dessert people."
Everything Bagel Breakfast Version
Swap the sweet filling for a mixture of cream cheese, everything bagel seasoning, and a touch of honey. These are incredible for brunch with coffee or as part of a breakfast spread. The savory-sweet combination hits all the right notes, and the everything seasoning gives it that addictive quality that makes people hover around the plate. Pro tip: make a double batch because these disappear faster than free samples at Costco.
Mediterranean Inspired
Fill with a mixture of finely chopped pistachios, orange zest, cardamom, and a touch of honey. The floral notes of cardamom pair beautifully with pistachio, and the orange adds brightness that prevents it from feeling heavy. Drizzle with a simple orange glaze after baking for extra elegance. These taste like something you'd find in a fancy Middle Eastern bakery, but they're surprisingly easy to pull off at home.
Salted Caramel Apple
Replace half the nuts with finely diced dried apple, add a tablespoon of caramel sauce to the filling, and finish with a sprinkle of flaky sea salt before baking. The apple adds chewiness, the caramel brings richness, and the salt makes all the flavors pop. These taste like fall in cookie form and are perfect for Thanksgiving or any time you want your house to smell like a cozy autumn dream.
Chocolate Orange Marble
Create a marbled effect by spreading half the circle with chocolate-hazelnut spread and half with orange marmalade thinned with a bit of warm water. Swirl them together slightly for a marble pattern before cutting and rolling. The combination of chocolate and orange is classic for a reason, and the slight bitterness from the marmalade cuts through the richness perfectly. These look stunning and taste like a sophisticated chocolate orange in pastry form.
Savory Cheese and Herb
Skip the sugar entirely and fill with a mixture of grated sharp cheddar, chopped fresh herbs (thyme and rosemary work beautifully), and a touch of black pepper. These are incredible with soup or salad, and they make an impressive appetizer for dinner parties. The savory version keeps for a week in an airtight container, making them perfect for lunchboxes or afternoon snacking when you want something sophisticated but not sweet.
Storing and Bringing It Back to Life
Fridge Storage
Store completely cooled rugelach in an airtight container at room temperature, not the fridge — refrigeration makes the butter in the dough firm and the cookies taste stale. They'll stay fresh for up to 5 days, though they rarely last that long. If your kitchen is particularly warm or humid, add a piece of bread to the container — it'll absorb excess moisture and keep your cookies crisp. Replace the bread when it gets stale, and your rugelach will stay bakery-fresh. The cookies actually improve after the first day as the flavors meld and the texture settles into that perfect balance of crisp and tender.
Freezer Friendly
These freeze beautifully both before and after baking. For unbaked cookies, roll the logs and freeze them wrapped in plastic wrap and foil for up to 3 months. When the craving strikes, slice while still frozen (it's actually easier this way) and bake directly from frozen, adding 2-3 minutes to the baking time. For baked cookies, freeze them in a single layer first, then transfer to a freezer bag — this prevents them from sticking together. They'll keep for up to 3 months frozen, though good luck making them last that long. Thaw at room temperature for 30 minutes, or warm them in a 300°F oven for 5 minutes to revive that fresh-baked magic.
Best Reheating Method
While room temperature rugelach is delicious, slightly warm rugelach is transcendent. Revive day-old cookies by placing them on a baking sheet in a 300°F oven for 5-7 minutes. This refreshes the butter and brings back that just-baked crispness to the edges. Don't microwave them — it makes the dough tough and the filling weep. If you've frozen baked cookies, let them thaw completely, then warm them in the oven. Add a tiny splash of water to the baking sheet before reheating — it creates steam that helps re-crisp the exterior while keeping the interior tender. Serve them warm with coffee or tea, and watch people lose their minds over what they think are freshly baked cookies.