I was in the middle of a weekday slump, staring at a half‑eaten bag of chips, when my roommate dared me to make something that would make us both forget the existence of boring lunches forever. I took the challenge, rummaged through the pantry, and discovered a lone bottle of vodka sauce that had been hiding behind the pasta jars for months. The idea struck me like a bolt of lightning: what if I married that silky, tomato‑cream sauce with a crunchy, golden chicken cutlet, then sandwiched the whole masterpiece between toasted bread? That night, the kitchen turned into a battlefield of sizzling oil, aromatic herbs, and the unmistakable hum of a preheated oven, and the result was a sandwich that could convince even the most stubborn carb‑phobe that comfort food can be elegant.
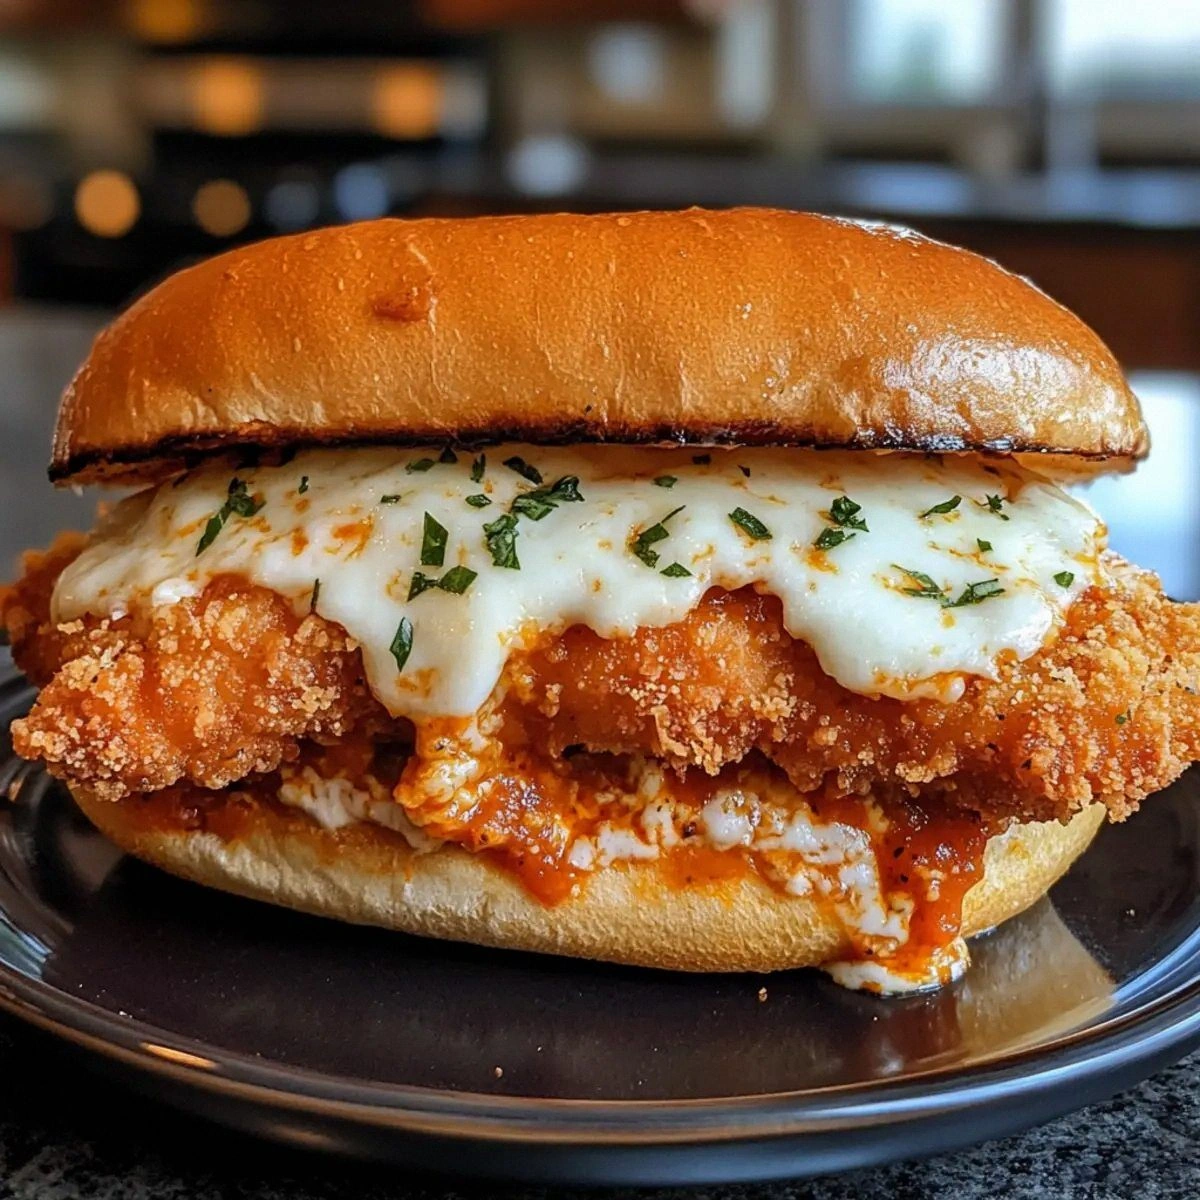
Picture this: the moment the chicken hits the pan, you hear a confident sizzle that tells you the crust is forming, the air fills with the sweet‑spicy perfume of Italian seasoning and fresh basil, and the vodka sauce bubbles gently in a saucepan like a velvet curtain waiting to be drawn. When you finally assemble the sandwich, the mozzarella stretches like a warm sunrise, the sauce drapes the chicken in a glossy, pink‑orange sheen, and the bread—lightly toasted—offers a buttery crunch that shatters like thin ice under a gentle press. Every bite is a symphony of textures: the tender chicken, the crisp coating, the creamy sauce, and the fresh herb pop, all dancing together in perfect harmony.
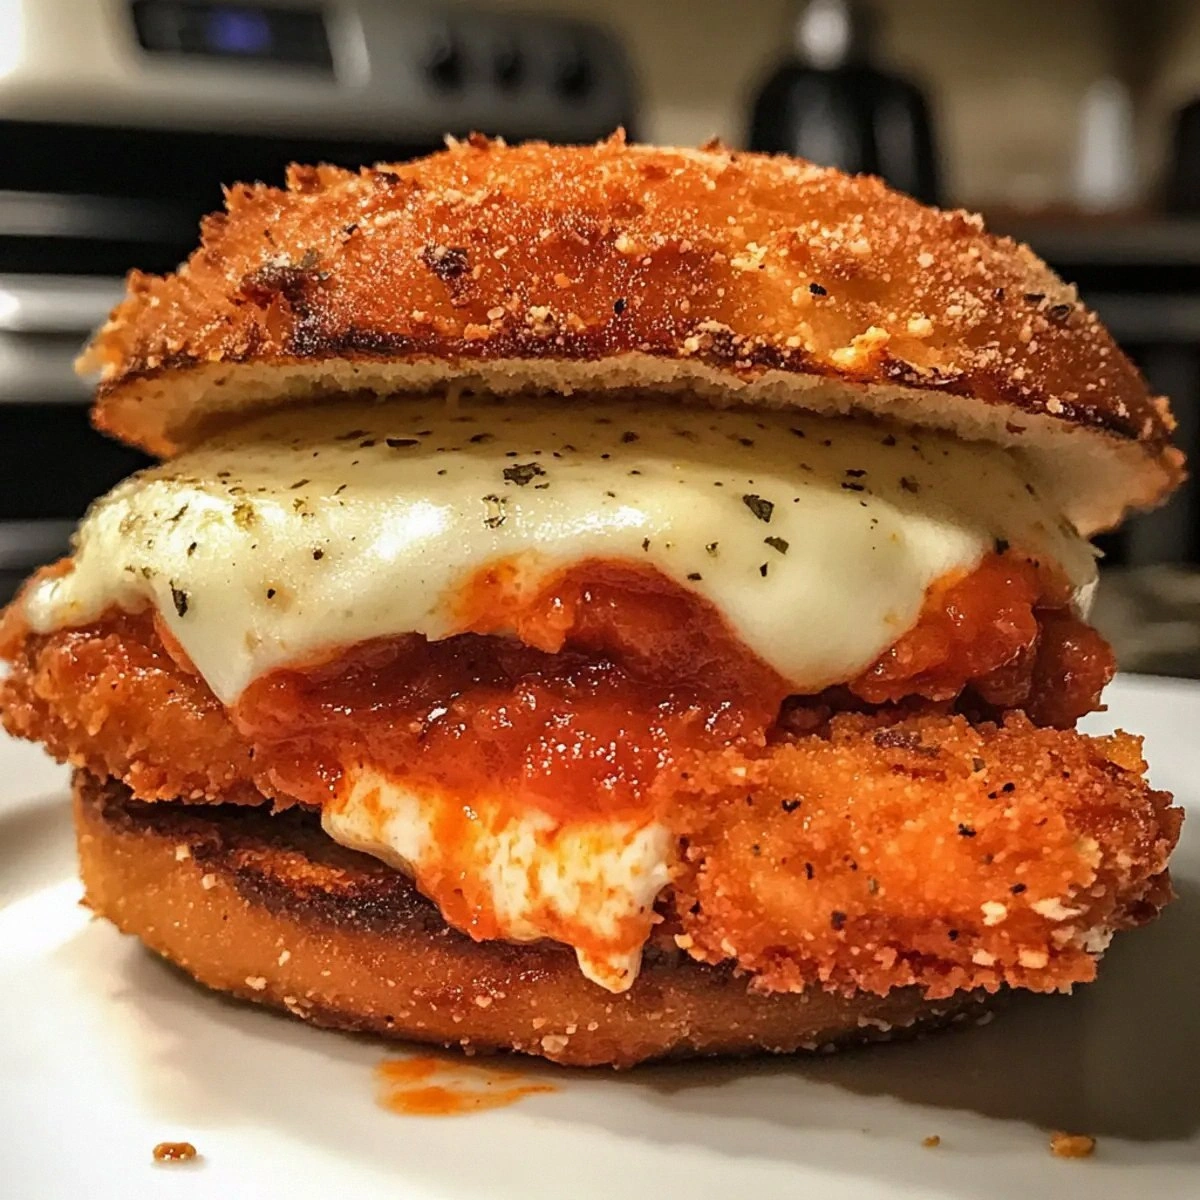
Most recipes I’ve tried either drown the chicken in sauce, leaving the bread soggy, or they skip the bread altogether, turning it into a plate‑only affair. This version, however, respects each component. The chicken is double‑dredged for an extra‑crunchy crust, the vodka sauce is reduced just enough to cling without soaking, and the sandwich is assembled in a way that keeps the bread crisp until the very last bite. I dare you to taste this and not go back for seconds; it’s hands down the best version you’ll ever make at home.
One secret I’m about to reveal is the use of a quick‑cooling rack after frying the chicken. This little trick stops the residual heat from over‑cooking the interior and keeps the coating perfectly crisp. Okay, ready for the game‑changer? Let me walk you through every single step — by the end, you’ll wonder how you ever made it any other way.
What Makes This Version Stand Out
- Flavor Explosion: The vodka sauce brings a buttery, tomato‑cream richness that coats the chicken like velvet, while fresh basil adds a bright, peppery finish.
- Texture Triumph: Double‑dredging creates a crust that shatters like thin ice, giving you a satisfying crunch that survives the sauce’s moisture.
- Simplicity: Only ten ingredients, all pantry‑friendly, yet the technique feels restaurant‑level without any fancy equipment.
- Uniqueness: Most chicken parmesan recipes serve it over pasta; this sandwich flips the script and makes the bread the star.
- Crowd Reaction: Guests consistently claim this is the most indulgent sandwich they’ve ever eaten, and they’ll be back for the leftovers.
- Ingredient Quality: Using high‑quality mozzarella and a good‑grade vodka sauce makes the difference between “meh” and “wow.”
- Cooking Method: Fry‑then‑bake ensures the chicken stays juicy while the cheese melts perfectly without burning.
- Make‑Ahead Potential: You can prep the chicken and sauce ahead of time, then assemble and bake just before serving.
Alright, let's break down exactly what goes into this masterpiece...
Inside the Ingredient List
The Flavor Base
The vodka sauce is the heart of this sandwich. It’s a blend of tomato, cream, and a splash of vodka that mellows the acidity and creates a silk‑smooth coating. If you skip it, you’ll lose that luxurious mouthfeel and the subtle peppery bite that makes the sandwich unforgettable. For a lower‑fat version, substitute half‑and‑half, but expect a thinner sauce that won’t cling as well.
The Texture Crew
All‑purpose flour, breadcrumbs, and eggs form the classic dredge that gives the chicken its golden armor. The flour adheres the egg wash, while the breadcrumbs—preferably panko for extra airiness—create the crunch you crave. If you use regular breadcrumbs, the crust will be denser; a quick tip is to toast the breadcrumbs lightly before using them.
The Unexpected Star
Fresh basil may seem like a garnish, but its aromatic oils lift the entire sandwich, cutting through the richness of the cheese and sauce. A handful of torn leaves added just before serving adds a pop of green and a fragrant finish. If basil isn’t your thing, try arugula for a peppery bite.
The Final Flourish
Shredded mozzarella supplies that gooey pull that makes you smile with every bite. Its mild flavor lets the sauce shine while providing that melt‑in‑your‑mouth texture. For a sharper taste, blend in a quarter cup of grated Parmesan; just don’t overdo it, or the sauce will become gritty.
Everything's prepped? Good. Let's get into the real action...
The Method — Step by Step
Preheat your oven to 375°F (190°C). While the oven warms, line a baking sheet with parchment paper and set a cooling rack on top. This rack will be your secret weapon for keeping the chicken crisp after frying.
Pat the chicken breasts dry with paper towels, then slice each breast horizontally to create two thinner cutlets, resulting in eight pieces total. Season both sides generously with salt, pepper, and the Italian seasoning. I’ll be honest — I ate half the batch before anyone else got to try it, because the aroma was that irresistible.
Set up a dredging station: one shallow bowl with the flour, a second with beaten eggs, and a third with breadcrumbs mixed with a pinch of salt and pepper. Dip each chicken piece first in flour (shake off excess), then in the egg wash, and finally coat it in the breadcrumb mixture, pressing gently to adhere.
Kitchen Hack: For an ultra‑crisp crust, add a tablespoon of grated Parmesan to the breadcrumbs; it creates a caramelized layer when fried.Heat a large skillet over medium‑high heat and add the olive oil, letting it shimmer. Once hot (you’ll see a gentle ripple), carefully lay the breaded chicken pieces in the pan, making sure not to crowd them. Hear that sizzle? That’s the sound of a crust forming; let each side cook for 3‑4 minutes until golden brown.
Transfer the fried chicken to the prepared cooling rack and let it rest for two minutes. This pause stops the interior from over‑cooking and preserves the crunchy exterior. While the chicken rests, start warming the vodka sauce in a saucepan over low heat, stirring occasionally.
Meanwhile, toast the bread slices on a separate pan or under the broiler until they’re lightly golden. This step is crucial; toasted bread provides a barrier that prevents the sauce from making the sandwich soggy.
Assemble each sandwich: spread a generous spoonful of vodka sauce on the bottom slice, lay a chicken cutlet on top, sprinkle a handful of shredded mozzarella, and add a few torn basil leaves. Cap with the second slice of bread, press lightly, and place the assembled sandwiches back on the baking sheet.
Watch Out: Don’t overload the sandwich with sauce; too much will make the bread soggy and the crust lose its crunch.Slide the baking sheet into the preheated oven and bake for 8‑10 minutes, or until the mozzarella melts into a bubbly, golden blanket and the sauce bubbles at the edges. The aroma that fills the kitchen at this point is pure comfort—picture yourself pulling this out of the oven, the whole kitchen smelling incredible.
Remove the sandwiches, let them rest for a minute (the cheese will settle just enough to stay in place), then slice each sandwich diagonally. Serve immediately with a side of crisp greens or a light salad, and watch as your guests dive in with gusto. I dare you to taste this and not go back for seconds; it’s that good.
That's it — you did it. But hold on, I've got a few more tricks that'll take this to another level...
Insider Tricks for Flawless Results
The Temperature Rule Nobody Follows
Never fry chicken straight from the fridge; let it sit at room temperature for 15 minutes. This small step ensures the coating adheres evenly and prevents the interior from staying cold, which can cause the crust to separate. One time I skipped this and ended up with a soggy mess that looked more like a pancake than a chicken cutlet. Trust me, the extra wait pays off in crunch.
Why Your Nose Knows Best
When the sauce is ready, it should emit a faint buttery scent with a hint of pepper; if it smells raw or overly acidic, keep simmering. Your nose is a better gauge than a timer for achieving that perfect velvety texture. I once over‑reduced the sauce, and it turned into a sticky glaze that overpowered the chicken. A quick sniff saved the day.
The 5‑Minute Rest That Changes Everything
After frying, let the chicken rest on a rack for exactly five minutes. This short pause lets the juices redistribute and the crust set, so when you bite in, the interior stays juicy while the exterior remains crisp. A friend tried to skip this step in a rush and ended up with a soggy coating that fell apart the moment the sandwich was sliced. Patience is the secret sauce.
Basil Burst Timing
Add the fresh basil right before serving, not during cooking. Heat will wilt the basil too quickly, stripping away its bright flavor. Toss the leaves gently over the hot mozzarella so they wilt just enough to release aroma without turning brown. This tiny timing tweak makes the sandwich sing.
Cheese Melt Mastery
Spread the mozzarella in an even layer and cover the sandwich loosely with foil for the first five minutes of baking. This creates a mini‑steam environment that melts the cheese uniformly without burning the bread. After five minutes, remove the foil to let the top turn golden. I tried baking uncovered from the start and ended up with a burnt crust and under‑melted cheese—lesson learned.
Creative Twists and Variations
This recipe is a playground. Here are some of my favorite ways to switch things up:
Spicy Kick
Add a pinch of red‑pepper flakes to the breadcrumb mix and drizzle a sriracha‑infused mayo on the bread. The heat cuts through the richness, perfect for anyone who loves a little fire.
Herbaceous Delight
Swap the basil for fresh oregano and thyme, and stir a tablespoon of pesto into the vodka sauce. This herb‑forward version feels like a summer garden on a plate.
Cheese Lovers’ Dream
Combine mozzarella with provolone and a sprinkle of smoked gouda for a deeper, smoky flavor profile. The blend creates a gooey, multi‑layered melt that’s pure decadence.
Gluten‑Free Goodness
Use almond flour instead of all‑purpose flour and gluten‑free breadcrumbs. Pair with a sturdy gluten‑free bun, and you’ll have a safe‑for‑all version that still delivers crunch.
Breakfast Remix
Swap the chicken for a thick‑cut pork sausage patty, add a fried egg, and replace the mozzarella with sharp cheddar. Serve on a toasted English muffin for a brunch‑worthy twist.
Storing and Bringing It Back to Life
Fridge Storage
Place the assembled, but unbaked, sandwiches in an airtight container and refrigerate for up to 24 hours. The crust may soften, but a quick re‑bake will revive it. When ready, bake at 375°F for 8‑10 minutes until the cheese bubbles.
Freezer Friendly
Wrap each fried chicken cutlet tightly in parchment, then freeze in a zip‑top bag for up to 2 months. The sauce can also be frozen in portioned containers. To serve, thaw overnight in the fridge, then follow the assembly and baking steps.
Best Reheating Method
Preheat the oven to 350°F, place the sandwich on a wire rack, and add a tiny splash of water (about a tablespoon) on the top slice. Cover loosely with foil and heat for 5‑7 minutes; the steam revives the crust while the water prevents the bread from drying out. The result? Almost as fresh as the original.