I was standing in my kitchen, half‑asleep, when a friend dared me to bake the most buttery, caramel‑kissed cookie I’d ever tasted. I laughed, grabbed the nearest butter stick, and the moment the butter hit the counter it melted into a golden pool that smelled like a summer sunrise on a bakery shelf. The whole house filled with a buttery perfume that made the dog whine and the cat stare, as if they both knew something spectacular was about to happen. I thought, “If this smells this good raw, imagine the magic after it hits the oven.” That daring moment turned into a full‑blown obsession, and I’ve finally nailed the version that makes even the toughest cookie skeptics swoon.
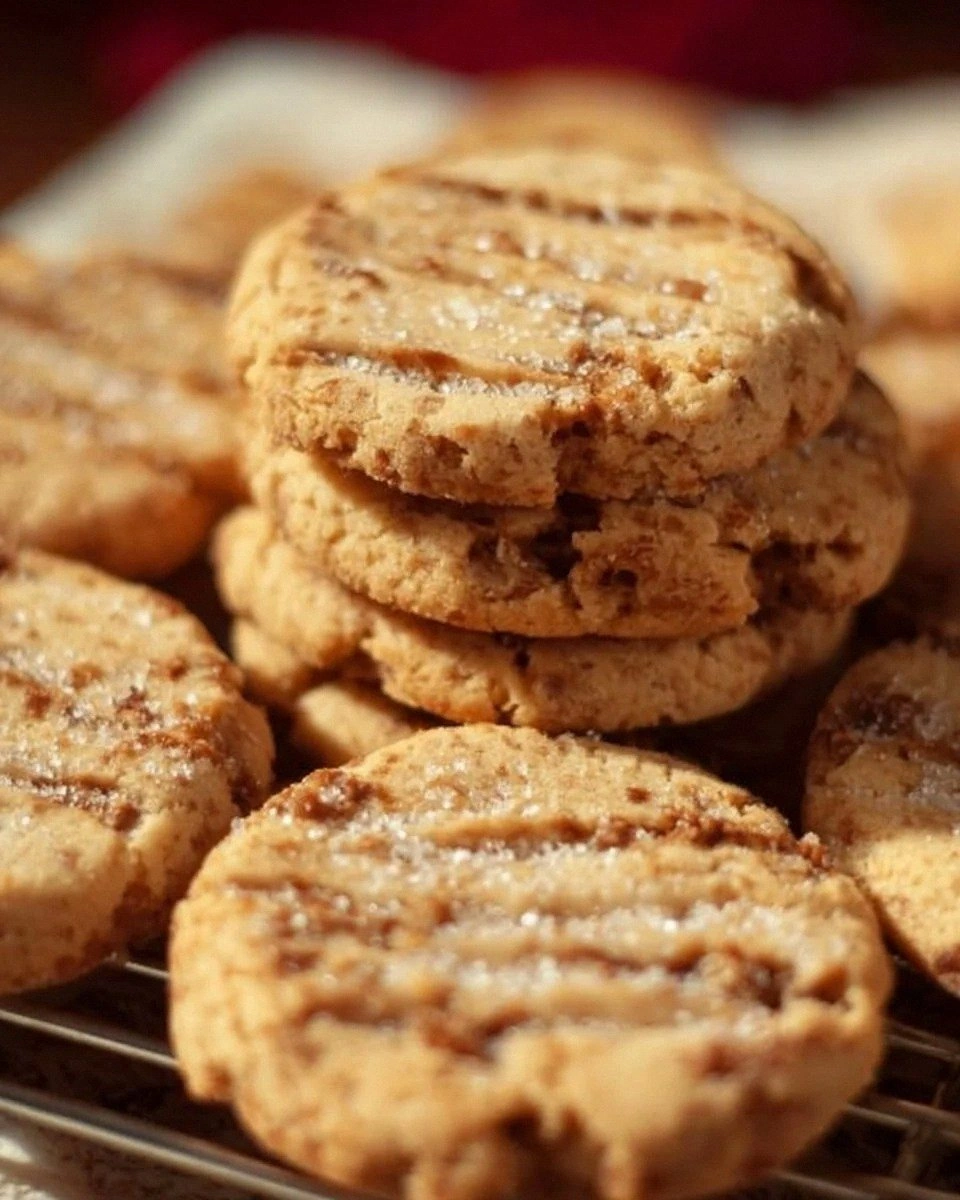
Picture this: a tray of glossy, buttery discs, each speckled with caramel‑rich toffee bits that glitter like tiny amber jewels. When you bite in, the edges are crisp enough to snap like a fresh snowflake, while the centers stay soft, almost melt‑in‑your‑mouth, with pockets of buttery caramel that ooze out like liquid gold. The aroma that wafts from the oven is a blend of toasted butter, sweet toffee, and a whisper of vanilla that makes you want to hug the oven door. The texture is a perfect balance of crunch and chew, a contradiction that somehow works because the recipe respects each ingredient’s role.
Most cookie recipes get the butter‑to‑flour ratio wrong, resulting in either a dry, crumbly mess or a greasy slab that slides off the plate. I’ve tried a dozen “icebox” variations that promised easy prep and a cool, buttery bite, but they all fell short on one critical point: the toffee never truly integrates, staying stubbornly clumped or, worse, melting into a soggy mess. The secret? A precise temperature dance, a brief chilling period, and a generous handful of premium toffee bits that retain their snap. That’s why this version stands out – it’s engineered for consistency, flavor depth, and that wow factor that makes people ask for the recipe before the first bite is even finished.
I’m about to spill the beans on a technique most bakers overlook – a quick “butter‑cream” emulsification that coats the flour before the dough ever meets the heat. It’s a tiny step that transforms the cookie from ordinary to unforgettable, and I’m daring you to taste this and not go back for seconds. Let me walk you through every single step — by the end, you’ll wonder how you ever made it any other way.
What Makes This Version Stand Out
- Butter‑First Emulsion: By creaming the butter with both sugars before the flour joins, the dough develops a silky matrix that yields a melt‑in‑your‑mouth crumb while keeping the edges crisp.
- Toffee Integrity: Using solid toffee bits (Skor or Heath) that are folded in at the very end preserves their crunchy heart, preventing them from dissolving into the batter.
- Icebox Chill: A brief 30‑minute chill firms the dough, ensuring the cookies keep their shape and the butter doesn’t melt too quickly when they hit the oven.
- Simple Ingredient List: Only eight core ingredients, all pantry‑friendly, yet each one is chosen for maximum impact on flavor and texture.
- Versatile Crowd‑Pleaser: The subtle sea‑salt sprinkle on top creates a sweet‑salty contrast that even the most discerning palates adore.
- Make‑Ahead Magic: The dough can be stored in the fridge for up to three days or frozen for a month, giving you fresh‑baked cookies on demand.
- Visual Appeal: The toffee speckles create a speckled, caramel‑gold surface that looks as good on Instagram as it does on the plate.
- Time‑Efficient: From start to finish it’s under an hour, perfect for a quick dessert after a long day.
Inside the Ingredient List
The Flavor Base
The unsalted butter is the heart of this cookie. Using a high‑quality European butter with at least 82% fat gives you a richer, creamier flavor that ordinary butter can’t match. If you skimp on butter, the cookie ends up dry and lacking that buttery perfume that makes you close your eyes in bliss. You can substitute with a plant‑based butter for a dairy‑free version, but expect a slightly different mouthfeel; the key is to choose a brand that mimics the high fat content.
Granulated sugar provides the initial sweet snap, while brown sugar adds moisture and a subtle molasses depth that balances the toffee’s caramel notes. Skipping the brown sugar will leave the cookie flat, as the moisture it contributes is essential for that soft interior. If you’re looking for a deeper, almost bourbon‑like flavor, swap half of the brown sugar for dark muscovado.
The Texture Crew
All‑purpose flour is the structural backbone, giving the cookie its shape and bite. Using cake flour would make the cookie too tender, while bread flour would turn it into a chew‑chew. The 1/2 teaspoon of baking soda is just enough to give a gentle lift without turning the cookie into a cake; it reacts with the sugars to create tiny air pockets that keep the interior airy.
A pinch of sea salt, or the optional sprinkle on top, is the secret whisper that makes the sweet flavors sing. Salt amplifies the caramel notes and prevents the cookie from tasting cloyingly sweet. If you love a pronounced salty bite, use flaky Maldon sea salt for that delicate crunch.
The Unexpected Star
Toffee bits are the showstopper. They bring a buttery crunch that contrasts the soft interior, and their caramel flavor deepens as they bake, turning the edges a rich amber. If you can’t find Skor or Heath, you can make your own by caramelizing sugar with butter and letting it set, then chopping into bite‑size pieces. Just be careful not to over‑cook them; burnt toffee turns bitter, ruining the whole batch.
The Final Flourish
Vanilla extract ties everything together with a fragrant, floral note that lifts the buttery base and makes the toffee taste even richer. A good quality vanilla bean or pure extract makes a noticeable difference; artificial “vanilla flavor” can taste flat and diminish the overall complexity. Finally, a light dusting of sea salt right before baking creates that irresistible sweet‑salty contrast that makes people reach for a second cookie.
Everything's prepped? Good. Let's get into the real action...
The Method — Step by Step
Start by softening the butter at room temperature; it should be pliable but not melted. In a large mixing bowl, cream the butter together with the granulated and brown sugars until the mixture is light, fluffy, and pale yellow – think of a cloud that’s just begging to be baked. This process incorporates air, which is crucial for that tender crumb. Tip: Scrape down the sides of the bowl every 30 seconds to ensure an even cream.
Kitchen Hack: Add a splash of heavy cream (about 1 tablespoon) while creaming; it makes the butter emulsion silkier and gives the final cookie a richer mouthfeel.Once the butter‑sugar blend is airy, whisk in the vanilla extract and a pinch of sea salt. The vanilla should dissolve instantly, releasing that sweet aroma that makes the kitchen feel like a boutique bakery. At this point, the mixture should have a glossy sheen, signaling that the sugars are fully integrated.
In a separate bowl, whisk together the flour, baking soda, and the remaining 1/4 teaspoon of salt. This dry blend ensures the leavening agent is evenly distributed, preventing any pockets of soda that could cause uneven rise. Slowly add the dry ingredients to the butter mixture, stirring with a wooden spoon or spatula until just combined – over‑mixing would develop gluten and make the cookie tough.
Now for the star of the show: fold in the toffee bits gently. Use a “cut‑and‑fold” motion, turning the dough over on itself while the spatula slides under the mixture. This technique keeps the toffee pieces whole, preserving their crunchy heart. Watch out: If the dough feels too sticky, chill it for 10 minutes before proceeding – this makes handling easier.
Watch Out: Over‑folding can crush the toffee bits, turning them into sugary mush that loses its signature snap.Cover the bowl with plastic wrap and place it in the refrigerator for 30 minutes. This chilling step solidifies the butter, which means the cookies will spread less and retain a defined shape. While the dough chills, preheat your oven to 350°F (175°C) and line two baking sheets with parchment paper.
After chilling, scoop the dough onto a lightly floured surface and roll it into a log about 2 inches in diameter. The log should be firm enough to slice cleanly without crumbling. Using a sharp serrated knife, cut the log into ½‑inch thick rounds. This uniform thickness ensures even baking and the classic “icebox” look.
Arrange the rounds on the prepared baking sheets, leaving about 2 inches of space between each. Lightly sprinkle a pinch of flaky sea salt on top of each cookie – this is the final flavor pop that makes the cookies unforgettable. Slide the trays into the oven and bake for 12‑14 minutes, or until the edges are a deep golden brown and the tops have a faint sheen.
Kitchen Hack: Rotate the baking sheets halfway through the bake to guarantee uniform browning on both the top and bottom of each cookie.When the timer dings, remove the cookies and let them sit on the sheet for 2 minutes – they’ll continue to set as they cool. Then transfer them to a wire rack to cool completely; this prevents steam from making the bottoms soggy. The moment you bite into a cooled cookie, you’ll hear that satisfying snap, followed by a buttery melt that releases pockets of caramelized toffee.
That’s it — you did it. But hold on, I've got a few more tricks that'll take this to another level. For instance, a quick drizzle of melted dark chocolate over the warm cookies adds a sophisticated bitterness that balances the sweetness, or a dusting of powdered sugar for a snow‑kissed finish. Experiment, enjoy, and remember: the best part of baking is sharing, so don’t be shy about offering a warm batch to anyone who walks through your door.
Insider Tricks for Flawless Results
The Temperature Rule Nobody Follows
Always start with butter that’s soft but still cool to the touch. If the butter is too warm, the dough will spread excessively, giving you thin, crispy edges and a flat center. A quick trick is to place the butter in the fridge for 15 minutes after it softens – this brings it to the perfect temperature window of 65‑70°F. I once tried using melted butter straight from the microwave; the cookies turned into a greasy pancake, and I learned my lesson the hard way.
Why Your Nose Knows Best
During the creaming stage, stop the mixer when the mixture smells like toasted sugar and vanilla. That aromatic cue tells you the sugars have dissolved enough to create a smooth, glossy texture. If you keep mixing beyond that point, you risk over‑aerating the dough, which leads to a dry crumb. Trust your nose more than the timer; it’s the most reliable sensor in the kitchen.
The 5‑Minute Rest That Changes Everything
After shaping the dough into a log, let it rest on the counter for five minutes before slicing. This short pause lets the gluten relax just enough to prevent the cookies from shrinking back as they bake. I once sliced the log immediately, and the cookies puffed up then collapsed, resulting in an uneven surface. Those five minutes are a tiny investment for a perfect, uniform cookie.
Sea‑Salt Sprinkling Strategy
If you love the sweet‑salty pop, use a fine-mesh shaker to sprinkle sea salt just before the cookies enter the oven. The heat will lightly melt the salt crystals, creating a subtle crunch that doesn’t overpower the toffee. Too much salt, however, can dominate the flavor, so a light dusting (about ¼ teaspoon per batch) is all you need.
The Cool‑Down Flip
After the cookies have rested on the baking sheet for a couple of minutes, flip them onto a wire rack while they’re still warm. This prevents the bottoms from becoming soggy due to trapped steam. I once left them on the sheet for too long, and the bottoms turned rubbery – a simple flip would have saved that batch.
Creative Twists and Variations
This recipe is a playground. Here are some of my favorite ways to switch things up:
Chocolate‑Swirl Delight
Add ½ cup of mini chocolate chips to the dough and swirl in a tablespoon of melted dark chocolate before chilling. The result is a marbled cookie where rich cocoa meets buttery toffee, perfect for chocolate lovers who still crave that buttery crunch.
Nutty Crunch Fusion
Fold in ½ cup of toasted pecans or walnuts along with the toffee bits. The nuts add an earthy depth and an extra layer of crunch, making the cookie feel more substantial without overpowering the toffee’s caramel notes.
Spiced Autumn Version
Mix in a teaspoon of pumpkin spice or a pinch of ground cinnamon and nutmeg. This variation brings a warm, cozy flavor that’s perfect for cooler evenings, and the spice pairs beautifully with the caramelized toffee.
Citrus Zest Brightness
Add the zest of one orange or lemon to the butter‑sugar mixture. The citrus lifts the richness, giving the cookie a fresh, bright finish that balances the deep buttery notes.
Vegan/Gluten‑Free Adaptation
Swap the butter for a plant‑based solid butter, use coconut sugar in place of brown sugar, and replace all‑purpose flour with a 1:1 gluten‑free flour blend. The texture changes slightly, but the toffee still provides that satisfying crunch.
Storing and Bringing It Back to Life
Fridge Storage
Place cooled cookies in an airtight container with a parchment paper layer between each layer. They’ll stay fresh for up to five days, and the butter will stay soft enough that the cookies remain tender. If you notice a slight loss of crispness, pop the container into the fridge for a few minutes before serving – the cooler air revives the bite.
Freezer Friendly
Arrange the baked (and cooled) cookies on a baking sheet, freeze until solid, then transfer to a zip‑top freezer bag. They’ll keep for up to three months. When you’re ready to eat, let them thaw at room temperature for 10 minutes, then give them a quick 5‑minute bake at 300°F to restore that fresh‑out‑of‑the‑oven crunch.
Best Reheating Method
To bring a day‑old cookie back to life, preheat your oven to 325°F, place the cookie on a foil‑lined tray, and add a tiny splash (about 1 teaspoon) of water to the foil. The water creates steam that re‑hydrates the interior while the oven’s dry heat revives the crisp edges. In just 5‑7 minutes you’ll have a cookie that tastes like it just left the oven.